Power socket bracket with switch for RepRapPro Huxley
thingiverse
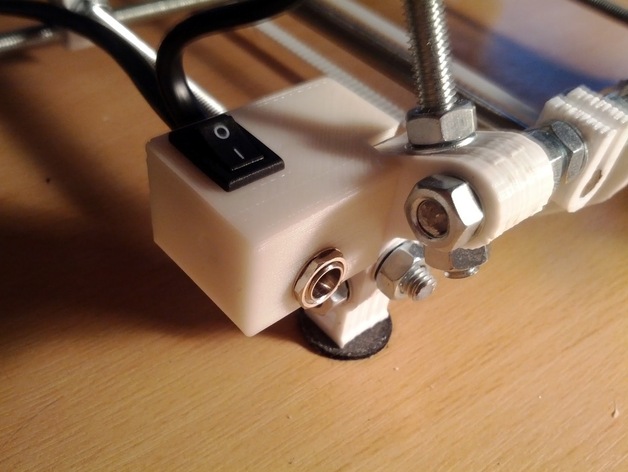
This bracket replaces the RepRapPro Huxley's "first print" power socket bracket, fitting on the opposite side. A rocker switch is positioned in the top of the bracket and aligned with a power socket leg. Follow the RepRapPro instructions to solder negative leads to the legs; then insert the switch into the bracket. Secure it to the Huxley's leg using a screw, washer, and nut on the other side. Solder positive leads to one side of the switch and the correct leg on the power socket (aligned but verify with instructions). The switch model is kcd1 108, featuring a 13x8mm panel cut-out and 13mm depth below panel. Purchase it from this eBay link: http://www.ebay.co.uk/itm/230711988243. The OpenSCAD file is attached, utilizing the frame-vertex-foot.stl from this GitHub location: https://github.com/reprappro/Huxley/tree/master/Print-Huxley/Individual-STLs
With this file you will be able to print Power socket bracket with switch for RepRapPro Huxley with your 3D printer. Click on the button and save the file on your computer to work, edit or customize your design. You can also find more 3D designs for printers on Power socket bracket with switch for RepRapPro Huxley.