Power Supply Enclosure
thingiverse
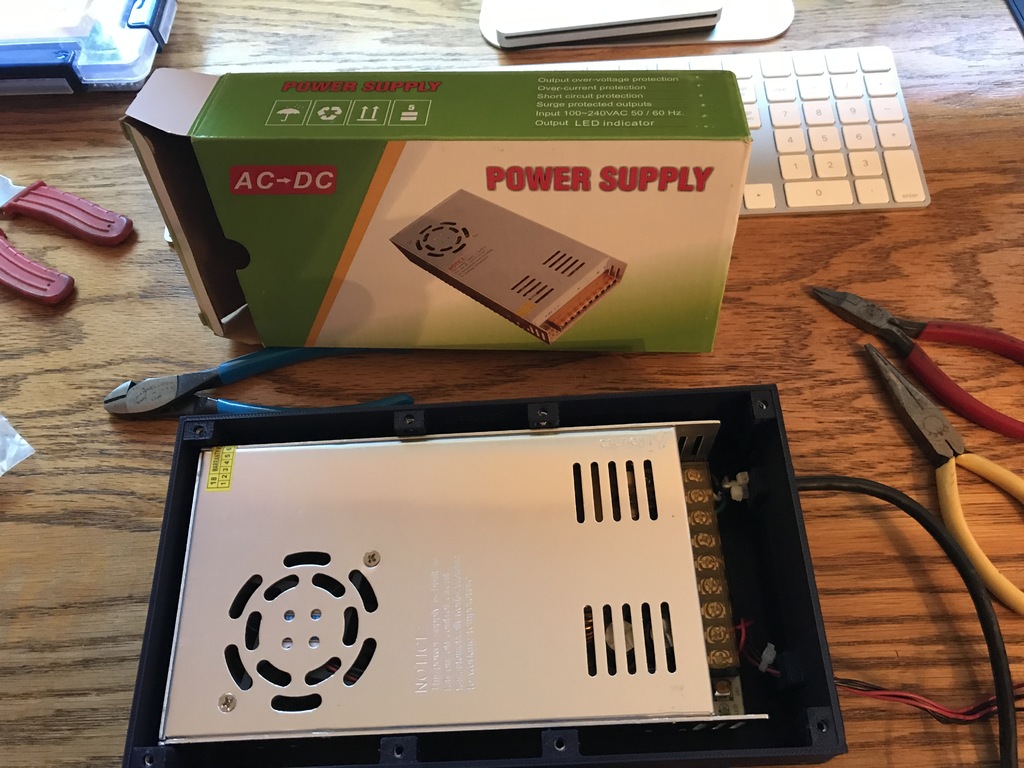
I am building an adjustable height welding table for my shop and will be using linear actuators to move the top up and down and to engage/disengage the wheels that allow the table to move. I obtained a 12 volt power supply to run the actuators and needed an enclosure to protect it from shop dust and also to provide a mounting capability. In addition to the print materials, you will need eight 3 mm nuts, inserted in the slots in the columns. The columns were designed to negate the need for supports when printed with the base on the print bed. You will probably need to clean out the slots with a pick to get any stringing out. You will also need eight 3 mm x 8 mm screws for the top and eight 3 mm x 12 mm screws to attach the power supply to the bottom. Required lengths may depend on your specific power supply. The hole patterns worked for the power supply shown in the images; I'm assuming this is a standard bolt pattern. The mounting tab holes are sized for 1/4" bolts The cable holes are sized for standard 110 volt power cable; the output power hole should accommodate any required wires for your project. I used zip-ties to anchor the wires both inside and outside the enclosure. Vent holes are provided for convective cooling. My application will have low duty cycle, if your application has a high duty cycle, you might want to consider mounting a fan to one of the vent regions.
With this file you will be able to print Power Supply Enclosure with your 3D printer. Click on the button and save the file on your computer to work, edit or customize your design. You can also find more 3D designs for printers on Power Supply Enclosure.