Power Supply Vertical Mount for TEVO Tarantula Pro
thingiverse
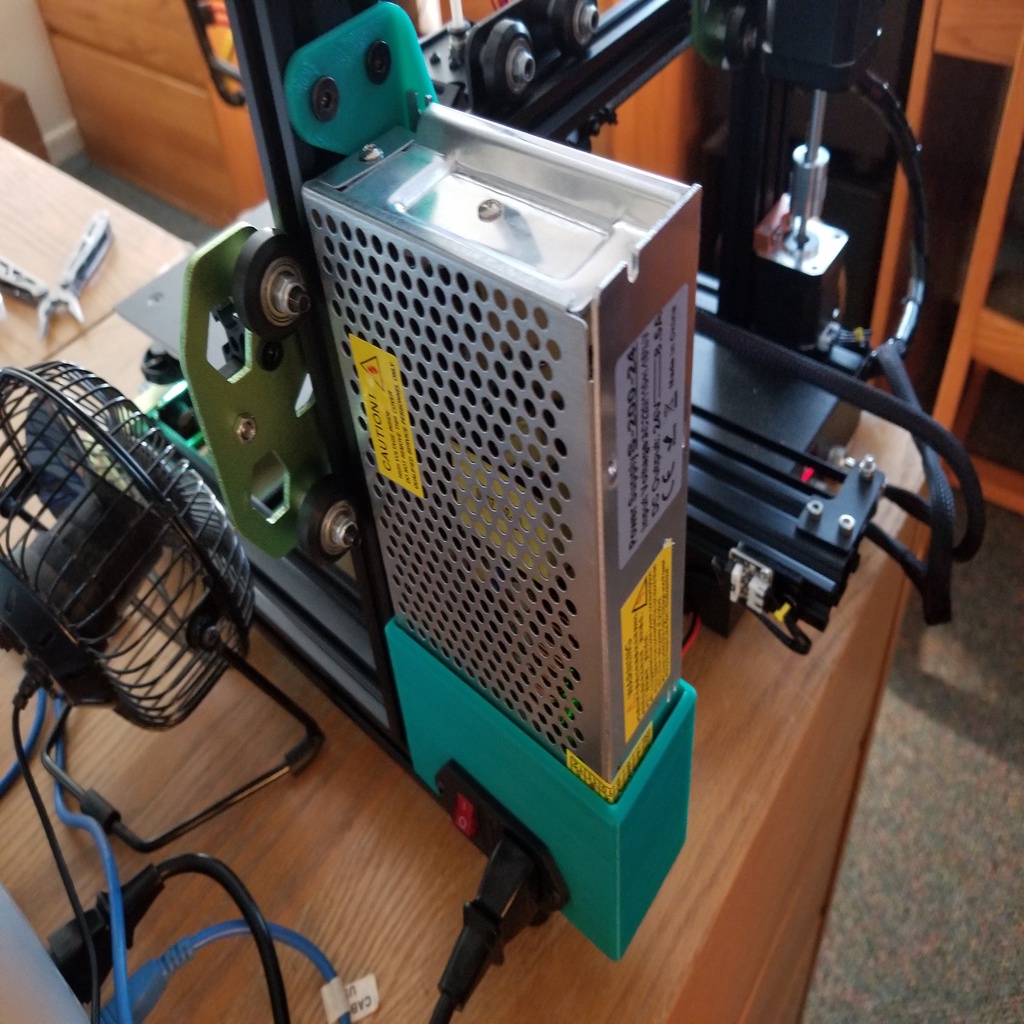
This is a very ideal upgrade for every TEVO Tarantula Pro that allows for more sufficient cooling to the power supply. After getting my Tarantula Pro working through following the manual, I noticed that the 24v power supply unit (PSU) is mounted such that the ventilation holes are facing flat on the ground, eliminating a majority of the cooling that is needed for the PSU to cool off as it supplies power to the printer. After around 30 minutes or so of printing, the PSU became so hot that I couldn't touch it for long without getting burnt, something that isn't good by any standards. I found that if I ran a small desk fan pointed down beside the printer near the PSU, the cooling was sufficient and the PSU didn't even get warm. This solution worked, but wasn't elegant, so I set out to remount the PSU vertically behind the z extrusion, much like a Prusa and many other printers. ________________________________________________________________________ Building Instructions ****MAKE SURE that the printer is unplugged before taking anything apart!!!!**** Implementing this mod is very easy and short. I'm just going into detail in these instructions. This mod doesn't require any additional bolts or nuts, only the ones currently in use. After printing the parts, unplug the current PSU housing and disassemble (definitely not at the same time!). Take a picture of the wire orientation before disconnecting any wires from the PSU. Keep all the bolts and t-nuts used. Next, attach the Top Mount to the PSU and temporally to the extrusion about half way up, using the small button head bolt and two big bolts and t-nuts. Now attach the Bottom Mount to the bottom of the z extrusion using one big bolt and t-nut, screwing it in from the window where the power entry module will sit. Next mount the power entry module (the thing with the switch) to the Bottom Mount using the screws that held it onto the original housing. The screws will thread themselves into the plastic mount, so some assertive force might be required. Thread the power wires that connect to the MKS board though their little window and plug in all wires to the PSU, following the picture you should have taken earlier. If you didn't take a picture, look at the picture with the wires above, or do some Googling. Now unscrew the top mount and slide the PSU into the bottom mount until the screw hole on the back lines up with the hole in the mount. Screw in the small button head small screw into that screw hole. Then tighten down the top mount. Double check that everything is good and nothing is in the way of the bed or the z-carriage. If something is rubbing, you can loosen the bolts and slide everything to the left or right a bit before retightening. ________________________________________________________________________ Additional Notes Print everything in 100% infill and be sure not to lose any bolts. I went ahead and added a little fan to cool off the power supply even more, as you can see in the pictures. Not absolutely necessary, but a nice touch. Happy printing!
With this file you will be able to print Power Supply Vertical Mount for TEVO Tarantula Pro with your 3D printer. Click on the button and save the file on your computer to work, edit or customize your design. You can also find more 3D designs for printers on Power Supply Vertical Mount for TEVO Tarantula Pro .