PowerBook 180c Hinge Repair
thingiverse
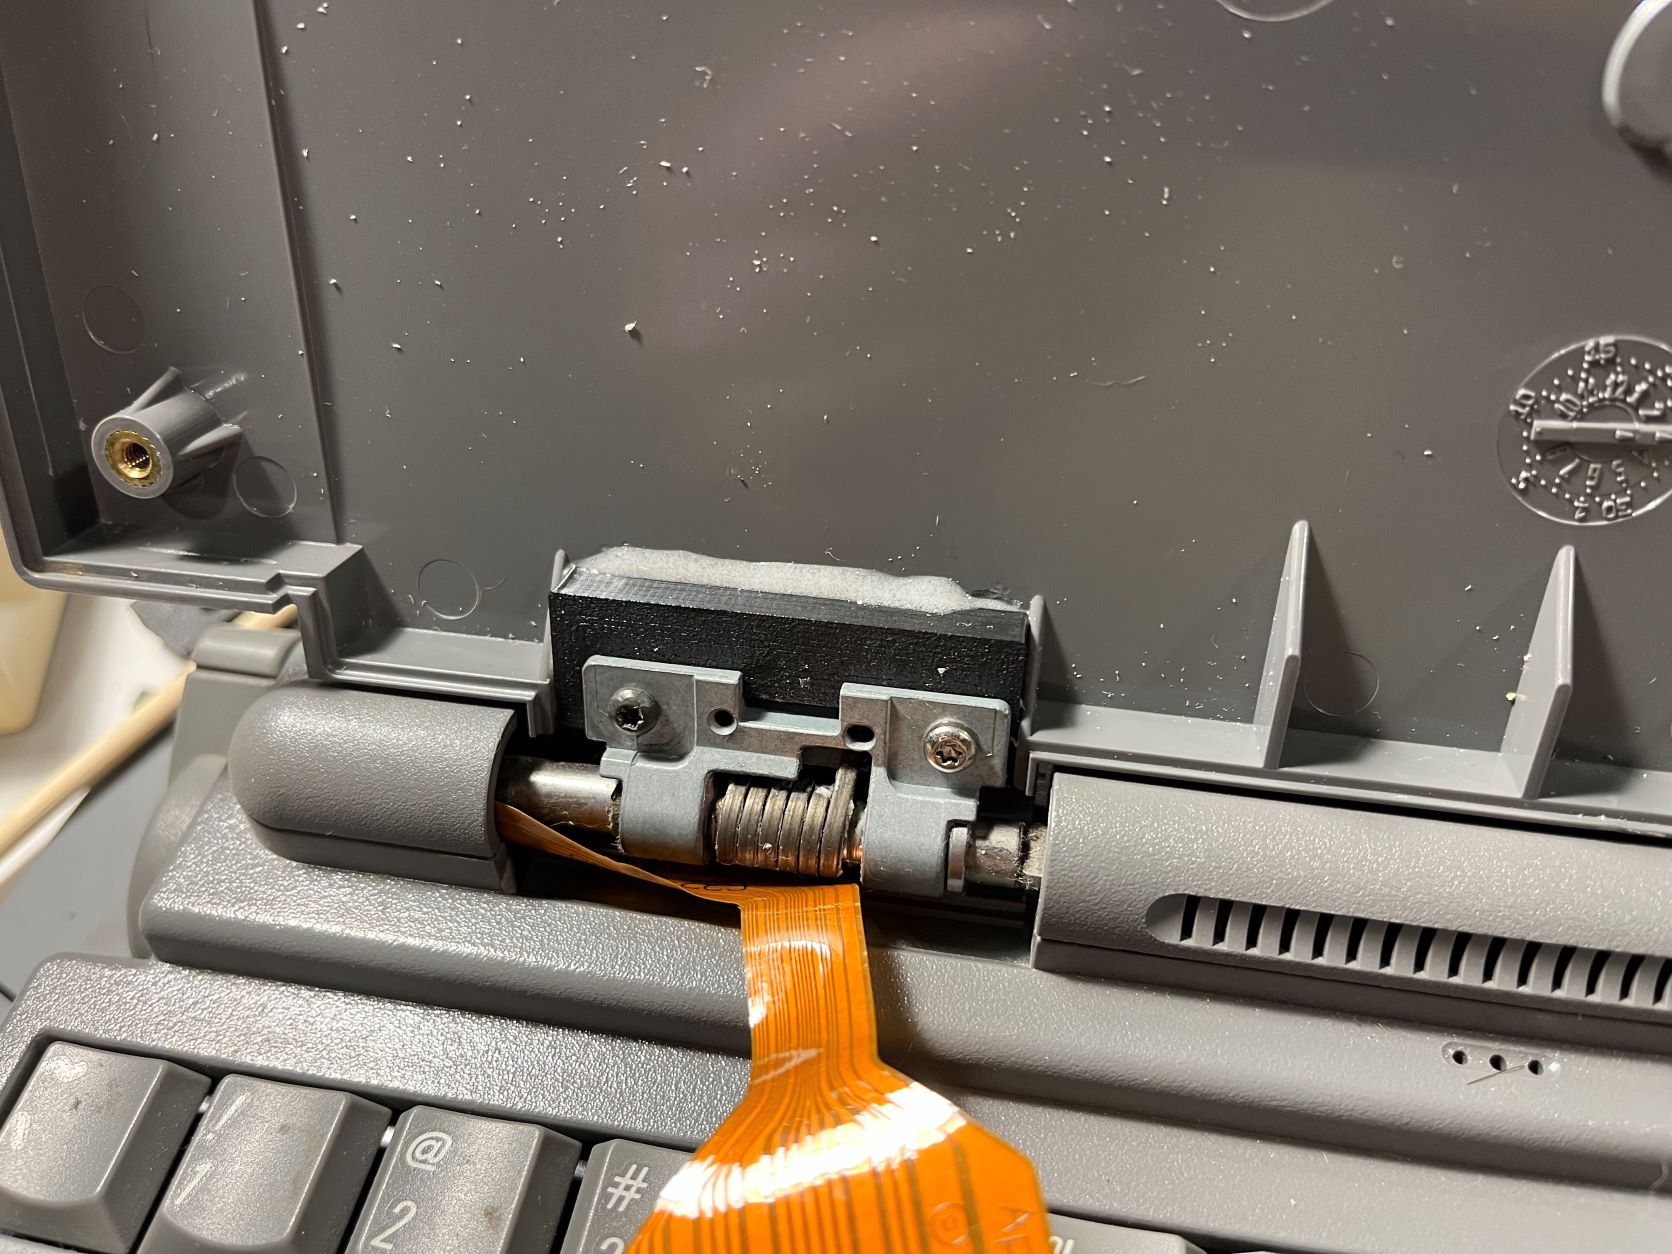
Repair your wobbly PowerBook 180c screen hinges! These blocks are designed to be glued in place of the original hinge mounts that inevitably break, shaped so that they are easy to align. Note that you will need to cut away the original hinge mounts and their support webbing, in order to fit these pieces. I designed this part to fit my PowerBook 180c. It should also fit the 165c. It will probably *not* fit any of the black-and-white 100-series PowerBooks (including the regular 165 and 180), due to the thicker screen backshell of the colour models. I have included the FreeCad document so that it can be modified to fit other models if necessary. Note that the left and right pieces are mirror images of each other, and are not identical! # Instructions: 1. Print both left and right pieces, using 100% infill 2. Cut out the broken standoffs and support webbing (see images, the areas to cut are marked in red). 3. Using a soldering iron, carefully press the brass heat-set inserts into the tapered holes. You can re-use the original ones, but any M2.5 heat-set insert should do. 4. Trial-fit the repair blocks. They should fit snugly between the outer sides of the case, and the notch on the backside should align with the notch on the screen backshell. Depending on the dimensional accuracy of your 3D printer, you may need to edit the included FreeCAD document and generate your own STLs. 5. Glue the repair blocks in place with a suitable adhesive (I used JB Weld Plastic Bonder), and wait for it to cure. 6. Reassemble the screen. The ribbon cable on the left hand side should run OVER the front face of the hinge. The backlight cable on the right hand side should sit in the notch on the outer side of the repair block. # Tips - When inserting heat-set inserts, press the insert in with a soldering iron until it is only a couple of mm above the surface, then flip the piece over and hold it against a flat, heat-resistant surface for a few seconds. This ensures that the insert goes in straight, and keeps the surrounding surface flat. - When gluing the repair pieces in place, coat the hinge screws with light oil and screw them fully into the heat-set inserts. This prevents excess glue from welling up and blocking the threads, and the oil will prevent the glue from sticking to the screws. Note that the photos show an earlier version of the design, where I had neglected to leave a channel for the backlight cable to run in. I fixed this problem with a dremel :)
With this file you will be able to print PowerBook 180c Hinge Repair with your 3D printer. Click on the button and save the file on your computer to work, edit or customize your design. You can also find more 3D designs for printers on PowerBook 180c Hinge Repair.