Print Temperature Calibration Piece
thingiverse
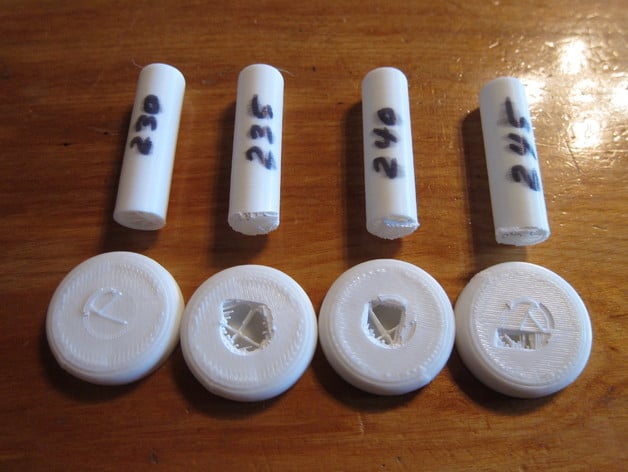
To determine the optimal print temperature for highest bond strength, conduct a series of tests using different temperatures. Label each piece with its corresponding temperature and ensure the platform is level and filament diameter is correct. Print with 10% infill and two shells. Test print speeds at 80mm/s. After printing, break off the spindle from the base and assess bond strength visually and by the force required to break the pieces. In the author's case, 235°C yielded the best results, with a strong bond that ripped off three layers of infill from the base. Consider repeating tests for different plastics and take note of the required force when breaking the pieces.
With this file you will be able to print Print Temperature Calibration Piece with your 3D printer. Click on the button and save the file on your computer to work, edit or customize your design. You can also find more 3D designs for printers on Print Temperature Calibration Piece.