Printable Tripod Mount 2014 - after Starno
thingiverse
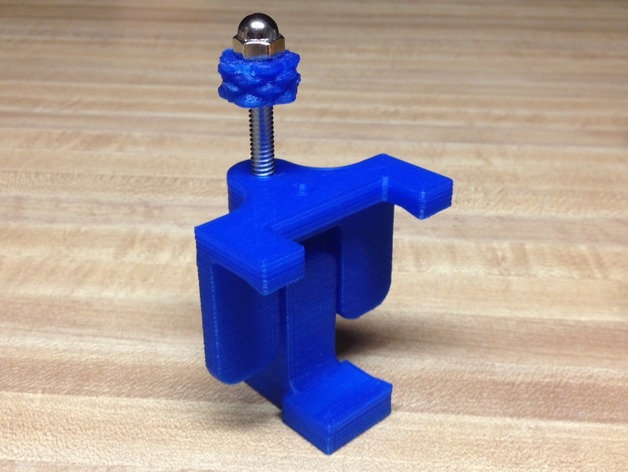
EDIT: 8/2016 Streamlined the design to eliminate the funny bottom piece. More on that below** Note: This model requires inserting metal hardware mid print, to then get covered, which is a technique that requires either manually pausing the print it the correct moment, to insert the part, or modifying the G-Code being sent to the printer. This is a remix of Starnos "Printable Tripod Mount" for smartphones. I loved the original concept, because it allows for different brands and cases. Anything shaped like a bar of soap. After building and using the original, there were some issues this update addresses: the original clamp fingers stuck out horizontally and the phone could easily slip out, away from the plastic. There is now an angled lip on each finger, to pull the phone in to mount when the nut is tightened down. -the original used a 4" pan head screw (102mm to the sane world) sticking up through the clamp pieces. This could get loose and the head of the screw could spin around free when the hand nut gets tightened down. In this version it is changed to a bolt, so there is no way the head can spin in the bottom ("Camera Bracket") when the top gets tightened. -the original used 10-24 sized screw. This uses 1/4", because they are easier to find at the hardware store, in the length needed. Also the smaller screw size seemed to bow/bend a little when mount got tightened down on a phone. -the original relies on a press fit for the 1/4" nut the tripod screws into. A bump could make it fall out of the cavity, and let the phone/tripod mount fall off the tripod. This version uses a buried nut that cannot pop out, because it is encased in the plastic. Other differences are cosmetic: An acorn cap for the top, and a knurled nut (also using a steel nut buried in the plastic) as a 3d printed alternative to the wingnut. *BURIED NUTS. In order to encase a nut completely in a 3D printed plastic part, it is possible to pause the print at the right layer, and insert the metal nut into the cavity, and then print over the top to encase it forever. More in the instructions. **UPDATE 8/2016 I Realized with the buried nut, that this design didn't need the original's Camera Bracket Piece, the 1/4" nut that the tripod screws into can just be inside the bottom of "Side 2". Less parts to print, smaller, better. Instructions Hardware: 1x 1/4"-20 Bolt, (4" long for phones like iphone 4 or 5 size, or 5" for gigantic smart phones), nut should be threaded completely. 3x 1/4"-20 nuts. 1x 1/4" washer 1x 1/4"-20 acorn nut. Instructions: Print side 1 and 2. You may want to print them together. Side 2 and Knurled Nut require a special technique with 3D printing, it requires "pause printing" to encapsulate a metal part in the print. It means to pause the printer, mid print, at the correct layer, and insert one of the nuts into the part, to then get buried/printed over when you resume the print. Here are some articles:http://solidutopia.com/3d-print-around-captive-parts/http://hydraraptor.blogspot.com/2014/03/buried-nuts-and-hanging-holes.html Here are some personal notes on the subject: The trick with "pause printing" is to pause it at the right time. One can do this manually, or better, by editing the G-Code text being sent to the printer in the host software. In the slicing software G-code preview, it is possible to go through each layer visually. Find the layer that is the last layer with the nut's hexagonal void, before it gets printed over the top of it. You can either remember this layer number, and sit there and watch the machine for it to get to this number, and pause it manually, insert the part, and resume; or, better yet, so you don't have to be on call and hit the button at the perfect time, edit the G-code by hand. One can insert a pause command into the G-Code text that stops the printer and tells it to wait until the user tells it to continue. In Repetier, the command is @pause Simple enough, but how does one find the right line, within thousands of lines of code, to write this in? Use the software's tools to find the layer in the G-code. Repetier, for example, has an option to see a single layer in the G-code preview window, and by clicking on "First Layer", you can jump to the beginning of the layer in the G-Code text editor, or "Last Layer" jumps to the last line of the layers G-code text. There should be a Z axis command (here "Z10.800") as the next line of code, like: G92 E0 ; reset extrusion distance G1 Z10.800 F12000.000 ; move to next layer (35) which is the start of the next layer. So, right before that, you write in the pause command: G92 E0 ; reset extrusion distance @pause G1 Z10.800 F12000.000 ; move to next layer (35) Now it will pause the print at the precise right moment. You can program in a sound, too, if desired, by typing @sound. One extra refinement, is that the extruder will sit there and ooze while it is paused, and make a lump. It will probably be in the way if it is a small part. You can insert a command to move it out of the way directly before the pause. This is useful for a filament change in mid print as well. Use something like this: G92 E0 ; reset extrusion distance G1 X90 Y140 ;gets extruder head out of the way M84 ; disable motors @pause G1 Z10.800 F12000.000 ; move to next layer (35) Now the print head will get out of the way and ooze harmlessly over empty space. You can write in any X and Y coordinates you want in the G1 command, I just used X90 and Y140, these aren't special. Lastly, after the part is inserted, and you're ready to print over it, is to wipe the ooze off the head the instant before you click to resume the print, so it doesn't make a blob in the print. One physical issue with burying the metal nuts, is that the next plastic layer won't want to stick to the top of the nut, and will make a mess and get in the threads. I've had excellent results by covering the nut top in blue painters tape, to give the plastic something familiar to stick to. You can trim the sides of the tape away from the nut with an xacto knife. One other thing that seems to help is heating the nut up a little, like by taping it to a heated bed, in the corner where it will be out of the way, while printing the part, or a little heat from a heat gun.
With this file you will be able to print Printable Tripod Mount 2014 - after Starno with your 3D printer. Click on the button and save the file on your computer to work, edit or customize your design. You can also find more 3D designs for printers on Printable Tripod Mount 2014 - after Starno.