Printed Modular MMU2s Dry (Zero Edition) Non-Dry (Tricid Edition) Buffer
prusaprinters
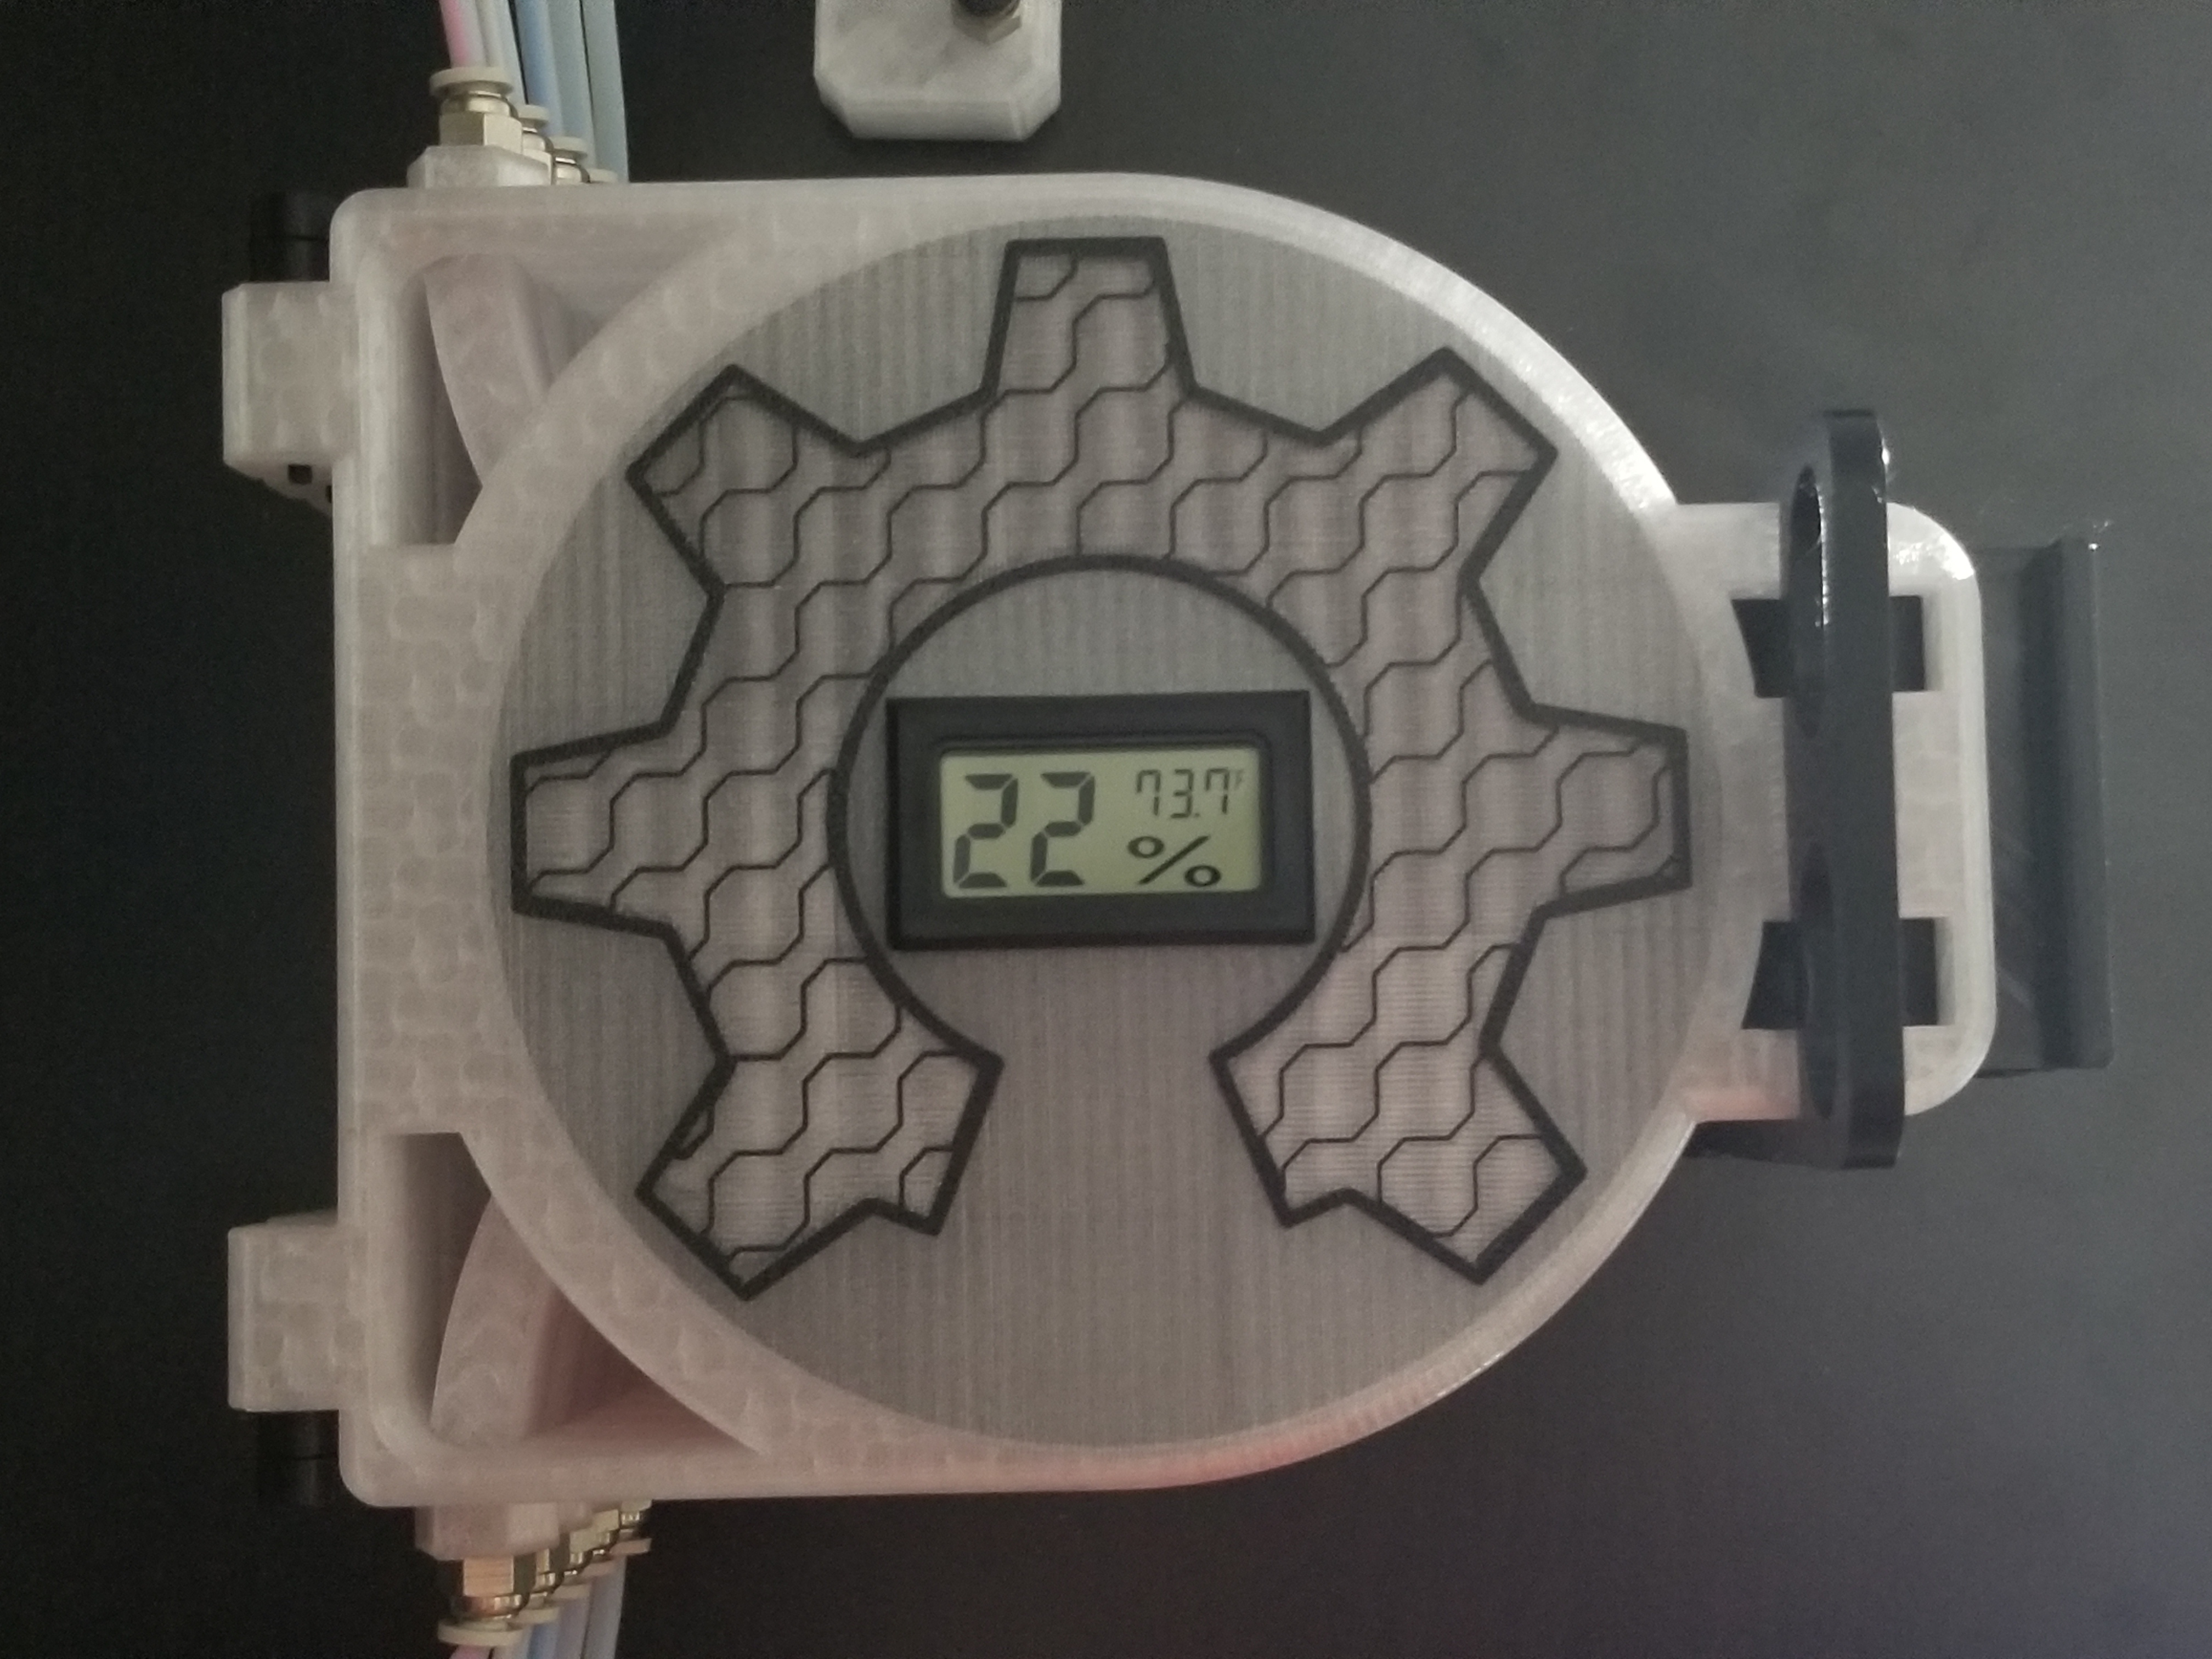
<p>Have questions? Need help? You can find me on the #Prusa3d discord. <a href="https://discord.gg/rCB7cS9">https://discord.gg/rCB7cS9</a></p> <p>The Back Story:<br/> I have two MK3s MMU2s printers, and I love them. I do not, however, love the stock buffer. I tried a bunch of things available, and for one or more reasons did not like them, and air buffering can be a pain even with a lot of room. Also, what is the point of printing directly from a drybox with an open air buffer? So I needed to create my own.</p> <p>Feature Wishlist:<br/> Reliable<br/> Durable<br/> Low Friction<br/> Easy To Load<br/> Printable<br/> Independent Filament Access While Printing<br/> Space Saving<br/> Multiple Mounting Options<br/> Dry and Dust Free Environment<br/> Humidity Indicator<br/> PC4-M10 Fittings</p> <p>The Solution:<br/> A book style pulley buffer that is expandable from 1 filament to as many as you want. As pictured in the Face Down configuration, the buffer supports 5 filaments with desiccant containers in the top and bottom sections. Additionally, the top houses a fairly standard rectangular humidity and temp display. Closure is handled with 20mm x 3mm round n52 magnets and sealing is achieved with TPU filament gaskets and a printed TPU latch.</p> <p>The Usage:<br/> Simply release the TPU and pull on the filament retainer to break the magnetic bond. Feed enough filament into the buffer to wrap around the pulley 3 times and reach the MMU2s. Tell the printer to load filament. Wrap the pulley 3 times, slide the filament retainer in halfway and feed the filament to the MMU2s until it grabs. Insert the filament retainer all the way in and close the buffer up. Re-secure the latch and you are done.</p> <p>The Hardware:<br/> 1x 608 Bearing Per Filament (5 For A Full MMU2s)<br/> 4x M3 6mm Socket Cap Head Screws Per Buffer Section For The Pulley (20 For Zero Face Down, Zero Face Up, Tricid)<br/> 2x PC4-M10 Per Buffer Section (10 For Zero Face Down, Zero Face Up, Tricid)<br/> 2x M3 25mm Socket Cap Head Screws Per Section (14 For Face Down & 12 For Face Up)<br/> 2x M3 Lock Nut Per Section (14 For Face Down & 12 For Fave Up)<br/> 4x M3 Washers Per Section (28 For Face Down & 24 For Face Up)<br/> 4x M3 Washers For The TPU Latch (Not need for Tricid)<br/> 3x M3 6mm Socket Cap Head Screws Per Desiccant Container (6 For Zero Face Down, 3 For Zero Face Up, 0 For Tricid)<br/> 1x 20mm x 3mm N52 Magnet For The Bottom & Each Internal Section ( 6 For Zero Face Down, 5 For Zero Face Up, 4 for Tricid)<br/> 1x 20mm x 3mm N52 Magnet For Each Filament Retainer (Including Desiccant Sections) ( 7 For Zero Face Down, 6 For Zero Face Up, 5 For Tricid)</p> <p>The Printed Parts</p> <p>Other Notes:<br/> I recommend 3mm ID and 4mm OD PTFE from the spool to the buffer and from the buffer to the MMU.</p> <p>I flare the PTFE in the buffer outlet chamfer with a Phillips head screw driver, that came with the printer, to make loading easier.</p> <p>The buffer doesn't like friction in the filament path between the spool and the buffer. Some filaments generate more friction that others, looking at you Prusament Galaxy Black PLA. Using spool holders that support the spool through the middle and avoiding tight bends in the filament path can help with that friction.</p> <p>Update: 1-5-2020<br/> Added Tricid Edition!!!<br/> Basically the same without the hygrometer, desiccant, and seals.</p> <p>Update:1-6-2020<br/> Uploaded Tricid Top and Insert with corrected coordinates.</p> <h3>Print instructions</h3><p>Printing:<br/> PETG, but other filaments should work.<br/> Zero Edition 0.2 Layer Height (Because of the gasket grooves)<br/> Tricid Edition 0.3 Layer Height (You could probably go higher)<br/> 2 Perimeters<br/> 5 Top and Bottom Layers<br/> Default Extrusion Widths<br/> When printing the pulleys, enable supports from bed and detect thin walls if you are using Slicer++.<br/> The desiccant container top should be printed with 10 perimeters, 0 top and bottom layers, and ~85% grid infill.</p> <p>Assembly:<br/> The pulley screw heads should face the filament retainer.</p> <p>Be careful when gluing in the magnets, you have to make sure they are facing the right direction, as the direction changes depending on the arrangement. I recommend dry assembly of the buffer and then pulling out the retainers and installing the magnets in them first.</p> <p>If you want to match Jo's Tattoo, you have to rotate the top 45 clockwise in slicer, it just barely fits on a MK3s.</p>
With this file you will be able to print Printed Modular MMU2s Dry (Zero Edition) Non-Dry (Tricid Edition) Buffer with your 3D printer. Click on the button and save the file on your computer to work, edit or customize your design. You can also find more 3D designs for printers on Printed Modular MMU2s Dry (Zero Edition) Non-Dry (Tricid Edition) Buffer.