Printer Enclosure
thingiverse
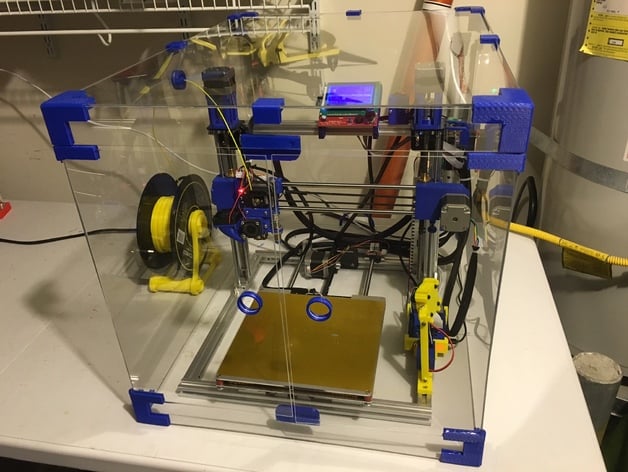
I have a very curious cat, and this enclosure keeps his paws and nose safe. As a side benefit, the enclosure helps the printer maintain a more stable ambient temperature, and keeps dust off the printer. This design is a remix of DrewPetitclerc's terrific 3D printer enclosure. There are a few notable changes: Designed for thinner 0.093" acrylic sheets. (Note: Drew's original design used 0.25" thick sheets.) This makes the design lighter and less expensive. I purchased 18" x 24" x 0.093" OPTIX clear acrylic glass sheets from my local Home Depot, which sells them for $10.48/sheet. Glue-together frame. No bolts or drilling required! I used Loctite 5 min Plastic Epoxy, which is plenty strong, and advertises that it is designed to be used on ABS and other hard plastics. Edge brackets. These brackets keep the frame rigid, even with the thinner acrylic sheets. 2mm hinge pins. I used K&S 2mm aluminum tubes for the pins, available from many hobby stores or your favorite online retailer for about $2 total. I haven't tried, but you might even be able to use a small length of 1.75mm filament as the hinge pin instead. I chose to print in ABS for its durability, which is not as brittle as PLA. Also, the plastic epoxy is advertised to work well with ABS, though it may also be equally effective with PLA. This project gave me the "opportunity" to learn about cutting acrylic sheets, with many mistakes made along the way. If you are equally inexperienced at this skill, you may wish to purchase an extra sheet for practice. Or plan on making that eventual trip back to Home Depot for a replacement sheet, as I did. The "score and snap" method never worked for me as well as it did on the many YouTube videos I watched. Even after scoring both sides several times and snapping along a hard corner, the sheet would inevitably crack at the wrong place. Eventually, I decided to use my trusty, $30 jig saw, which performed like a champ. The jig saw makes a nice, clean edge. I've listed several of my recommendations for using a jig saw, learned by yours truly the hard way. I think if you follow this, you might be able to make it through perfectly the first time. Make a practice cut, though, just to be sure! Pick up the Bosch Plexiglass jig saw blade. Wrap both sides of the acrylic sheet with masking tape, along the edge you intend to cut. I used two layers. This prevents the edge from shattering as you cut. Place the sheet on a board, clamp it down, and cut right along the edge of the board. This prevents the sheet from vibrating, which can eventually cause it to shatter near the blade. Hold the loose end of the sheet as you cut, to prevent it from vibrating too much. Use a medium speed, and cut at a steady pace. Be careful at both edges of the sheet, since this is the place where it is most likely to chip. I've also included a mouse hole for the back of the enclosure, allowing power cables to pass through. This hole can also be cut with a jig saw. I really liked schlem's swivel pass-through for his enclosure design (see http://www.thingiverse.com/thing:55065). You can see it in a few of my enclosure pictures. As he states in his instructions, a 1" hole saw drill bit works just fine for the hole. I used the same drill bit for the door handles. When putting the enclosure together, I recommend paying very close attention to the orientation of the top corners and top edges before gluing in place. Note that the top sheet is recessed relative to the side sheets. Once the epoxy sets, the bond is permanent.
With this file you will be able to print Printer Enclosure with your 3D printer. Click on the button and save the file on your computer to work, edit or customize your design. You can also find more 3D designs for printers on Printer Enclosure.