Printrbot 1405 Filament Guide
thingiverse
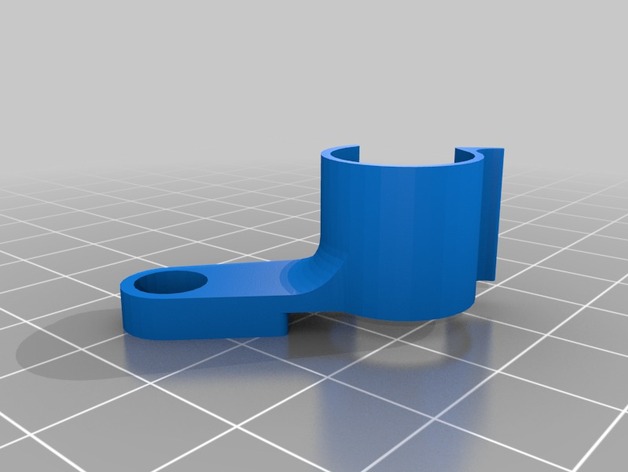
A Simple Guide to Upgrade Your Printrbot Simple 1405. To make this upgrade, you'll need a few tools: - An M3 x 5mm Socket Head Cap Screw (You can cut it from a longer screw) - An Allen Wrench (Hex Key) - A tool to remove excess filament Here's what settings we recommend in your slicing software for the best results: Recommended Slicing Software: Cura or Slic3r version 1.2.7 or later Layer Height: .2mm Infill: 100% Supports: Enabled To Install Your Upgrade: Remove support material and any stray filament from the part. Now, remove the filament from the printer completely. Next, take off the spring-loaded arm from the extruder. Carefully slide your new filament guide over the drive pulley (hobbed bolt). Then attach it to the upper left hole in the stepper motor using the M3 x 5mm screw. Put back on the spring-loaded arm to the extruder now. Finally, put the filament into the printer and you're done. Note: This modification lets you print Ninja Flex & Semi Flex with your Printrbot 1405 but if your printer doesn't have an extruder cooling fan it's suggested that you use an external fan when printing flexible filaments so your extruder doesn't get too hot and the filament jams in the small hole on top of the hotend.
With this file you will be able to print Printrbot 1405 Filament Guide with your 3D printer. Click on the button and save the file on your computer to work, edit or customize your design. You can also find more 3D designs for printers on Printrbot 1405 Filament Guide.