Printrbot Jr M8 Z-axis upgrade
thingiverse
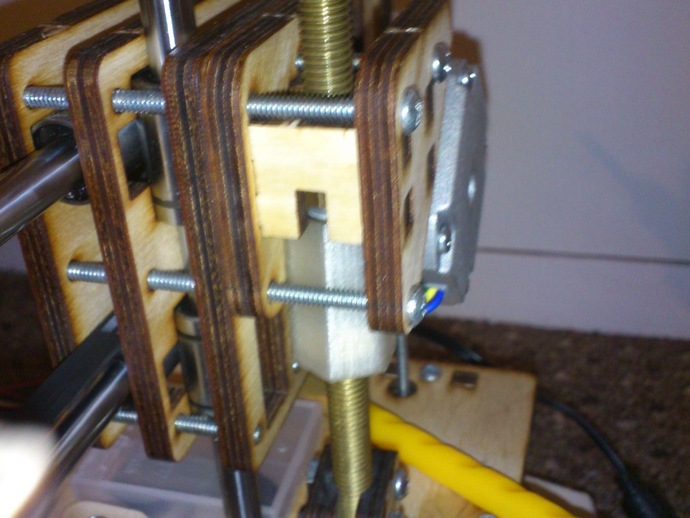
Upgrading to an M8 anti-backlash setup with two nuts and a spring necessitates using a hexagonal tube that captures both nuts. While Brian Evans' M6 model provides inspiration, an M8 rod requires larger alterations. The "missing sides" of the tube avoid interfering with the y-axis motor. The fit is snug, preventing issues with torsion. Brass, known for its self-lubricating properties in brass-on-brass mechanisms, is the material of choice for threaded rods and nuts. This cost-effective upgrade costs around £8 in the UK, but a more appropriate combo involving brass washers exists.
With this file you will be able to print Printrbot Jr M8 Z-axis upgrade with your 3D printer. Click on the button and save the file on your computer to work, edit or customize your design. You can also find more 3D designs for printers on Printrbot Jr M8 Z-axis upgrade.