Printrbot + LC spider coupler
thingiverse
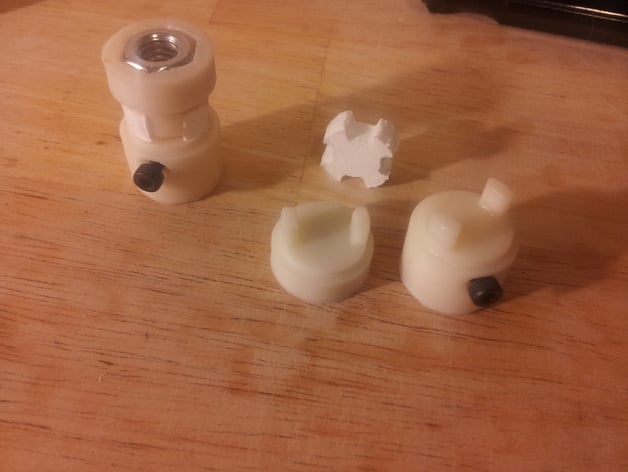
I've designed another spider coupler to eliminate "z wobble" and fix slightly bent threaded rods, but with an improved version compared to similar designs. The plastic & rubber spacers in this design are more rigid than others. To ensure the spacer is soft even after use, I filled a mold with bathroom silicone (you can use any substance of your choice). Despite the softness of the silicone, it passed my z-travel test with flying colors using a dial gauge. The dimensions of the hardware used are similar to Printrbot's standard shipped hardware, but I forgot to note down the exact sizes. To assemble this coupler, you'll need some cleaning due to its tight tolerances. Print the parts at 90% infill with a layer height of .35mm (.4mm for molds). For better support during printing, use honeycomb support on top couplers since bridging might be challenging. Once you've printed the molds, fill them with your chosen substance and allow it to cure (mine took 24 hours). After curing, clean the parts as necessary, especially re-drilling some holes. You'll need small nuts and bolts for bottom couplers and a large nut for each threaded rod (top coupler). Teflon tape can be used on threaded rods to prevent slipping. Finally, remove the thin walls from the mold and slide out the spacer. If needed, apply acetone to the outer layer with a syringe to strengthen it before assembling and enjoying your improved z-axis stability.
With this file you will be able to print Printrbot + LC spider coupler with your 3D printer. Click on the button and save the file on your computer to work, edit or customize your design. You can also find more 3D designs for printers on Printrbot + LC spider coupler.