Printrbot Metal Open Cable Chain Kit
thingiverse
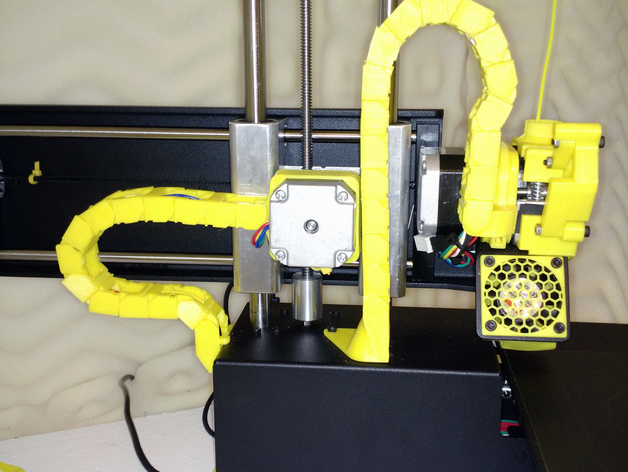
This kit is a remix of a handful of assorted sets of cable chains for the Printrbot Simple Metal. I found that none of them were a full solution or that they had some minor fit problems on my machine, so I modified the attachment points and some links, and have repackaged for your benefit. Instructions Parts Links: 1x 45-out 12x 90-in 13x 90-out 2x offset-in 1x offset-out 1x extruder Attachment points: 1x E Motor Mount 1x Front Attachment Point 1x Rear Attachment Point 1x Y Motor Mount Installation Instructions Once the pieces are printed, you will be able to install the chain without disassembling your Printrbot. The pieces are designed to snap around the cable. Make sure you have removed the original cable wrapping, and loosened the cables from underneath to ensure you have enough slack during installation. Links will be installed in an alternating in-out order. Note that when I say "in", these are the links that have their U-shape pointing inwards. "Out" pieces have their opening pointing outwards and have a small channel accross the long side. Rear Chain 1) Install the Rear Attachment Point at the back of the Printrbot. Use a short M3 screw to attack to the hole in the back of the printer. You may need to trim your grommet slightly to ensure a snug fit. 2) The order of links is as follows: 45-out, 6x(90-in, 90-out) 3) Slide the Y Motor Mount around the Y motor, with the cable attach point facing the rear. There are small tabs you can use to secure it with a zip tie. 4) Connect the chain to the motor mount. Front Chain 1) Install the Front Attachment Point on the base of the printer. It will install under two of the screws used to hold the Z-axis rods. You may need to trim your grommet for a secure fit. 2) The order of links is as follows: 5x(90-out, 90-in), 90-out, offset-in, offset-out, offset-in, 90-out, 90-in, extruder. 3) Install the E Motor Mount around the extruder motor. There are slots to allow you to put a zip tie fully around the assembly to secure it. 4) Connect the chain to the motor mount. Notes You can safely install the front chain around the hotend/thermistor couplings that are on the cable. I have encountered no issues with this. You may need M3 screws that are 1-2mm longer than you currently have holding your z-axis rods. If you did a kit, you will probably have spares already. Otherwise, pop over to your local Home Depot and take care of that. You will also need a short (~8mm) M3 screw for the back side. Depending on the size of your cable grommets, you may need to trim the edges slightly to allow the attachment points to sit flush with the body. After everything is installed, use Cura to move the Z and Y axes to their full extensoin and ensure the cable chains are not being stretched. Once you are satisfied with the range of motion, use zip ties to secure and tidy up the excess cabling in the bottom of the printer.
With this file you will be able to print Printrbot Metal Open Cable Chain Kit with your 3D printer. Click on the button and save the file on your computer to work, edit or customize your design. You can also find more 3D designs for printers on Printrbot Metal Open Cable Chain Kit.