Printrbot Simple 1405 bottom cover piece
thingiverse
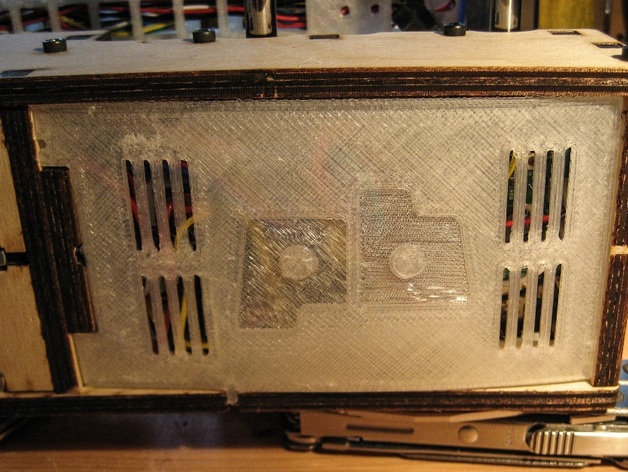
Well, the Printrbot Simple 1405 model doesn't seem to come with any way to contain the wires inside, so I made a cover piece to do so for mine to make it a bit tidier and thought I'd share it. It's meant for the 1405 model but it may fit other models with slight tweaks I don't know. You will need an upgraded X-axis to print this on a Simple, as it's just over 12cm long. There's a flat head screwdriver hole to prise the piece off if you want to remove it easily, as it's meant to be a tight fit. As you can see from my picture I haven't used a heated bed so my piece warped. I recommend you print this using a heated bed to keep it perfectly flat. It uses clips to pop into the wire feed-through and screw hole recesses. I've included my original sketchup and the fixed STL files so if you want or need to modify it to fit yours, you can. Hope it's useful to someone. EDIT: I have added an option for those people who don't have a large enough build area to print it all as one piece, and don't wish to upgrade to print larger pieces. Please download and print files "left", "right" and "middle", and then glue them together. Instructions You will need an upgraded X-axis as it's just over 12cm long, larger than the Printrbot Simple can print without the upgrade. EDIT: I have added an option for those people who don't have a large enough build area to print it all as one piece, and don't wish to upgrade to print larger pieces. Please download and print files "left", "right" and "middle", and then glue them together. Printed in PLA. I recommend a heated bed or yours will be warped like mine is as you can see from the photo. It works, but it's not ideal. 100% infill is recommended, as it's not a thick piece. You don't need to use any support material, but you may need to rotate it 180 degrees on the X-axis before printing in repetier or whatever software you use, so the flattest part is at the bottom. I recommend using slicer. Uses very little plastic and only takes about 40minutes to print depending on your settings. N.B. Not every 1405 model will be identical, it will depend on how well the pieces were laser cut and how well you put your kit together. In order to make this fit your model perfectly I recommend printing only 2 layers of the STL, then stopping your print. Compare this to the underside of your printrbot circuit board area and modify accordingly. Once all good, finish the print and install underneath.
With this file you will be able to print Printrbot Simple 1405 bottom cover piece with your 3D printer. Click on the button and save the file on your computer to work, edit or customize your design. You can also find more 3D designs for printers on Printrbot Simple 1405 bottom cover piece.