PrintrBot Simple Z-axis Extension
thingiverse
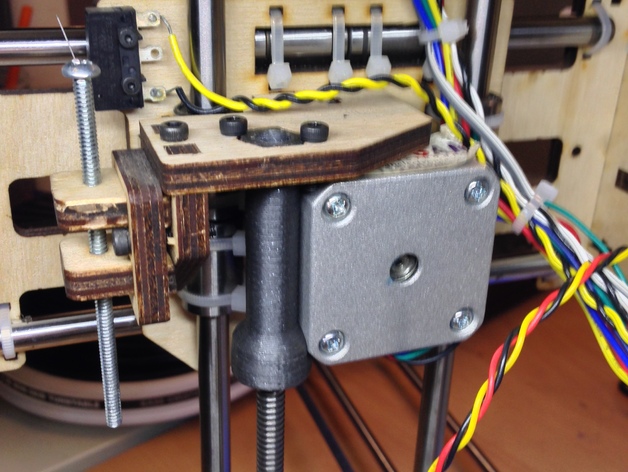
To increase Z-axis travel by 47mm, spend $5 on extra parts. First, obtain a 36" 8mm polished rod (McMaster 88625K67). Keep extras for other projects. Next, gather tools like a calibrated printer, 6.5mm drill, Allen wrench, hacksaw or die-grinder, and heat gun/hair dryer. Follow these steps: print the part, clean it by trimming overhangs and drilling clearance holes; cut two 14" rod pieces, sand ends to remove burrs; replace existing rods with new ones; run printer close to Z-axis top; remove acme nut and carriage screws, then pop off nut; lift carriage, fit part into nut (warm part if needed); angle the part, thread it onto the motor from bottom; manually turn rod to home position while checking wires. Lastly, adjust printer settings in Repetitier (160 Print Area Height) and KissSlicer (160 bed size Z).
With this file you will be able to print PrintrBot Simple Z-axis Extension with your 3D printer. Click on the button and save the file on your computer to work, edit or customize your design. You can also find more 3D designs for printers on PrintrBot Simple Z-axis Extension.