Printrbot X Axis Belt Tensioner (No Zip Ties)
thingiverse
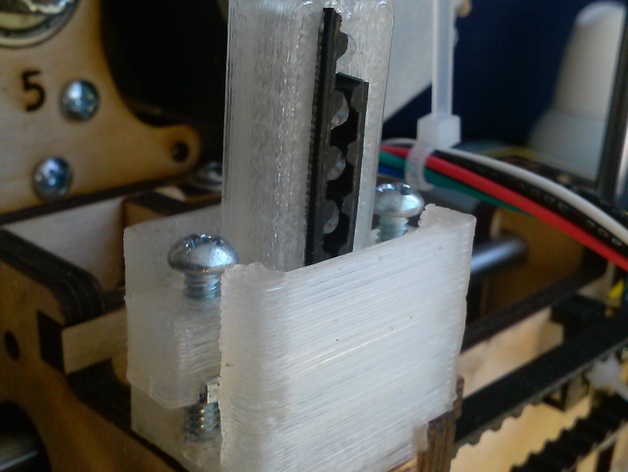
To adjust your x-axis belt tension, follow these steps: first, remove the belt ends from the extruder carriage. Then, place the casing on the carriage so that the hole aligns and route the belt ends through it. Drill the screw holes and attach a bolt and nut. Remove the screws temporarily, insert the part into the casing, feed the belt ends through it, and push the insert down. Tighten the belt as needed, slide on a clip, and reinstall the screws. Finally, adjust the tension so it's snug but not straining the components or stalling the x-axis stepper motor.
With this file you will be able to print Printrbot X Axis Belt Tensioner (No Zip Ties) with your 3D printer. Click on the button and save the file on your computer to work, edit or customize your design. You can also find more 3D designs for printers on Printrbot X Axis Belt Tensioner (No Zip Ties).