PrintRite DIY 3D Printer Fan Duct
thingiverse
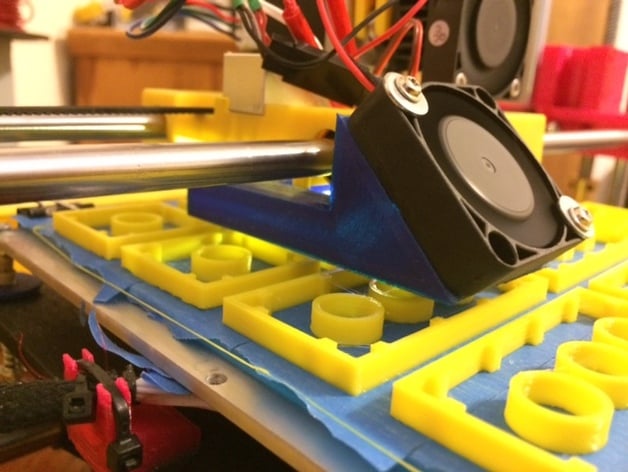
Fan Duct for PrintRite DIY 3D Printer I have an updated version here: http://thingiverse.com/thing:1012778 The updated version has a larger tube from the fan mount to the corner. And now I also have a 3rd and much improved, completely redesigned version here: http://www.thingiverse.com/thing:1242620 Instructions Print it out on its side as oriented in the STL file, attach to the front surface of the extruder carriage with double-sided foam tape. Remove the existing extruder fan and move it to the duct. Drill some holes for the fan screws and mount the fan to the duct with some sheet metal screws. Install a new 40mm fan on the Extruder. Run a new pair of wires to supply constant 12V power to the fan on the extruder. I'm pretty sure the Extruder fan should be running all the time to maintain the correct temperature gradient inside the nozzle, not varied as it is from the factory. I also used this 12V constant power to run a section of LED strip under the carriage. It gets dark under there..
With this file you will be able to print PrintRite DIY 3D Printer Fan Duct with your 3D printer. Click on the button and save the file on your computer to work, edit or customize your design. You can also find more 3D designs for printers on PrintRite DIY 3D Printer Fan Duct.