Printrite DIY - Ramps 1.4 mount case
thingiverse
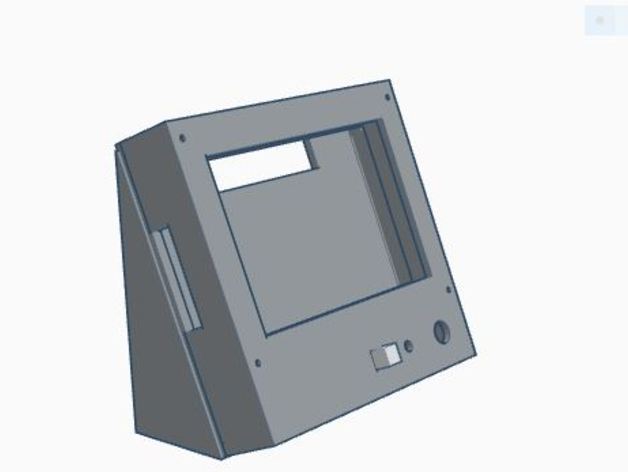
Just finished swapping out my Colido/Printrite DIY 3d printer's Mainboard for a full Ramps 1.4 setup. these designs are to allow the Ramps board to be housed in the same location as the original Printrite board and to house the connected full graphics lcd controller in a self contained case that can be left as "standalone" as I have, or screwed/bolted somewhere you might find convenient. the ramps backplate use the two left most original screws and the upper centre clip point (using a zip tie) to mount to the original backplate while the front plate clips into place on the backplate with two holes for additional screws if you wish to fully lock the front in place (its pretty solid without tbh). I havnt entirely extended over the original backplate as I intend to create a smaller second cover for the incoming & outgoing cables (utilizing the two remaining original screw points) that can be removed individually for better convenience and simple access to the plugs. Print Settings Printer: Colido Printrite diy 3d printer Rafts: No Supports: No Resolution: 0.2 Infill: 0.30 Notes: Ive used 0.2 layer depth (my extruder tip is still 0.3) on these designs simply because the new ramps board copes so much better with the finer resolution than the original printrite board did and the results are alot more cleaner and solid.
With this file you will be able to print Printrite DIY - Ramps 1.4 mount case with your 3D printer. Click on the button and save the file on your computer to work, edit or customize your design. You can also find more 3D designs for printers on Printrite DIY - Ramps 1.4 mount case.