Pro PCB Vise
thingiverse
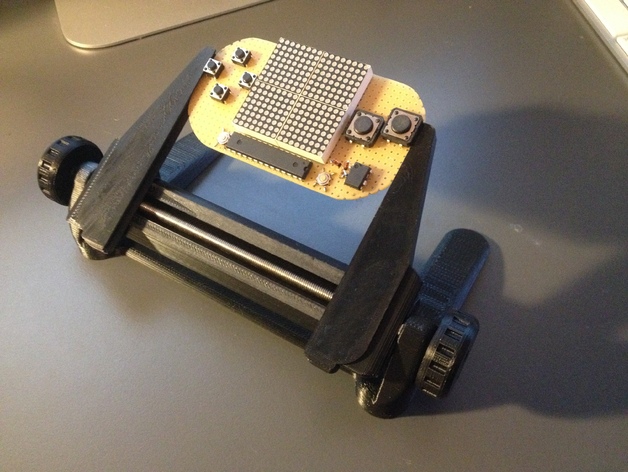
One PCB vise to rule them all! It is very sturdy and can hold PCBs up to 100mm wide with great grip. One knob adjusts the grip and the other tightens the rig to position. Arms are separate and can be installed for more convenience. Their fit should be easy but snug. Hardware: 5x M5 nut 1x M5 htreaded rod ~180mm Instructions Parts printed with black ABS. 0.2mm layer height, 2 perimeters, 20% infill. I suggest printing PCBViseA.stl and PCBViseB.stl separate from others to make sure they come out nice. Make sure they fit together, and slide smoothly. Use file or knife if needed. Drill the hole in PCBViseA to 5 or 5.5 mm. One knob needs to be fixed to the threaded rod. This can be done by either tightening to nuts against each other on the end and sliding the knob over them or just glueing the knob, one nut and rod together. The nut going to the other knob doesn't need to be fixed. Put the remaining two nuts on both sides of PCBViseA and slide it to PCBViseB. Install them to base with the threaded rod; glued knob is on the left side on most of the pictures. Make sure PCBViseA rides smoothly when you turn the knob. The other knob can now be installed. It will be used to tighten the position of the grip and should be loosened when adjusting the claws. Tip: If your grip extensions are loose, try blue tack or just glue them to place. Tip: Add washers under the knobs to make them turn smoother.
With this file you will be able to print Pro PCB Vise with your 3D printer. Click on the button and save the file on your computer to work, edit or customize your design. You can also find more 3D designs for printers on Pro PCB Vise.