Project Venturi
thingiverse
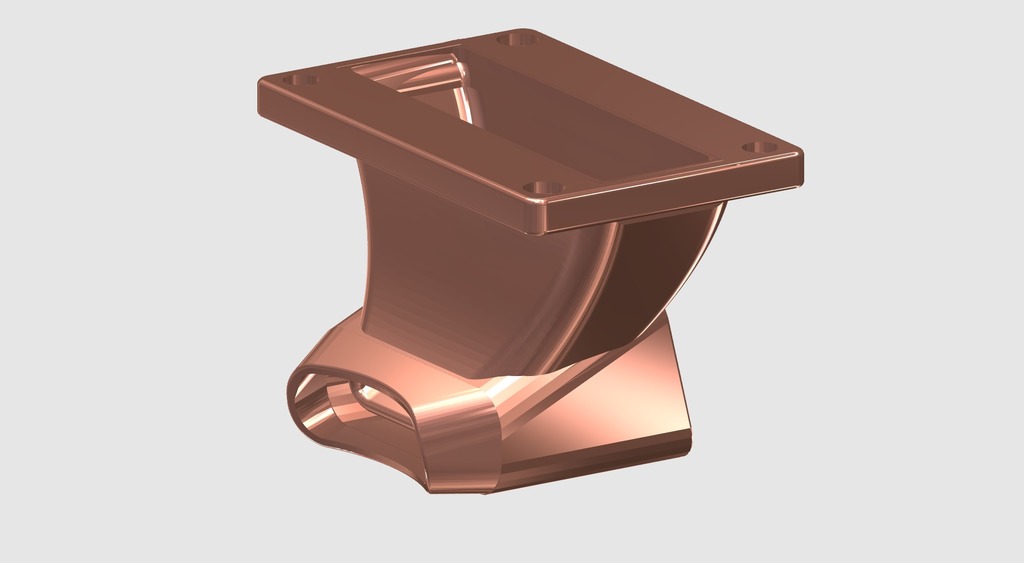
Project Venturi (Largely with the Anycubic Kossel Linear Plus in mind) Ok, ok... that's a bit grand for some bits of printed plastic for attaching to you printer but bear with me. First, apologies: Exhaust_Duct.stl is in my opinion... awesome. Sadly testing suggests Cannon.stl and Dual_Cannon.stl were not so hot after all. Also Dual_Cannon.stl was quite the SOB to screw in place. I've therefore reworked them both and replaced the old versions with new and hopefully better designs. I'll update when I've thoroughly tested. Possibly you noticed your printer could do with some better part cooling and saw a good few alternate air ducts to be found on Thingyvese? (an understatement of Biblical proportions) Possibly you may have heard of the Bernoulli's Principle, and how it may be applied to make a Venturi? Best look it up, but here comes the 'executive summary': The faster air flows the lower it's pressure becomes. This is a large part of what allows flying things larger than an insect to fly. You can also use that low pressure flow to 'suck'* things along with it, hence the Venturi. *yes, yes, there's actually no such thing as sucking (but for your insistence in wanting to correct me) but for the sake of this 'executive summary'... Intake: -Blower_Duct.stl Should help increase the intake efficiency of a blower it's attached to. The effect is not huge -Cut_Blower_Duct. Is the version to fit the Anycubic Kossel. I'm sill trying to optomise this design; size constraints don't help. Power: -Within reason the the more powerful your blower the better everything else will work. The primary area for improvement. Exhaust: -In my opinion these ducts employing the Venturi principle are for their size the best flowing ducts available. Further opromisation is, of course, possible. As a bonus all these designs will work with PLA. -Exhaust_Duct.stl Flows very well indeed, considering it's size, and has well concentrated air flow. I'd suggest a good choice for those with a standard / upgraded blower who wish to use the minimum of filament. -Cannon.stl Flows better still at the cost of reduced back pressure, and a slightly less concentrated flow. Fine for those who want to give it a go, works better with an upgraded blower. -Dual_Cannon_Done.stl Has the potential to double the flow of Cannon.stl and has the advantage of multi-direction cooling. Although I've increased the back pressure a little this one really needs an upgraded blower to be useful. Detail: As air is just as much a fluid as any other can these principles be applied to your 3D printer's cooling? Yes. Let's concentrate on the three areas that can be most readily tweaked: -The power driving the air flow -The intake -The exhaust, or business end of your air duct Power: Within reason it's always good to push the air you want to flow harder if you want it to flow more. With that in mind it's generally a good idea to upgrade the stock bower that comes with your machine. On that subject I'd suggest taking a look at the Better Blower thing I cooked up for the Anycubic Kossel Linear Plus. The intake: Have you ever noticed how the intake of a jet engine isn't just a hole? Yep, for a given amount of 'suck'* the intake is shaped to increase airflow in to the engine by speeding / lowering the intake pressure so allowing more air to enter overall. There's also a thing called the Coander effect which relates to how air flows over a surface that may be employed to also increase efficiency. I've posted two versions of just such an intake that ought to increase the amount of air that flows though your printer. Blower_Duct.stl and Cut_Blower_Duct.stl It should be possible to glue the former to the face of any blower intake, where there's room, to improve it's efficiency and so air flow. It's size may need to be altered in your slicer depending on the application. The latter is designed specifically to fit an Anycubic Kossel Linear Plus printer, preferably one that's already undergone my Better Blower upgrade. (I've updated my Better Blower upgrade thing to go along with this thing but if you've already made the original Better Blower housing it just needs part of the lip of it's Coander intake removing with a sharp knife prior to gluing on the new duct) The exhaust: The plan is to get as much air to flow as possible. It helps if the exhaust duct has a smooth, and preferably short, path for air flow. It also helps if the cross-section of the duct is both as large as practicable and narrows a bit to increase air speed past the print you are trying to cool - more flow means a greater potential to take heat away from the area you want to cool as long as the narrowing doesn't obstruct overall flow too much. That also means, via Bernoulli's principle, a lower exhaust pressure can be used to 'suck'* more air in to the system that might then be added to the overall exhaust flow to further improve cooling efficiency. This is the Venturi effect in action. The cooling duct I have included here is designed to do just those things. I'm afraid this design will only work with a Kossel Linear Plus printer. But the concept can be modified to suit other machines. Unconvinced? Try the following experiment: -Print out exhaust_duct.stl and carefully clean off the support material -Put it's intake to you mouth such that it's outlet is pointing at your neck and you can block the passive intake with your thumb -Blow though the duct noting how hard you are blowing and how the stream of air feels on your neck. -Do it again with your thumb covering the passive intake Did you notice the difference? Feel free to have a few goes until you are convinced. If you are still wondering: -Try partially blocking the passive intake with your thumb as you blow With a little practice you should note a couple of things: -You can feel (and possibly hear) the air flowing past the partial occlusion made by your thumb -You notice the air always flows in to the passive intake, not out* *Ok, ok. Because the venturi outlet is also narrowed a little to help improve the final 'fuff' on your print, if you really blow unreasonably hard you can induce sufficient back pressure for the air to flow the wrong way though the venturi. I don't see this as a practicable issue as anyone using a leaf-blower with their printer is unlikely to be be bothered about the efficiency of their air flow. Final Thoughts: The goal is of course to improve the quality of your prints by increasing air flow. I have also put some thought in to the shape / size / positioning of the exhaust duct as airflow quality is even more important. ie: It's no good if the air isn't blowing on the correct part of your print.
With this file you will be able to print Project Venturi with your 3D printer. Click on the button and save the file on your computer to work, edit or customize your design. You can also find more 3D designs for printers on Project Venturi .