Promega Simplified Extruder Back Plate
thingiverse
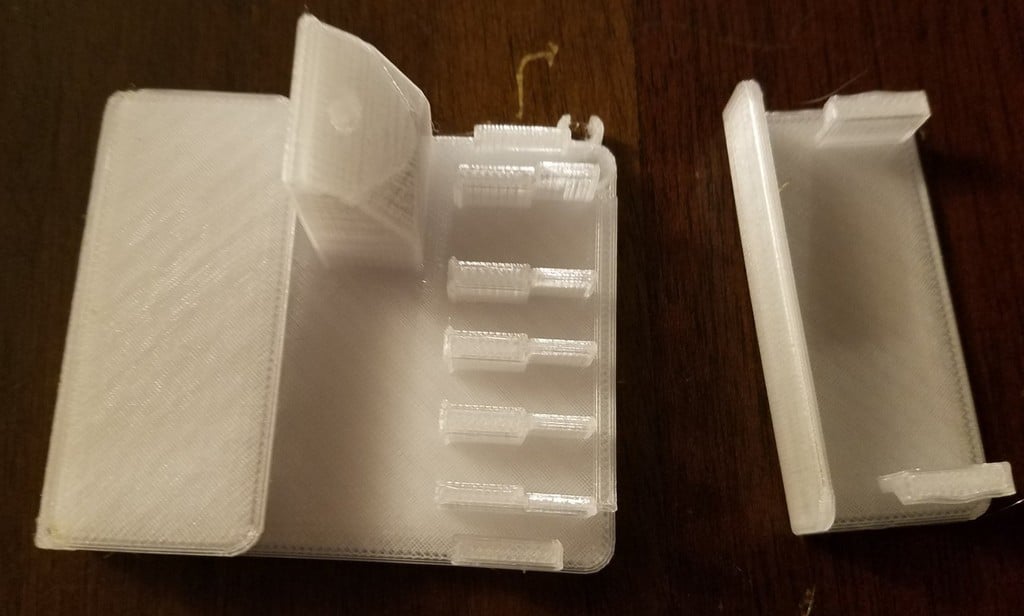
A simplified extruder back plate for the M3D Promega printer. Easier to print, Easier to install, Easier to troubleshoot. V2- Added wall to prevent covers from sliding too far inward. Wasn't a problem for me but thought it might cause trouble. Also separated the files to make printing easier Install instructions. Install the back plate first with two screws. Pop in each connector housing making sure to match them to their appropriate side. Place them in this order Extruder motor Thermister Heater Fan (i placed front fan on right and side fans on left) Slide covers over each side they should be mildly loose. Printed on a prusa with 0.4mm nozzle 100% infill. Print in ABS-R or PETG. Side pieces need to be installed to hit the limit switch. Has only been tested with gearbox upgraded limit switch. hardware needed 2pcs M3 35mm length countersink head style screws for connecting the backplate to the motors 1pcs M3 16mm to 18mm either countersink head or socket cap head for connecting the cable harness to the tower
With this file you will be able to print Promega Simplified Extruder Back Plate with your 3D printer. Click on the button and save the file on your computer to work, edit or customize your design. You can also find more 3D designs for printers on Promega Simplified Extruder Back Plate.