Prototype: 3D Printed HOT SWAP Mechanical keyboard.
thingiverse
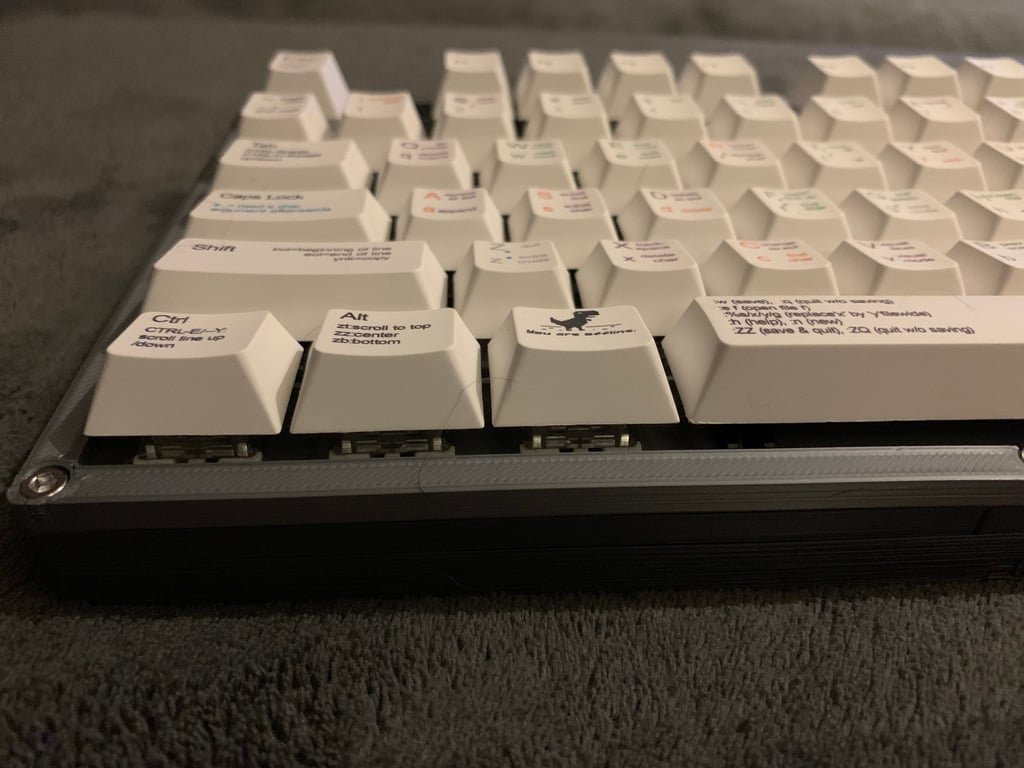
THIS IS A PROTOTYPE This is a set of a TKL (normal size, full height TKL 80%) and matching NumPad. Both consist of a plate, on which the switches are mounted, a "pcb" on which the hot swap sockets are placed and a base, in which the USB-C breakout board is screwed in, and wired to the controller. Project completion notice; The keyboard is done. I have no intentions of tinkering with the designs anymore, unless someone suggests a (valid and needed) improvement. Update April 30th - Added uncut plate, pcb and base for the TKL so you can make your own cut (.05 mm gap worked perfectly for me) - Moved the m2 nut/bolt holes slightly for nicer print Update April 29th - I created a custom version of the base just for myself that includes a USB hub and Type A socket, demo on youtube. - I updated the Base; I removed the two bolt holes on top and bottom; they didn't do much. Left the one in the middle, but not using it myself. - I also noticed the socket pillars were mis aligned. It is a wonder I haven't pushed out socket ;) Moved the pillars to the correct position. - Fixed 2 screw holes that got plugged in v3. - Updated the Plate; it now has 2 slots for M2 nut and 2 tunnels for matching bolt (M2x8 should suffice, to make the plate solid. It should give a cleaner look, and easier assembly. Update April 27th I noticed, while (finally) assembling my numpad, that the hotswap socket pillar under the zero (2u) key was missing and 2 regular 1u pillars were there. stupid. I used cutters and glue, but of course, I updated the design. -> Numpad base v3 Also, I updated the PCB to reduce the width of some plate supports as they interfered with the stabilizers. -> Numpad PCB v3 Update April 23rd This message is typed on the as-good-as-completed keyboard. It took a while, but I finally finished the soldering. My final findings on this project as I will be taking an extended break from it; The design is fundamentally flawed; To hold in the hot swap sockets, the pillars are required as I did not want to have to glue them in. But these pillars also cause major headaches assembling the keyboard. I will be thinking of a new method, but don't hold your breath. New design for the bottom is added Bottom housing has screws to make it one piece, however, I found that keeping the bottom as two separate pieces makes assembly a lot easier, though the keyboard now is less sturdy. Added a picture of my soldering work. As you can see, I'm not very good at it, but it works. Had to move a dataline last minute to a new pin (E0) as the pin i used (D6) is an LED pin, causing weirdness (auto repeating column) Summary; This was a fun project, but also a very stressful project. I will not be doing this again. My next project, if I start another, will be based on a hot-swap PCB, manufactured by PCBWay or JLCPCB. Final note; This is still very much a prototype. In the time it took me to create this, a lot of other projects popped up, some with nicer designs, some with better construction. I wish you all happy 3D printing, happy Keeb-ing and see you in the next one. --- end of update ---
With this file you will be able to print Prototype: 3D Printed HOT SWAP Mechanical keyboard. with your 3D printer. Click on the button and save the file on your computer to work, edit or customize your design. You can also find more 3D designs for printers on Prototype: 3D Printed HOT SWAP Mechanical keyboard..