Prototyping Breadboard
thingiverse
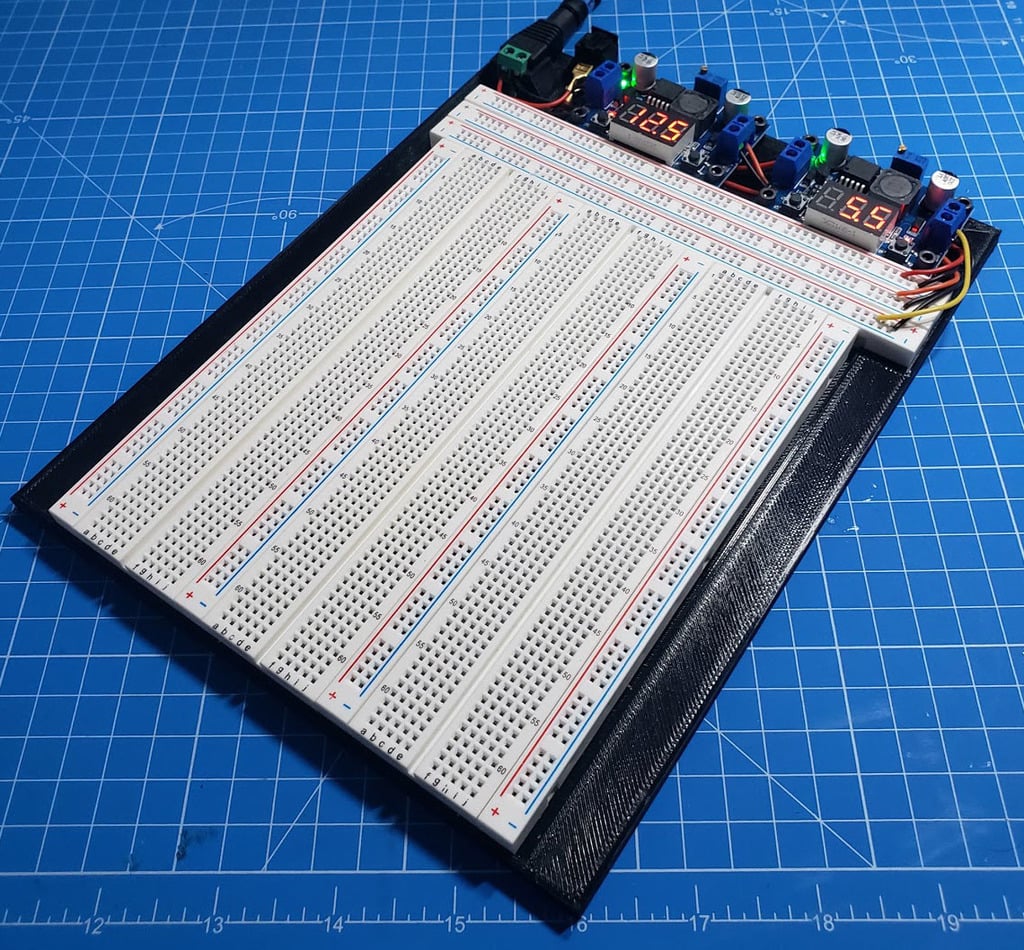
A single breadboard is great when prototyping with a microcontroller and a couple of small DIP packages. And the wonderful, little 5V/3V breadboard power supplies definitely help keep the project organized. And with breadboards that snap together, expanding is definitely possible. But needing to move the project from one workspace to another is a recipe for breadboards separating and countless connections needing to be mended. Coupled with a growing number of projects that also need multiple voltages or multiple power supplies for servos and stepper motors, decided to "design a better mousetrap". This design is for the "elegoo"-style breadboards but can certainly be adapted for others. The vertical power rails can be unsnapped giving score lines where the adhesive backing can easily cut with an xacto knife. Buying three boards (~$9) will give you enough pieces for the three-wide breadboard and two horizontal power rails at the top. Buy a fourth if you want a third power rail for the unregulated, power supply voltage. There are a plethora of DC-to-DC step down voltage regulators; the most common ones have mounting holes of spacing 50mm x 28mm, require 3mm screws and are ~$6. Note: I have found that the displayed voltage on lots of them -- be expensive or cheap -- aren't accurate, especially when under load. You will also find that there can be a few tenths of a voltage drop from one side of the breadboard to the other. Best to always measure, under load, the voltage to make sure your components are getting the correct voltages. A SPST minature rocker switch and a female barrel connector plug (with a little CA glue) are the remaining parts.
With this file you will be able to print Prototyping Breadboard with your 3D printer. Click on the button and save the file on your computer to work, edit or customize your design. You can also find more 3D designs for printers on Prototyping Breadboard.