Prusa buffer extended bottom with fittings
prusaprinters
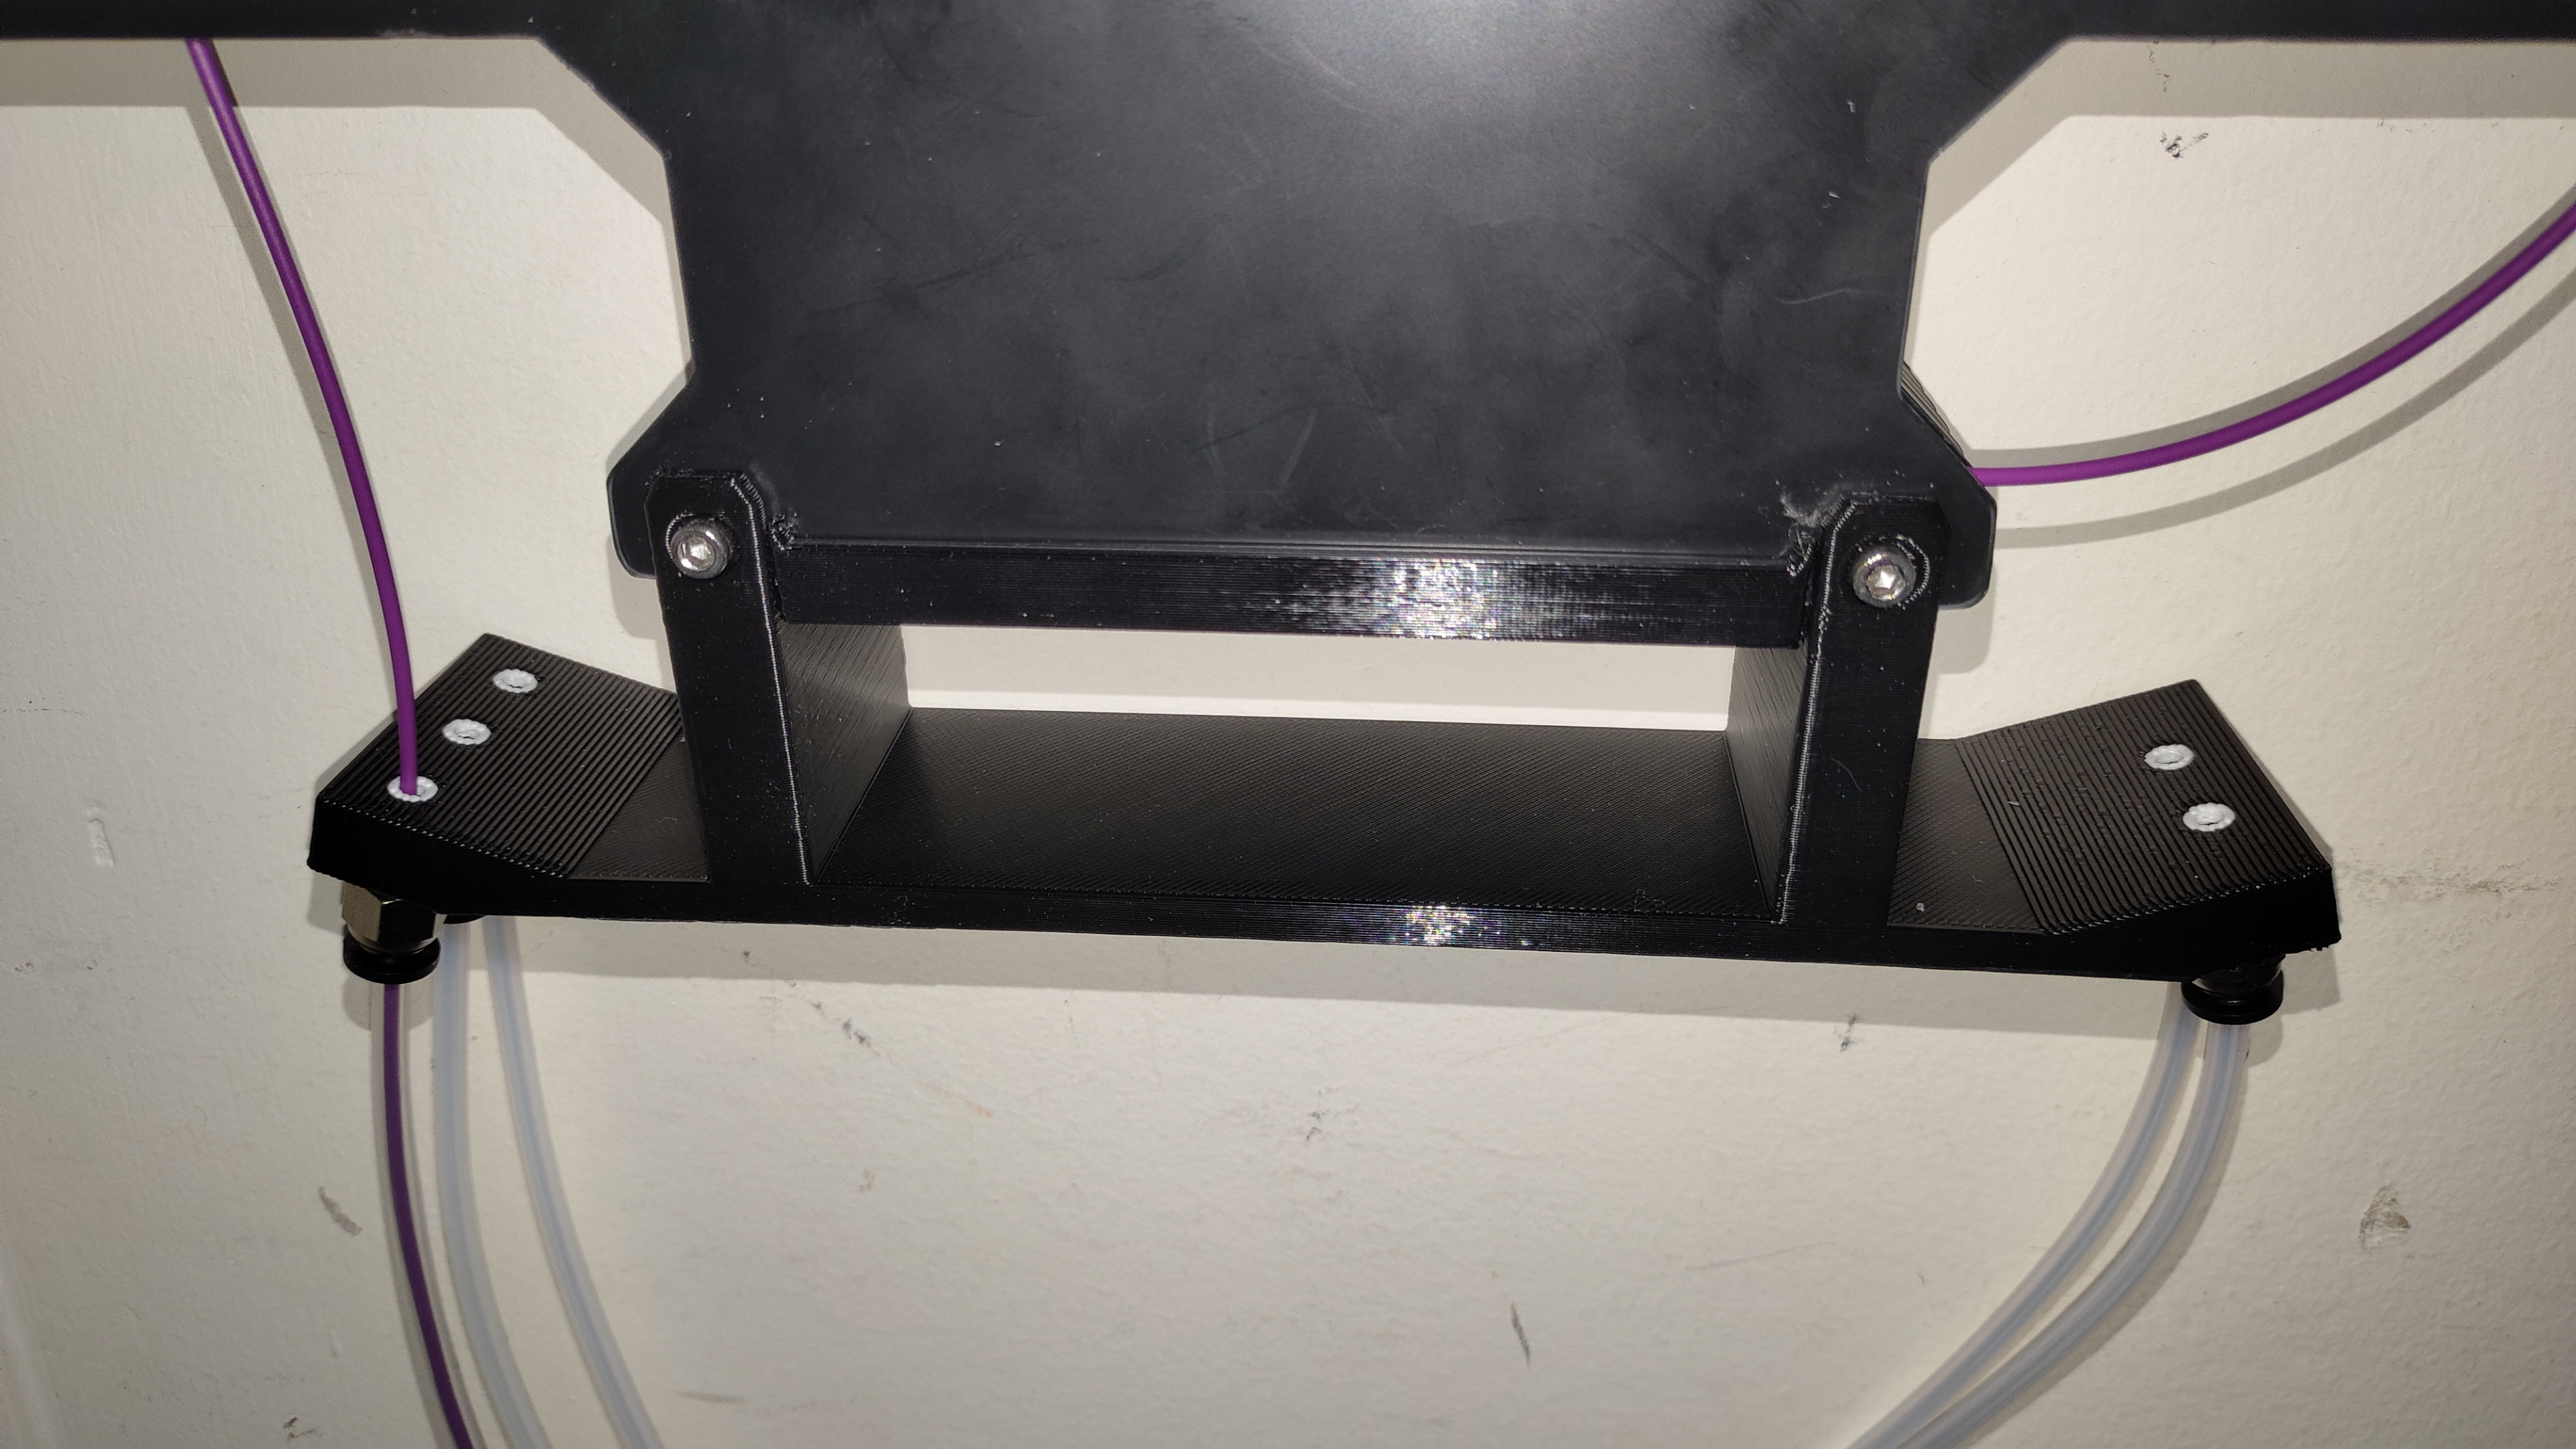
<p>I went through a lot of different arrangements to get my MMU working. I tried various buffering solutions, but in the end, I found that the buffer that came with the MMU2S worked the best for me and my arrangement. But loading it was a real pain, and I didn't like the way the tubes were connected to the unit.</p><p>I saw <a href="https://www.printables.com/model/116509-extended-rear-buffer-plate-for-mmu2mmu2s-easier-fe">this model</a> which extends the bottom of the buffer, but it has two issues. First, it uses the same method of attaching the tubing, and second, it requires a lot of support to print.</p><p>So I took that idea and made my own model. This model extends the base, but splits it into two separate pieces. The first piece just slides onto the bottom of the buffer plates and lines up with the holes. The second piece is the extension piece and goes “over” the first piece. You then use the screws and nuts that came with the buffer to attach both pieces to bottom of the buffer.</p><p>I also included sockets for PC4-M10 fittings to make it easy to connect and disconnect the tubing.</p><p>Finally, I found it difficult to find the hole for the filament in the black filament, so I added a small ring that I printed in white to make it easier to insert the filament.</p><p>I suggest that you use smart fill on painted on supports on each of the sockets from the bottom to add support. It's a little bit of a challenge to get the support out, but it does come out nicely in the end, and the threads in there are intact.</p>
With this file you will be able to print Prusa buffer extended bottom with fittings with your 3D printer. Click on the button and save the file on your computer to work, edit or customize your design. You can also find more 3D designs for printers on Prusa buffer extended bottom with fittings.