Prusa Dual Extruder, Dual Front-Mount Fan X-Carriage v2
thingiverse
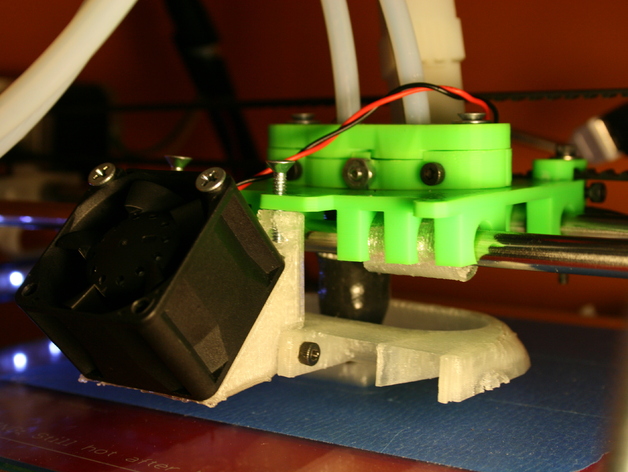
This is an updated version which is more printable. The previous version had some small pointy parts that were too small to print. The parts have been cleaned up and I've printed and assembled them - it works pretty good! The benefit to having your fans on the front instead of the side should be obvious. Side fans take up X-space and make your build area smaller. Moving the fans to the front frees up X-space. This is important if you use a 30mm deep fan, which I do. This is designed to sit on four bearings. I've used 3x metal bearings and 1x printed. I think both work equally as well! Instructions 1] Print 1 duct. 2] Print 2 fan mounts. 3] If you only want to use one fan, print 1 fan mount cover. 4] Print 1 X-carriage or modify your favorite X-carriage to add mounts for the fan mounts/duct. 5] Slide the fan mounts into the duct, they should sort of snap in to place. Use some super glue if needed. 6] Insert nuts in the nut locks at the top of the fan mounts. 7] Screw through the X-carriage into the fan mounts and into the nuts. Nice and tight! 8] Mount and screw your fan(s) and cover, if needed, onto the fan mounts. 9] Wire up your fan(s) and test it out! Note: I'm also using this Bowden adapter to support dual extruders: http://www.thingiverse.com/thing:27704
With this file you will be able to print Prusa Dual Extruder, Dual Front-Mount Fan X-Carriage v2 with your 3D printer. Click on the button and save the file on your computer to work, edit or customize your design. You can also find more 3D designs for printers on Prusa Dual Extruder, Dual Front-Mount Fan X-Carriage v2.