Prusa i3 bed probe - mechanical switch parts
thingiverse
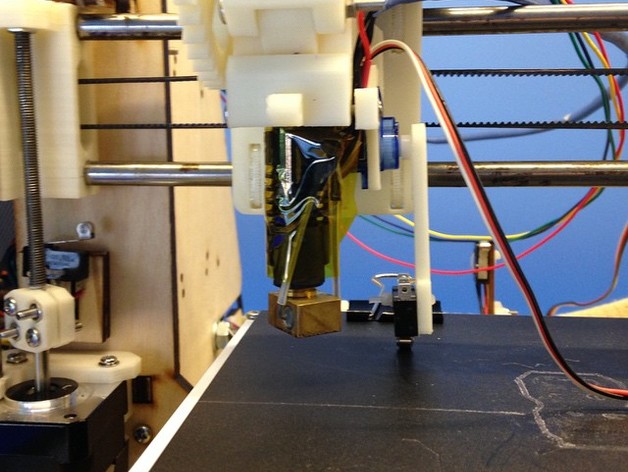
After testing I've decided this method is not only not good, it makes things worse. I've left it here so you can learn from my mistake. With a bed probe your printer can compensate for an uneven bed. In theory this makes your printer a little more fire-and-forget. The probe switch connects a limit switch to a servo arm. The probe mount holds the servo under the extruder and manages cables. See pictures for explanation. This method is garbage because the servo doesn't bring the arm down to the same angle every time. The measurements are wildly different and the software thinks the bed is at a crazy angle. End result: hitting bed, damaging nozzle, printing mid-air... everything wrong you could never want. Next I'm going to try an induction probe. You can find out more about things I make athttp://marginallyclever.com Instructions physical assembly I used a 9g servo and a limit switch with a roller. The roller part is not required. The 35mm M3 screws that hold the hot end into the extruder ALSO hold the probe mount in place. There's a recess on one side to hold the wires for the hot end and the servo out of harm's way. The servo arm is glued into the probe arm. the switch is held on with a zip tie. There is a hole in the arm used to hold the wires away from the nozzle. Code The harder part is configuring your firmware. If you are reading this then I have not yet published the blog post and linked it here. Write to me! Say something encouraging! :)
With this file you will be able to print Prusa i3 bed probe - mechanical switch parts with your 3D printer. Click on the button and save the file on your computer to work, edit or customize your design. You can also find more 3D designs for printers on Prusa i3 bed probe - mechanical switch parts.