Prusa i3 Cable Duct Kit
prusaprinters
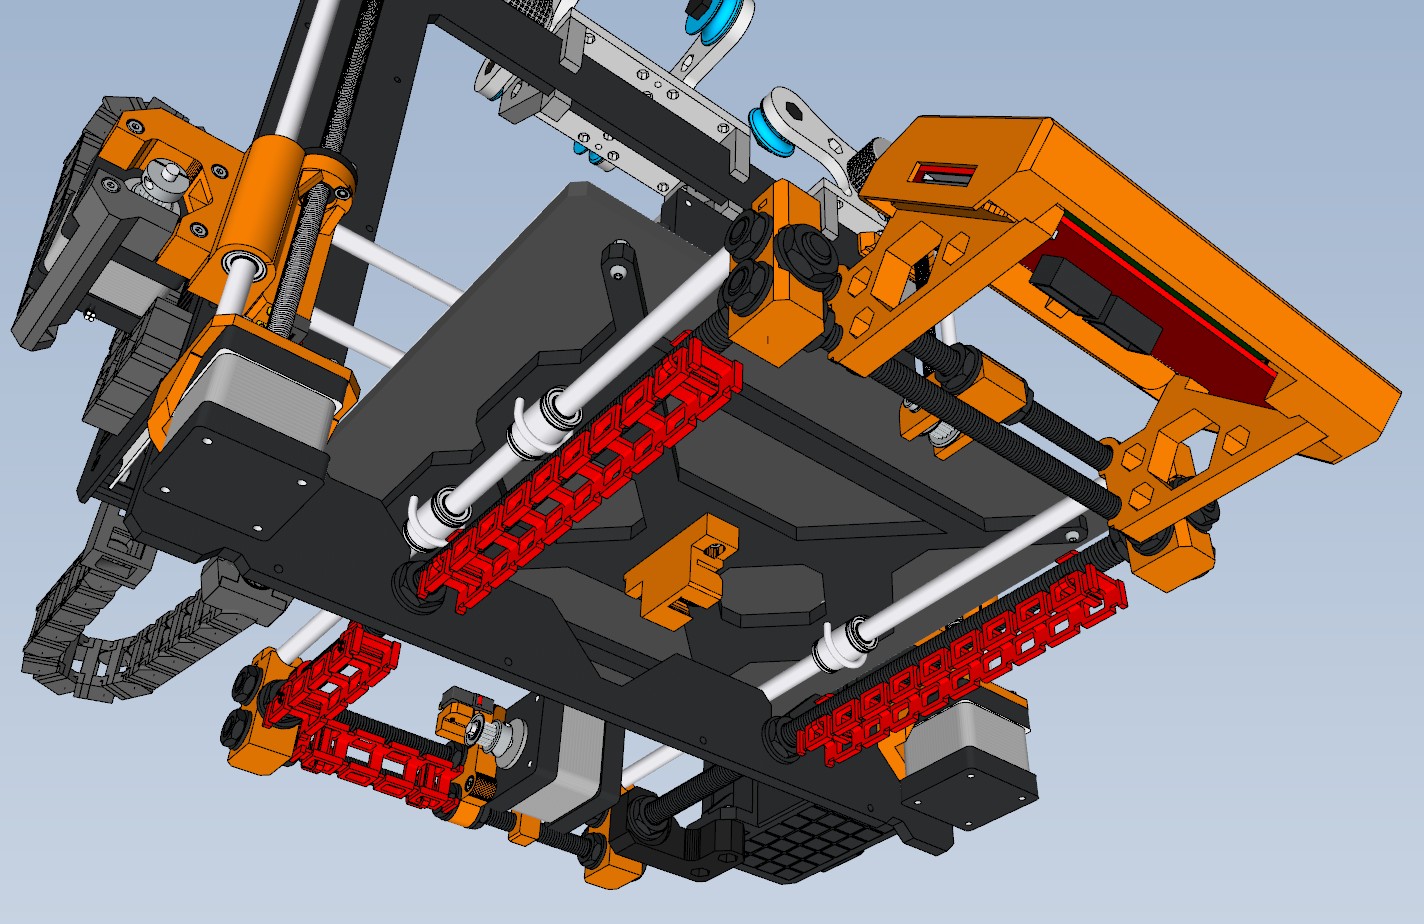
<p>I created these to finish off my Cable Chain mods add cable management to the printer with cable ducts which replaces all the wiring zip ties with the same theme.<br/> There are 2 heights of cable ducts included, I've only used the "short" ones which fit a stock MK2S without feet, the "tall" ones I haven't printed/tried but allow for additional cables beyond originally included, they just need to be rotated to the side vs bottom.</p> <p>Comments greatly appreciated, let me know what you think!</p> <h3>Print instructions</h3><h3>Category: 3D Printer Parts Print Settings</h3> <p><strong>Printer Brand:</strong> Prusa</p> <p><strong>Printer:</strong> <a href="http://amzn.to/2rqZ6Uo">Prusa Mk2</a></p> <p><strong>Rafts:</strong> No</p> <p><strong>Supports:</strong> No</p> <p><strong>Resolution:</strong> .35</p> <p><strong>Infill:</strong> varied (see below)</p> <p><strong>Notes:</strong></p> <p>Infill varies between parts, the cable ducts were 0%, the clips were 100%.</p> <h3> Post-Printing</h3> <p><strong>Build & Assembly Notes:</strong></p> <ul> <li>All parts are designed so the wires can be slid into them, there should be no need to disconnect any wiring.</li> </ul> <ul> <li>There are 2 sizes of parts for the rod ducts, short ones for behind the frame, and long ones for the front.</li> <li>For the rod ducts they are designed to be mounted using the original Prusa LCD Cable clips, I've included my redesign/adjustment of the stock one as well as a modified one for the smaller x-axis threaded rods at the back.</li> <li>For the frame ducts there are two mounting positions, use the two locations which best line up with the y-axis rod centered. This part can be mounted 2 ways, its printed with small holes in the "ears" which let it be mounted with short M2 screws (which I have a ton of). It can also be mounted using zip ties, the hole just needs to be drilled out to pass the zip tie through it, through the frame, back around and through the square hole.<br/> -Due to a couple questions on how the Ribbon Cable routes I added a couple more pictures, basically, it runs under the frame flat, then up behind the cable duct in the notched gap, securing the duct to the frame holds it in place. If you imagine it coming straight up flat against the frame, twist it counterclockwise around a half turn which basically causes it to roll over to the front exiting to the right with the other wires.<h3>Bill Of Materials:</h3> </li> </ul> <p><strong>The parts below are required to "Chain All The Things":</strong></p> <h5>Frame Cable Ducts:</h5> <ul> <li>2x Frame Cable Duct.stl (one for each side)</li> <li><p>16x Frame Cable Duct Clip.stl<br/> ##### Rod Cable Ducts (Short or Tall):</p> </li> <li><p>1x duct part "Rod Cable Duct {short/tall} Front.stl"</p> </li> <li>2x duct part "Rod Cable Duct {short/tall} Rear.stl"</li> <li>20x clips "Rod Cable Duct {short/tall} Clip.stl" or "Rod Cable Duct {short/tall} Clip Ears.stl"</li> <li>2x the cable clip for the smaller rod "Y Cable Clip.stl"</li> <li><p>4x the original clip (or use the ones that came with it) "Prusa LCD Cable Clip.stl"</p> <h3>Revisioning:</h3> <p>v1.0 - Moved cable ducts from my Cable Chains thing <a href="https://www.thingiverse.com/thing:2311596">https://www.thingiverse.com/thing:2311596</a> into this new thing...</p> </li> </ul>
With this file you will be able to print Prusa i3 Cable Duct Kit with your 3D printer. Click on the button and save the file on your computer to work, edit or customize your design. You can also find more 3D designs for printers on Prusa i3 Cable Duct Kit.