Prusa i3 Dual Extruder Design
thingiverse
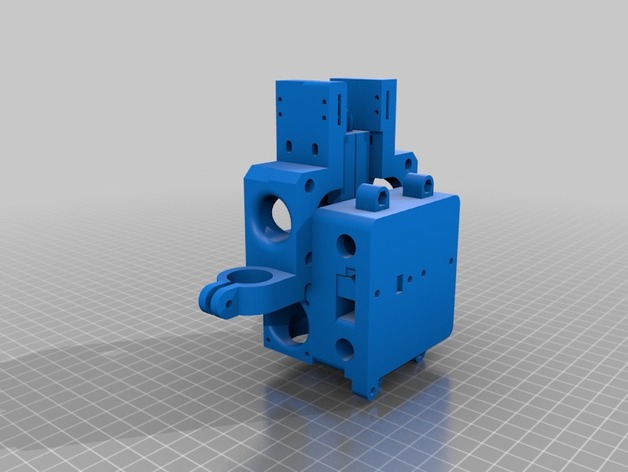
This is my take on a dual extruder setup for Prusa i3 machines. It uses 2 E3D-V6 extruders, I use genuine ones (supporting British innovation) so you need to check sizes if clones are used. It can be assembled as a side by side or a front and rear layout and includes optional 18mm Diameter capacitive Z-Probe mount and Filament Runout switch mount. It also has the option of either 3 or 4 linear bearings. In both cases one of the extruders is adjustable. Pros and Cons of different arrangements. Front/Rear Extruders has the advantage of a more balanced design but has the disadvantage of reducing the Z axis to about 160mm and the Y axis to about 180. Side by Side means its front heavy but allows the full X, Y, Z movement. 3 bearing probably has lower friction than the 4 bearing but may wear faster and possibly not be as accurate. I have tried the 3 bearing first and will report back on the performance later. Depending on which arrangement you require you will need to mirror (flip) some of the extruder body parts. For instance for the side by side design with no Z-Probe or RunOut switch you need Two Extruder Body Basic and two Extruder Body Basic mirrored (flipped about Y if using Slic3r) The Extruder body that is to be adjustable needs the Adjuster Lug glued into it (if printed in ABS then a dab of acetone is perfect) so that it locates in the X-Carriage Front, a 3mm cap head screw is screwed into the lug and locates into the carriage. The Extruder body is fixed to the carried by 3mm cap head screws in two slotted holes, tighten the screws a little then use an allen key to make the Z adjustment. A fan can be mounted on the rear X-Carriage, if this is required then glue the Fan Lug in place. The fan mount and duct is the one supplied with the Prusa i3 Plus Original from Prusa Research as it's Open Source I have included the STL file for this as well. A suitable fan is: http://www.ebay.co.uk/itm/161834906059?_trksid=p2055119.m1438.l2649&ssPageName=STRK%3AMEBIDX%3AIT The Capacitive probe I used is one of these:http://www.ebay.co.uk/itm/291369250165?_trksid=p2057872.m2749.l2649&ssPageName=STRK%3AMEBIDX%3AIT If anyone needs to fit a 12mm diameter probe either make an adaptor or let me know and I will modify the part for you. The Filament RunOut Sensor is a simple micro-switch with a lever and roller:http://www.ebay.co.uk/itm/281854711611?_trksid=p2057872.m2749.l2649&ssPageName=STRK%3AMEBIDX%3AIT The Extruder fans should be assembled so as to both blow in the same direction to get a through flow of cooling air. If going for the Front/Rear layout you have 3 Carriage options including a slightly narrower 3 bearing design. Print Settings Printer Brand: RepRap Printer: Prusa i3 Plus Rafts: No Supports: Yes Resolution: 200 micron Infill: 25% Notes: Print in either ABS or PET if you want it a bit less brittle. Supports are only needed for the lugs that hold the X-Carriage together. How I Designed This Designed in AutoCAD 2016 on a Mac, possibly not the best choice but I've been using AutoCAD now for 30+ years!!! If anyone wants the files then let me know.
With this file you will be able to print Prusa i3 Dual Extruder Design with your 3D printer. Click on the button and save the file on your computer to work, edit or customize your design. You can also find more 3D designs for printers on Prusa i3 Dual Extruder Design.