Prusa i3 IPI rework
thingiverse
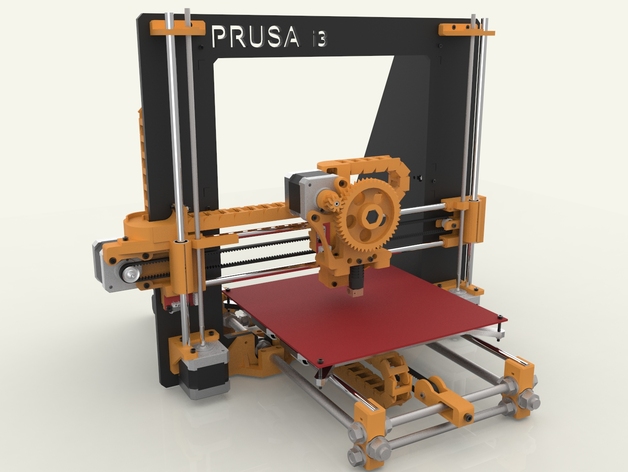
This is my own reworked version of the Prusa i3, heavily influenced by various ideas I've gathered from here and combined with my own unique perspectives. Improvements over the original Prusa i3 design include: A highly adjustable belt tensioner for both Y and X axis. Firmly secured endstops, featuring a customizable screw for Z and Y axis adjustments. Streamlined cable management through clever use of cable-chain guides strategically placed throughout the printer. Universal and easy-to-assemble extruder mount. Robust reinforced structure throughout. Innovative design for the X-axis minimizes efforts on the transverse direction of the Z guide bars caused by belt tension, preventing unwanted compression on these components. Red arrows illustrate the forces at play due to belt tension, with a blue highlighting compression efforts applied to the X guides. Detailed images can be found in separate notes. I've made all necessary parts available for download as RAR files: * Z-axis.rar * Y structure.rar * Y carriage.rar * X structure.rar * Extruder.rar * Other.rar Note that this extruder is an exact replica of Johnash's design, available on the same platform. Recent updates have also been incorporated, such as: A small vent for better ventilation, added with support from an additional file and improved to be cooler than V1. Adjustments were made to the X axis structure and Z endstop system for better usability. All components required for these updates can be found within a single RAR file titled 'Prusa i3 IPI rework V2.rar'. Extruder and frame components can also be downloaded directly from Thingiverse. Check out two remixes specifically designed to adapt to different setups: A version remixed by "Thehebs" features modified Pololu nuts, available here: <http://www.thingiverse.com/thing:976946> Another version, this time from "GarryBu", can be seen using M6 nuts: http://www.thingiverse.com/thing:1044485 I have now added a video instructional guide to the printer assembly. This can be found on my instructions page and will assist you with setup. In light of recent experiences I recommend avoiding PLA for the extruder support component, which tends to experience thermal degradation when exposed to prolonged heat stress. For more optimal results it is recommended that ABS or another thermal-resistant material should be used in place. Also consider using a fan or implementing some insulation to ensure your part will hold up. As before a commercial components listing can still be accessed directly below. This listing allows you to download parts as thing files for purchase. A tutorial for assembling the Y axis can be located in an additional instructional video also included. Do not forget that, at assembly, the nut and washer need to secure it firmly, or this is doomed to happen, where I find that all these necessary components would end up scattered, forcing me to disassemble it completely and wasting precious time! This critical piece of knowledge can easily be learned by watching the Final printer assembly video. The links provided below direct you straight into these respective tutorials: 1. X-axis assembly: https://www.youtube.com/watch?v=--lqjMMGfyw 2. Y axis assembly: https://www.youtube.com/watch?v=ux9tOZNxXvg 3. Z-axis assembly: https://www.youtube.com/watch?v=tGtQBbFGpAc&feature=youtu.be 4. Final printer assembly: https://www.youtube.com/watch?v=DQu4xoaOoIE
With this file you will be able to print Prusa i3 IPI rework with your 3D printer. Click on the button and save the file on your computer to work, edit or customize your design. You can also find more 3D designs for printers on Prusa i3 IPI rework.