Prusa i3 MK2 MK2.5 Mk3 Ikea BROR Enclosure - MMU2.0 Ready
thingiverse
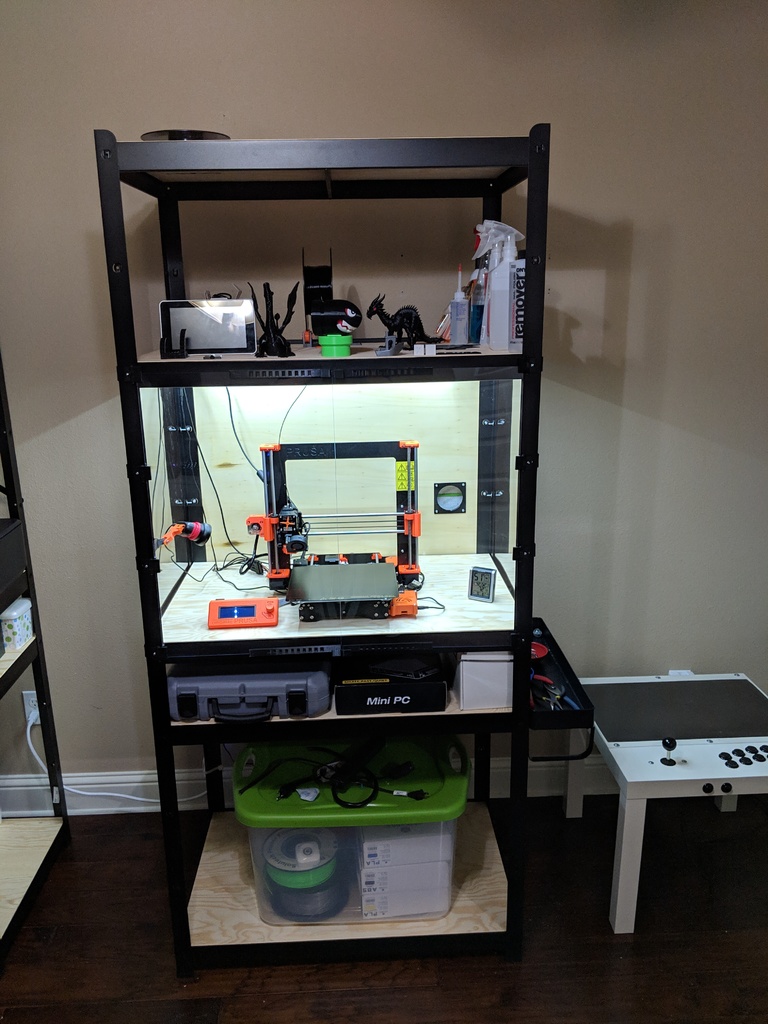
I wanted to build an enclosure for my Prusa i3 MK3 that could also fit the MMU2.0 kit (waiting for it to ship in December/18). I tried the lack enclosure but it would need some work to adapt to the MMU2.0 kit, besides the tight fit overall for the spools. I came across the BROR system from IKEA and it was perfect for my needs. It houses the MK3 (needs to detach the LCD panel from the frame, but does not need to switch the heated bed cable cover, per lack enclosure instructions), has enough height to fit the MMU2.0 kit and the area on the top has a lot of room for the five spools, besides the other shelves you can install. I had to design a few things like hinges and holders for the acrylic sheets and also for the PSU that I moved to the bottom, outside the enclosure, in addition to other stuff I found here on thingiverse (see "to print" section"). All parts fit nicely with the existing holes on the frame, which was a big plus! All files parts I designed have their corresponding Fusion 360 files for further customization. Printer Enclosure: 83cm width x 59cm height x 53cm depth Spool Holder Space (top): 83cm width x 39cm height x 53cm depth Future upgrades: - Add MMU2.0 Kit - Build enclosure on the shelf above the printer, where the filament spools will go, for added protection against humidity/dust/etc. - Attach 7in Raspberry PI screen to the frame - Build control panel for leds, printer power, Octoprint - will use the shelf below the printer
With this file you will be able to print Prusa i3 MK2 MK2.5 Mk3 Ikea BROR Enclosure - MMU2.0 Ready with your 3D printer. Click on the button and save the file on your computer to work, edit or customize your design. You can also find more 3D designs for printers on Prusa i3 MK2 MK2.5 Mk3 Ikea BROR Enclosure - MMU2.0 Ready.