Prusa i3 Mk2 / Mk2S / Mk2.5 PSU spacer
thingiverse
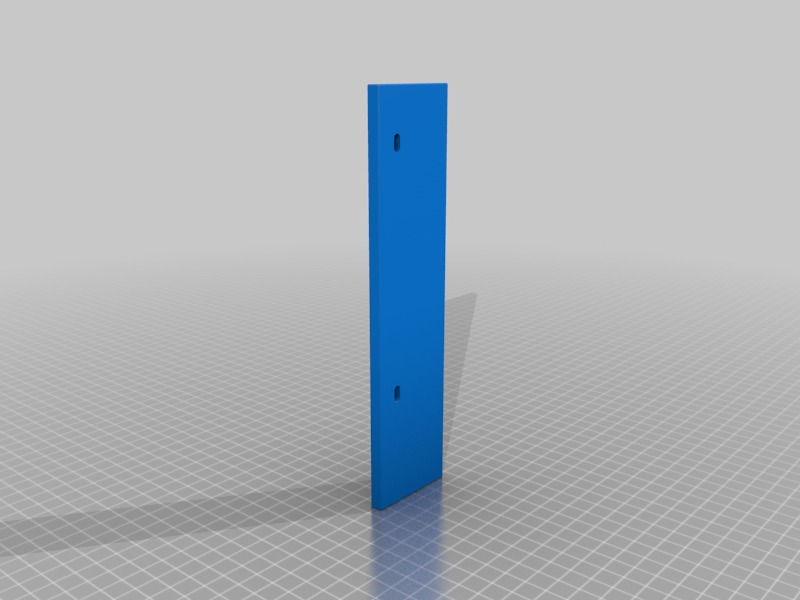
I have a Prusa i3 MK2 kit that was shipped in February 2017. Since then, I've upgraded it to a Mk2S in October 2017 and later to a Mk2.5 in April 2018. The bed-leveling search pattern on this printer has led me to believe that the vertical frame is slightly too far back on the Y-axis threaded rods. This issue causes sporadic problems with XYZ calibration. A proposed solution for this problem was suggested by others who have experienced it. They recommended unbolt the power supply unit (PSU) from its position at the back-right corner of the Y-frame, which would allow the vertical frame to be moved forward as needed. This approach worked, but it resulted in a loss of stiffness in the frame. My solution involves printing a spacer to go between the PSU and the vertical frame. This allows the vertical frame to shift forward on the y-axis while still being securely bolted to the back-right corner. To determine the thickness of the spacer (6.88 mm), I unbolted the PSU from the vertical frame, reattached it to the back right corner of the y-axis foot, and moved the z-axis frame further forward on the y-axis's threaded rods until the bed-leveling search algorithm was centered in the y-axis on the marker points on the heated bed. Then I measured the gap between the vertical frame and the PSU and printed the part accordingly. A more complete description of this issue can be found here: https://github.com/prusa3d/Prusa-Firmware/issues/616#issuecomment-385211047
With this file you will be able to print Prusa i3 Mk2 / Mk2S / Mk2.5 PSU spacer with your 3D printer. Click on the button and save the file on your computer to work, edit or customize your design. You can also find more 3D designs for printers on Prusa i3 Mk2 / Mk2S / Mk2.5 PSU spacer.