Prusa i3 MK2(s) & MK3 Spool Holder - Frame Mount - Top Loader
thingiverse
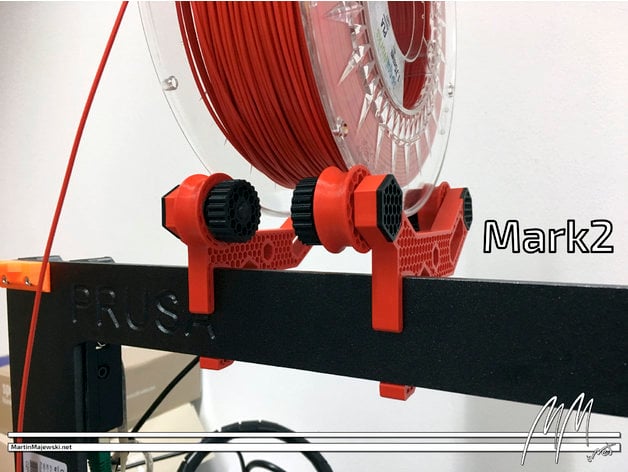
This text appears to be a tutorial or guide for printing a spool holder using a 3D printer, specifically the Original Prusa i3 MK2s. The author provides detailed instructions and tips for printing and assembling the holder, as well as troubleshooting advice. Here are some key points from the text: **Printing Settings** * Layer height: 0.2 mm (200µm) or 0.1 mm (100µm) * Infill pattern: Honeycomb * Number of perimeters: + Small parts: 3 + Arm: 4 + Wheels: 6 * Top and bottom layers: 4, except for the arm which has none **Post-Printing** * Bolts, nuts, and spacer should fit with a small clearance * Use PTFE grease on threads to make handling easier (optional) * Assemble wheel and bearing by pressing bearing into tire, starting with Mark1 wheels which have an asymmetrical design. **Design Details** * The spool holder is designed to use all parts on both sides of the holder * The axis bolts can be switched from back to front and vice versa * The "smooth bedside" orientation should be towards the outside if using a mirror along the x-axis Overall, this text provides a comprehensive guide for printing and assembling a spool holder using a 3D printer.
With this file you will be able to print Prusa i3 MK2(s) & MK3 Spool Holder - Frame Mount - Top Loader with your 3D printer. Click on the button and save the file on your computer to work, edit or customize your design. You can also find more 3D designs for printers on Prusa i3 MK2(s) & MK3 Spool Holder - Frame Mount - Top Loader.