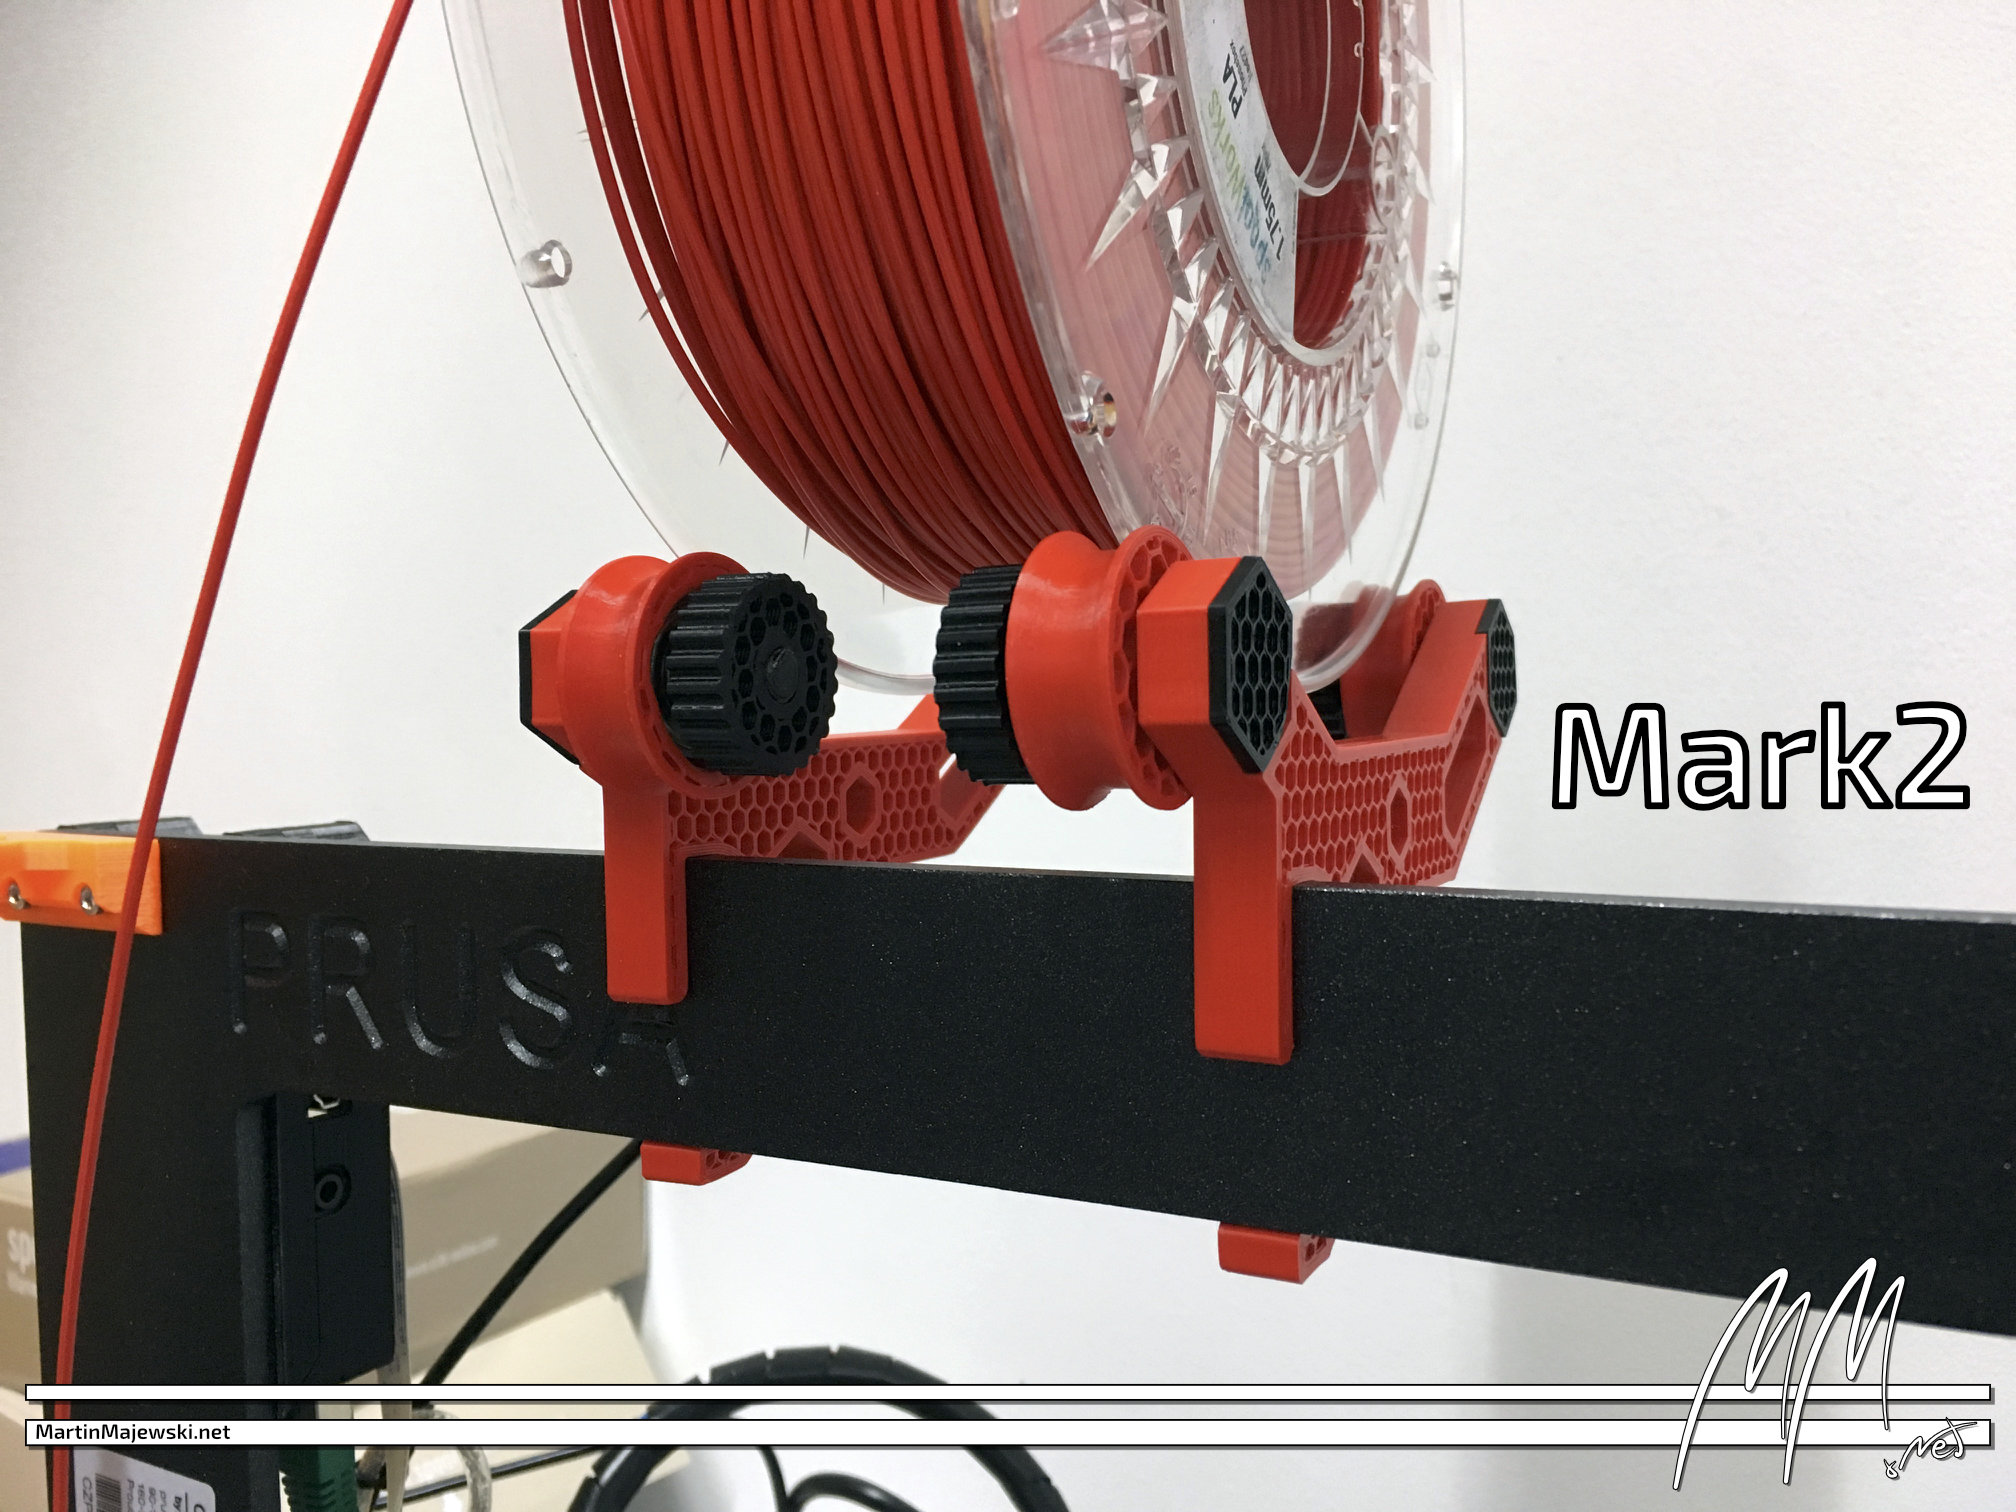
Prusa i3 MK2(s) & MK3 Spool Holder - Frame Mount - Top Loader
prusaprinters
<h3>Update 2022/04/19</h3><p>I've created a version of the Mark 3 arms for 2020 VSlot aluminum extrusions.<br>Check out the remix section!</p><h3> </h3><h3>Update 2019/10/18</h3><p>I've imported this project from my Thingiverse account.<br>To make things clearer, only the Mark 3 version is available here. Note that Mark 3 stands for the iteration of the spool holder. It is compatible with all metal Z-frame printers from Prusa Research, i.e., Mark 1, Mark 2 / 2S / 2.5 / 2.5S, and Mark 3(S).</p><p>If you are interested in the older iterations, please visit Thingiverse:<br><a href="https://www.thingiverse.com/thing:1832235">https://www.thingiverse.com/thing:1832235</a></p><p>Interactive 3D Modell:</p><p><a href="https://a360.co/2DbpG7G">https://a360.co/2DbpG7G</a></p><p>This SpoolHolder's history goes far back into mid-2016 when I received my first Original Prusa i3 MK2 with its terrible spool arm. It was a pain to switch spools, primarily if their width differed. Adjusting the arm on the frame was tedious, and one arm even broke at some point.</p><p>Therefore, I looked on Thingiverse for alternatives and found the top-loader spool holders like mine ended up being too. However, all of these designs back in the day had some flaws that bothered me — for example, some needed tools; others required hardware like real screws. However, the most significant weakness was the design of the mounting mechanics for the frame assembly. There was always that tight fit and the force one needed to clamp the arms onto the frame.</p><p>So I designed Mark 1 of the arm, which you can still see on most of the pictures and downloads as a legacy zip archive on Thingiverse (link above).</p><p>I was surprised by the success of my design throughout the community. However, this supported my bad opinion of the stock spool holder arm.</p><p>The Original Prusa i3 MK3 is out for sale, with some significant geometrical changes. My Mark 3 version of the arm takes them into account and also fits nicely on an MK2 and MK2S (most probably even on an MK2.5, but mine is still not delivered).</p><p>I hope you like my continuous efforts to make this arm better. I read every comment coming from you and try to react quickly. Many thanks also to the incredible Thingiverse community for providing a lot of derivates of my designs for other machines and purposes.</p><p>I also have a side project where I release arms for other machines. I do not test these arm derivates because I don't own all of these printers. The process is that you send me your request for such an arm derivate and the measurements of the frame of your machine, and I try to provide you with the best experience.</p><p>You can find these arms here: <a href="https://www.thingiverse.com/thing:2356183">https://www.thingiverse.com/thing:2356183</a></p><p>Please also look at my other designs, printer parts, and tools.</p><h4>Support</h4><p>If you like to support me and my work, please consider following me:</p><ul><li><a href="https://www.martinmajewski.net">MartinMajewski.net</a></li><li><a href="https://twitter.com/MMajewskiNet">Twitter</a></li><li><a href="https://www.instagram.com/martinjmajewski">Instagram</a></li><li><a href="https://goo.gl/QJTQKv">YouTube</a></li></ul><p>If you like to buy me a coffee to stay productive and creative, you can do so by sending a tip via Prusaprinters.org or PayPal...</p><p><a href="paypal.me/martinmajewskinet">PayPal.Me</a></p><p>... or by using one of the following affiliate links below (without any additional costs!).</p><h5>Products seen or related to this project</h5><ul><li>Amazon.de: <a href="https://amzn.to/32uTS8a">8x 608 ABEC 9 bearings as used on my prints</a></li><li>Amazon.co.uk: <a href="https://amzn.to/2MrDHmp">8x 608 ABEC 9 bearings, similar to the ones I used</a></li></ul><h5>Generic Affiliate Links</h5><ul><li><a href="https://amzn.to/2BppJuW">Amazon.de</a></li><li><a href="https://amzn.to/2VUPlZS">Amazon.co.uk</a></li><li><a href="https://rover.ebay.com/rover/1/707-53477-19255-0/1?mpre=https%3A%2F%2Fwww.ebay.de%2F&campid=5337986926&toolid=20008">eBay Germany</a></li><li><a href="https://www.gearbest.com?lkid=13789568">GearBest.com</a></li></ul><p>Thank you very much, and happy printing,<br>Martin</p><h3>Print instructions</h3><ul><li>The printer I used: Prusa i3 MK2S</li><li>Rafts: No</li><li>Supports: No</li><li>Resolution: 0.2 mm</li><li>Infill: 10% for all small parts, 20% for the arm, and 100% for the bolts (optionally).</li></ul><p><strong>Notes</strong></p><p>You'll have to print the following parts in the following quantities.</p><p>1x Mark3_SpoolHolder_HexStyle_ArmRight.stl<br>1x Mark3_SpoolHolder_HexStyle_ArmLeft.stl<br>4x Mark3_SpoolHolder_Bolts.stl<br>4x Mark3_SpoolHolder_Spacer.stl<br>4x Mark3_AxisNut.stl<br>4x Mark3_SpoolHolder_HexStyle_Tire.stl</p><p><strong>Note: users have reported that the bolts </strong>break<strong> easily during the assembly. To avoid this from happening</strong>,<strong> I highly suggest that you print them with 100% infill!</strong></p><p>To make the spool holder work, you need four 608 bearings for one set, which you can get from a local skate shop or from Amazon (by using the provided links, you can support me and my work):</p><ul><li>Amazon.de: <a href="http://amzn.to/2exyAlM">8x 608 ABEC 9 bearings as used on my prints</a></li><li>Amazon.co.uk: <a href="http://amzn.to/2dVwfho">8x 608 ABEC 9 bearings, similar to the ones I used</a><br>You often find eight bearings inside a set, enough for two spool holders.</li></ul><p>The spool holder is designed to use all parts on both sides of the holder and switch the axis bolts from back to front and vice versa. If you like to have the "smooth bedside" oriented to the outside, you have to mirror the right arm along the x-axis.</p><p>For the infill, I used a honeycomb pattern because it matches the hexagonal style of the holder, and my filament is quite translucent. Honeycomb gives good mechanical support in general.</p><p>I printed three perimeters for all small parts. Four parameters were used for the arm and six perimeters for the wheels to avoid infill there. Each part has four top and bottom layers on my prints - except for the arms, where I printed without any top and bottom layer to achieve the honeycomb look.</p><p>Even though I printed my final design in 200µm (0.2 mm) layer resolution, I also tested 100um (0.1 mm) for the wheels. That gave them a smooth finish, but it did not affect the mechanical properties. You can also use smaller layer heights for the bolts to make the threads more smooth.</p><p><strong>Post-Printing</strong></p><p><strong>Bolts, Nuts, and Spacer</strong></p><p>The bolts, nuts, and spacer should fit nicely with a small clearance. Nevertheless, it can be hard to get the nuts screwed onto the bolts the first time around. So give them a gentle press and try to find the sweet spot where the threads match up.</p><p>If you still want to use grease to get an easier fit, here is my recommendation:</p><h5>Finish Line Fett Synthetik Casual Grease</h5><ul><li>Amazon.de: <a href="http://amzn.to/2eawdDU">http://amzn.to/2eawdDU</a></li><li>Amazon.co.uk: <a href="http://amzn.to/2ee64Bn">http://amzn.to/2ee64Bn</a></li></ul><p>This PTFE-based grease is also very useful for other mechanical components.</p><ol><li>Put one bolt into one of the arm's determined holes and press gently. The bolt should fit nice and tight.<br>Put a spacer on the bolt and move it all the way to the arms surface.<br>After assembling a wheel with a bearing (see next step), tighten everything down with a nut wheel. However, don't use your force! This is just molten plastique, after all!</li></ol><h3>Bearing and wheel assembly</h3><p>Print one single wheel/tire first! Then check if you can press in the bearing. Bearings and wheels will always come with variances. What works for me might not necessarily work for you. If you have a hard time pressing fit the bearing (I mean a really, really hard time - I took the back of my screwdriver to press them in) into the tire, scale the tire up by a tiny amount (something of 0.01%) and try again.</p><p>I've printed the tires with 0.1 mm layer height for the best results!</p><p>The wheels are modeled with a small clearance. Therefore it is not always easy to press the 608 bearings into them. Here you are allowed to use your force!</p><h3>How I Designed This</h3><p><strong>Fusion 360</strong></p><p>This spool holder was designed in Autodesk Fusion 360 and optimized to be printed on an Original Prusa i3 MK2S - because that is what I had at that time. :-)</p><p>Because I'm now on a Full Bear Upgrade, I no longer use the spool holder. However, I also have other spool holders that you can find in my profile.</p>
With this file you will be able to print Prusa i3 MK2(s) & MK3 Spool Holder - Frame Mount - Top Loader with your 3D printer. Click on the button and save the file on your computer to work, edit or customize your design. You can also find more 3D designs for printers on Prusa i3 MK2(s) & MK3 Spool Holder - Frame Mount - Top Loader.