Prusa i3 MK2 - Y-Frame Assembly Helper - Square tool to keep 10mm rods parallel
thingiverse
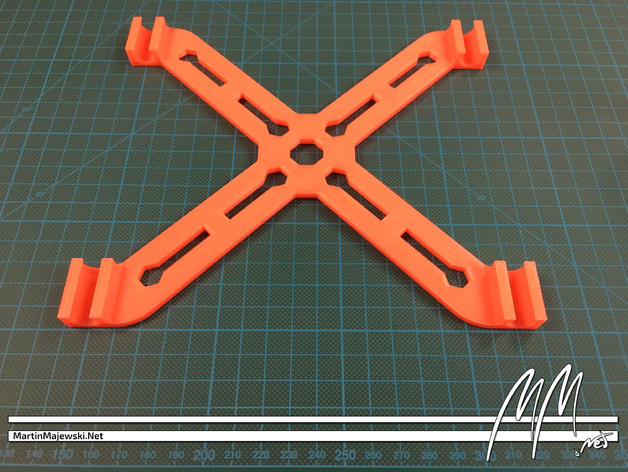
Update: I've added a snap-on version that can be easily removed after assembly of the printer. This means no modification of the first version is needed anymore. The snap-on version can also be secured with zip-ties if a permanent assembly is desired. Assembling the Prusa i3 MK2's y-frame can be a tedious and frustrating experience due to aligning it perfectly square. This "little" helper does not relieve you from this burden, but it can (and hopefully will) ease this task a little bit. Slide the 10 mm rods into the brackets of this square and it will hold them perfectly parallel for you. It also gives you a rough estimation of how deep to screw the front nuts of the metal X-Z-frame mounting onto the rods, leaving enough room to adjust the nuts later on. Sadly, Prusa does not provide something like this within its kits, so you'll have to have a good working 3D printer to print this helper. However, with the MK2's XY-compensation, you can actually print a good square, even on a not-so-perfectly aligned machine. Then you can use it to readjust the frame. Please be aware that I designed this square to stay attached to my printer permanently, so the brackets embrace the rods up to nearly impossible to pop off of the frame! So if you like something easier to remove after assembly, you have three options: Take this design as inspiration and remix it to fit your needs! Cut off the inner top edges of the brackets with a knife, so that the rods have room to pop off. Cut off several top layers within your slicing software (see picture) Please also take a look at my other designs, printer parts, and tools. If you like to support me and my work, please consider following me on: Thingiverse MartinMajewski.net Twitter Instagram YouTube Sending a tip over Thingiverse is much appreciated and will provide me with coffee to stay productive. Please also consider buying your next gear via one of the affiliate links found inside my Thingiverse project pages or directly over the following links. Amazon.de Amazon.co.uk eBay Germany GearBest.com Print Settings: Printer: Original Prusa i3 MK2(S) Rafts: No Supports: No Resolution: 0.2 mm Infill: 20 to 50 % Notes: Use at least three perimeters and enough infill percentage to make it a stiff object. Adjust your infill-perimeter overlap percentage to allow a strong bonding between them (I used 20%). Top and bottom layers do not automatically add to the stiffness, but can make the object warp due to large surface tension. I used three top and bottom layers, but if I would print it a second time, I would completely deactivate them. This way the print would be even better looking with a nice finely woven honeycomb pattern. Post-Printing: Verify that the square is actually square and level, or it will do more harm to your frame than good.
With this file you will be able to print Prusa i3 MK2 - Y-Frame Assembly Helper - Square tool to keep 10mm rods parallel with your 3D printer. Click on the button and save the file on your computer to work, edit or customize your design. You can also find more 3D designs for printers on Prusa i3 MK2 - Y-Frame Assembly Helper - Square tool to keep 10mm rods parallel.