Prusa i3 Mk3 PSU Replacement Brace
thingiverse
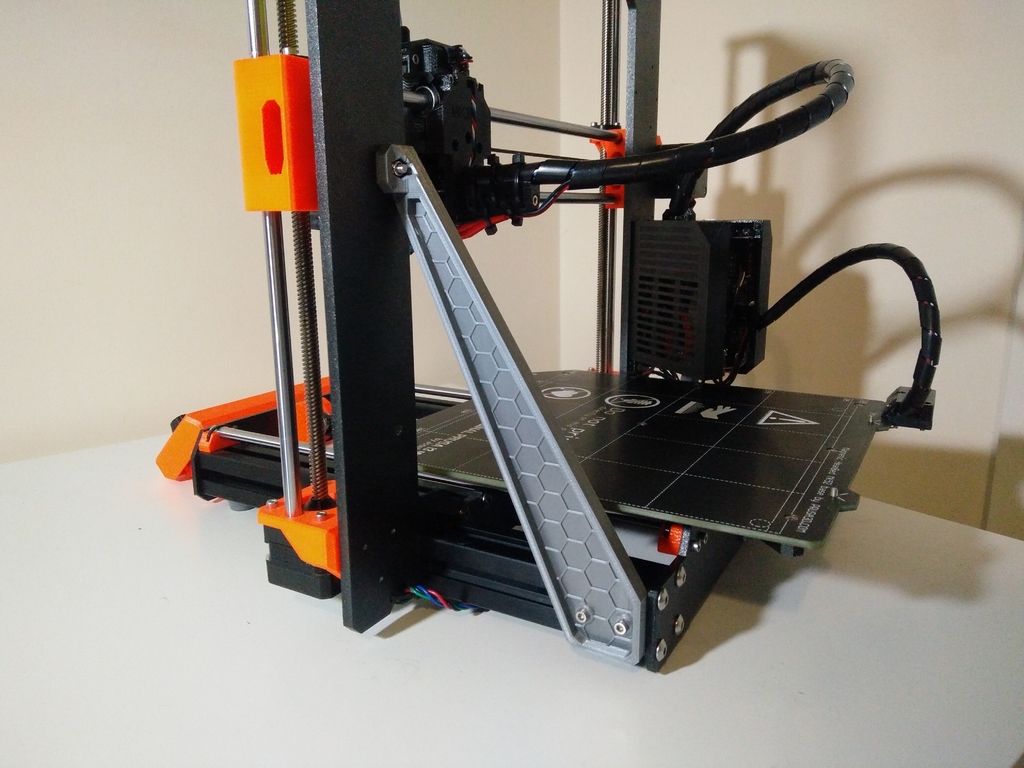
I'm working towards putting my printer in an enclosure. For this it is advised to put the PSU outside the heated chamber and replace it with a replacement brace to keep the frame stiff. There are a few options out there already but I wanted to design my own version that uses less plastic to print, keeps visibility of the print surface as best as possible while keeping the stiffness high. To achieve this I rotated the aluminium extrusion that usually holds the PSU by 90 degrees so that the two T-nuts are now facing outward on the side rather than upward. This allows a replacement brace to be mounted so that the loads are more in line rather than having smaller brackets to connect with the original mounting locations. To do this simply undo the 8 screws holding the aluminium extrusion in place and rotate this part, no need to do any further disassembling. The bracket does require you to purchase a single M4 nut (I used a nyloc nut but this isn't required) and a longer (M4x12 minimum) screw. I know this is annoying but I find that M4 is a nice size for other 3D printed projects and electronics anyway. It also features a fancy octagonal pattern on the outward facing surface to keep it in line with the Prusa design. In the picture you see a concept version printed in PLA. I'll reprint it in PETG now I know it fits and functions correctly as I fear PLA will lose stiffness in a warm enclosure. Hope you find the idea as neat as I do. As always, I appreciate comments and feedback.
With this file you will be able to print Prusa i3 Mk3 PSU Replacement Brace with your 3D printer. Click on the button and save the file on your computer to work, edit or customize your design. You can also find more 3D designs for printers on Prusa i3 Mk3 PSU Replacement Brace.