Prusa i3 MK3S Stepper Motor Cooler Shroud for use with heatsinks
thingiverse
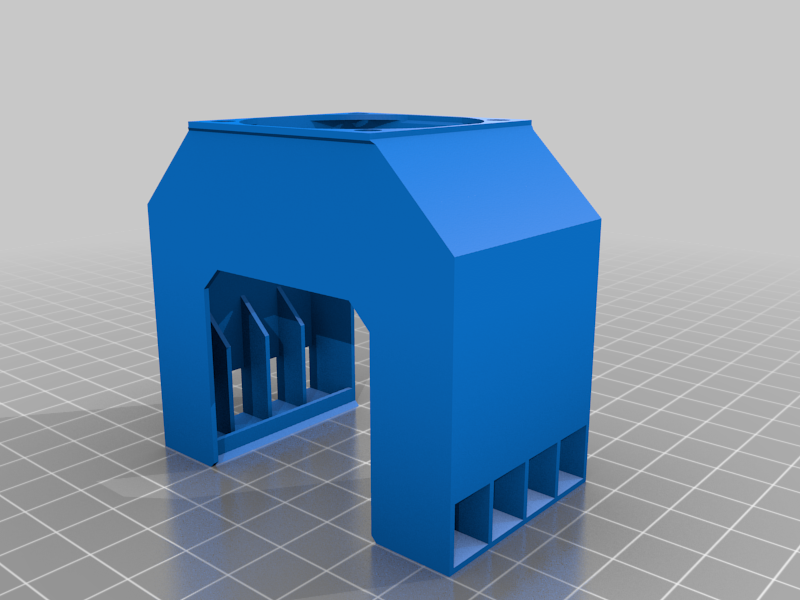
First, massive shoutout to CG-Tech for this original design:\r\nhttps://www.thingiverse.com/thing:2975582\r\n\r\nMy design was inspired by theirs, but I wanted to take it a step further by adding three more aluminum heatsinks to boost cooling even more, so I created my own part from scratch.\r\n\r\nFor 40mm PC fans and three 40x40x11mm aluminum heatsinks (37x40x11mm heatsinks after preparation). I used these: https://www.amazon.de/gp/product/B07C7SJHTH\r\n\r\nThe design can be printed without supports when positioned bottom up on the print bed.\r\n\r\nWhen paired with the Noctua 40x40x20 12V PWM fan at full speed, after one hour of printing in an enclosure at 33°C, the stepper motor temperature rose to about 40°C. The temperature delta never exceeded 7.5K up to that point and will surely never reach 10K.\r\n\r\n(For comparison, with the same Noctua fan at the same speed with the shroud-only cooler https://www.thingiverse.com/thing:2975582, the temperature at the bottom of the stepper motor after one hour of printing was around 43°C, the overall delta increased to about 13K later.)\r\n\r\nSo, with additional heatsinks, it appears you can keep the stepper around 4-5 degrees cooler than without. Of course, depending on your print job, enclosure temperatures, and other factors, results may vary.\r\n\r\nAssembly tips:\r\n-Try to have each heatsink with 13 fin rows/lamellas by default, because one lamella on each heatsink has to go. After preparation, mine were 37x40x11mm with 12 lamellas, which is perfect for this shroud.\r\n-The remaining 12 fin rows / lamellas will fit into four groups of three in each pocket between the spacers/"print supports" on the sides of the shroud. Put the left/right heatsinks in first. Firmly push them down towards the bottom all the way.\r\n-Now is the last time to access the fan mounting holes from inside, so if necessary, add the 40mm fan or any mounting parts now.\r\n-Then, insert the top heatsink, ensuring proper positioning right in the center.\r\n-Use 1mm thick thermal conductor pads on each heatsink to cover the complete inner surface for better thermal coupling to the stepper motor.\r\n-For the left/right heatsinks, apply a folded double-layer strong plastic foil onto the thermal pads as assembling aids. (Thermal pads are too sticky for the shroud to slide onto the stepper otherwise.)\r\n-Gently but firmly push the whole shroud from the top onto the stepper. Note that one opening is narrower - it's the front, of course. Be careful not to hold the entire extruder from below and break your printer! ;)\r\n-When the shroud/heatsink/fan/thermal pad combination is about 90% positioned, pull out the plastic foil assembling aids. Afterwards, the thermal pads will be quite sticky to the stepper, so don't remove the aids too early. Again, be careful not to inflict damage upon your printer or yourself!\r\n-Finally, give the positioning a final detail check. Ensure you also push the shroud down again firmly to mold the thermal pads at the top heatsink onto the stepper motor a little. Be cautious not to inflict damage upon your printer or yourself!\r\n-(Fan connection and operation is your own responsibility...)\r\n\r\nDisclaimer:\r\nI don't give any guarantee nor warranty that this design is fit for the described use, or any use at all. I won't be held responsible for any injuries, damage, or hazards that may occur during use. Use this design at your own risk!\r\n\r\nHave fun and enjoy!
With this file you will be able to print Prusa i3 MK3S Stepper Motor Cooler Shroud for use with heatsinks with your 3D printer. Click on the button and save the file on your computer to work, edit or customize your design. You can also find more 3D designs for printers on Prusa i3 MK3S Stepper Motor Cooler Shroud for use with heatsinks.