Prusa Lack Enclosure
thingiverse
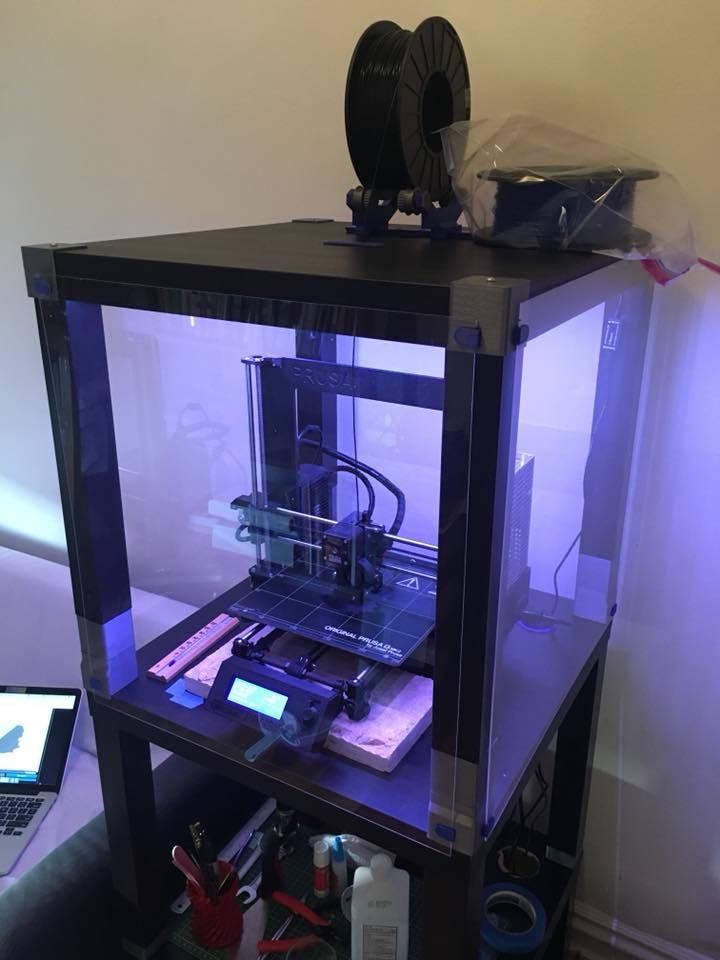
My version of Lack Enclosure It is essentially a remix of zuspiel’s design: https://www.thingiverse.com/thing:2012384 However, I incorporated the use magnets similar to what LKM did: https://www.thingiverse.com/thing:1843235 Enclosure I built uses 3 lack tables, however if you just want the actual printer enclosure you won’t need the ‘Lvl 1’ parts. You will need to print the following: 4 x ‘Lvl1_Leg Connector Bottom’ 4 x ‘Lvl1_Leg Connector Top’ 4 x ‘Lvl2_Leg-Connector-Bottom’ 4 x ‘Lvl2_Leg-Connector-Top’ 4 x ‘Top-Connector’ 16 x ‘Clip_wide’ Additional materials: Acrylic sheets 20” x 21.5” x 1/16” (TAP Plastics in US does relatively cheap cut to size) Magnets: 1/4” dia. x 1/16” and 5/16” x 1/16” (I purchased from K&J Magnetics) Screws Super glue Additional designs used: Spool holder: https://www.thingiverse.com/thing:2486632 Filament guide: https://www.thingiverse.com/thing:2228361 Ikea Lack Grommet: https://www.thingiverse.com/thing:2225786 General Construction Notes / Tips: Magnets are used for both the connectors and for the clips holding the acrylic. Only really need 2 screws for each connector, I found it was sturdy enough. Clips are super glued with magnets to acrylic.
With this file you will be able to print Prusa Lack Enclosure with your 3D printer. Click on the button and save the file on your computer to work, edit or customize your design. You can also find more 3D designs for printers on Prusa Lack Enclosure.