Prusa Mendel Caliper Clamps for Calibration
thingiverse
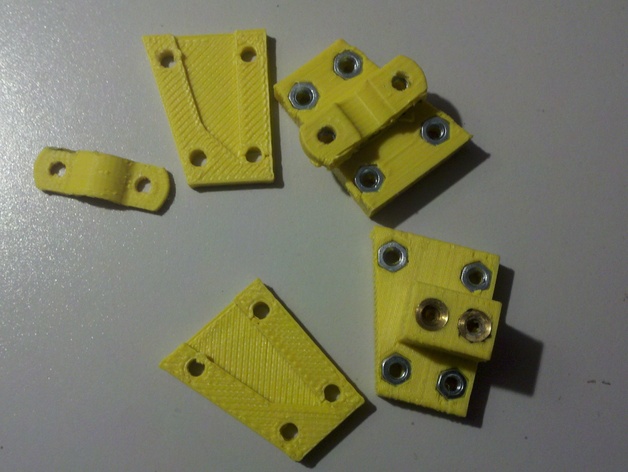
Based on the wonderful work of "thecrazy", I have created my own set of caliper clamps in order to better calibrate my Mendel. Please excuse my messy, over-extruded parts. Photos loosely follow steps listed under instructions. Requires: 10 M3 Nuts to join halves and for bar clamp 2 M3 3.8mm heatset inserts (or 2 more M3 nuts) for filament holder 8 M3 x 16mm Screws to join front and back halves around calipers 4 M3 x 10mm Screws for bar clamp and filament holder 10 M3 washers are probably optional Instructions 1) Print out bar calmp, back half, filament holder, and 2 of the front half parts. Print out the "filamentholderNUT" file if using M3 nuts instead of heatset inserts. 2) Insert nuts and/or heatseat inserts. A soldering iron works great for setting nuts in your parts. 3) Attach front and back halves around your caliper jaws 4) Attach clamp to frame member in front of Y-Axis. 5) Home Y-Axis and Zero Calipers, then jog Y-Axis 100mm. Repeat, average results, and make firmware changes if necessary. 6) Move to the X-Axis by attaching your clamp to your Z-Axis smooth rod, making sure that the carriage will make adequate contact and that nothing interferes. 7) Just like the Y-Axis, Home your X-Axis, extend your calipers until they touch the carriage, zero the calipers, and then jog your X-Axis 100mm. Repeat, adjust, repeat, etc. 8) On to the Z-Axis... Attach your clamps above your extruder as shown and measure just like you did the Y and X. 9) Add your filament holder and remaining "front half" pieces to your front caliper jaws. Align your calipers and X-Axis so that the filament will be fed as straight as possible. 10) Feed filament through the filament holder and into your extruder. Close your calipers as far as possible and clamp the filament in place using the set screws. Extrude 1 or 2mm of filament to remove any slack. 11) Zero your calipers and extrude filament in 10mm increments. As you can see, I was over-extruding by almost 10%... 12) Repeat anal-retentive calibration process until you exceed the precision of your calipers.
With this file you will be able to print Prusa Mendel Caliper Clamps for Calibration with your 3D printer. Click on the button and save the file on your computer to work, edit or customize your design. You can also find more 3D designs for printers on Prusa Mendel Caliper Clamps for Calibration.