Prusa mini anti z wobble
thingiverse
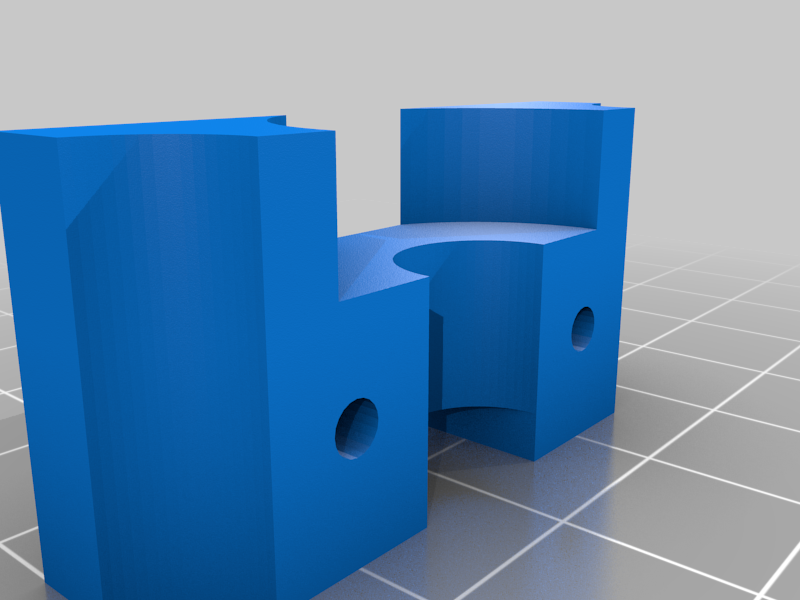
As a result of massive z banding, I designed this simple anti z wobble. *Requires:* - 2 x m3 screws - 10mm to 16mm will work. - 1 x ball bearing 8mm x 22mm x 7mm. You can freely change the model to fit any ball bearing that has an inner diameter of 8mm, which will fit the z rod. It did clean up my z banding a bit, but I'm not sure it's really needed :) Img shows first edition - I wanted the screws hidden, but it is way easier to screw in from the front. *How-to:* 0. Place the x carriage about halfway up. 1. The cable for the z motor needs to be loose. 2. Unscrew the z motor - 2 screws on the sides. 3. Lift up the z motor and rod 1-2cm. 4. Slide in the bearing under the rod, and push it up a few cm. 5. Re-attach the z motor. 6. Lift the bearing and add the two brackets. 7. Place the whole mount at the bottom, before finally tightening the screws.
With this file you will be able to print Prusa mini anti z wobble with your 3D printer. Click on the button and save the file on your computer to work, edit or customize your design. You can also find more 3D designs for printers on Prusa mini anti z wobble.