Prusa Mini Camera Mount Remixed
prusaprinters
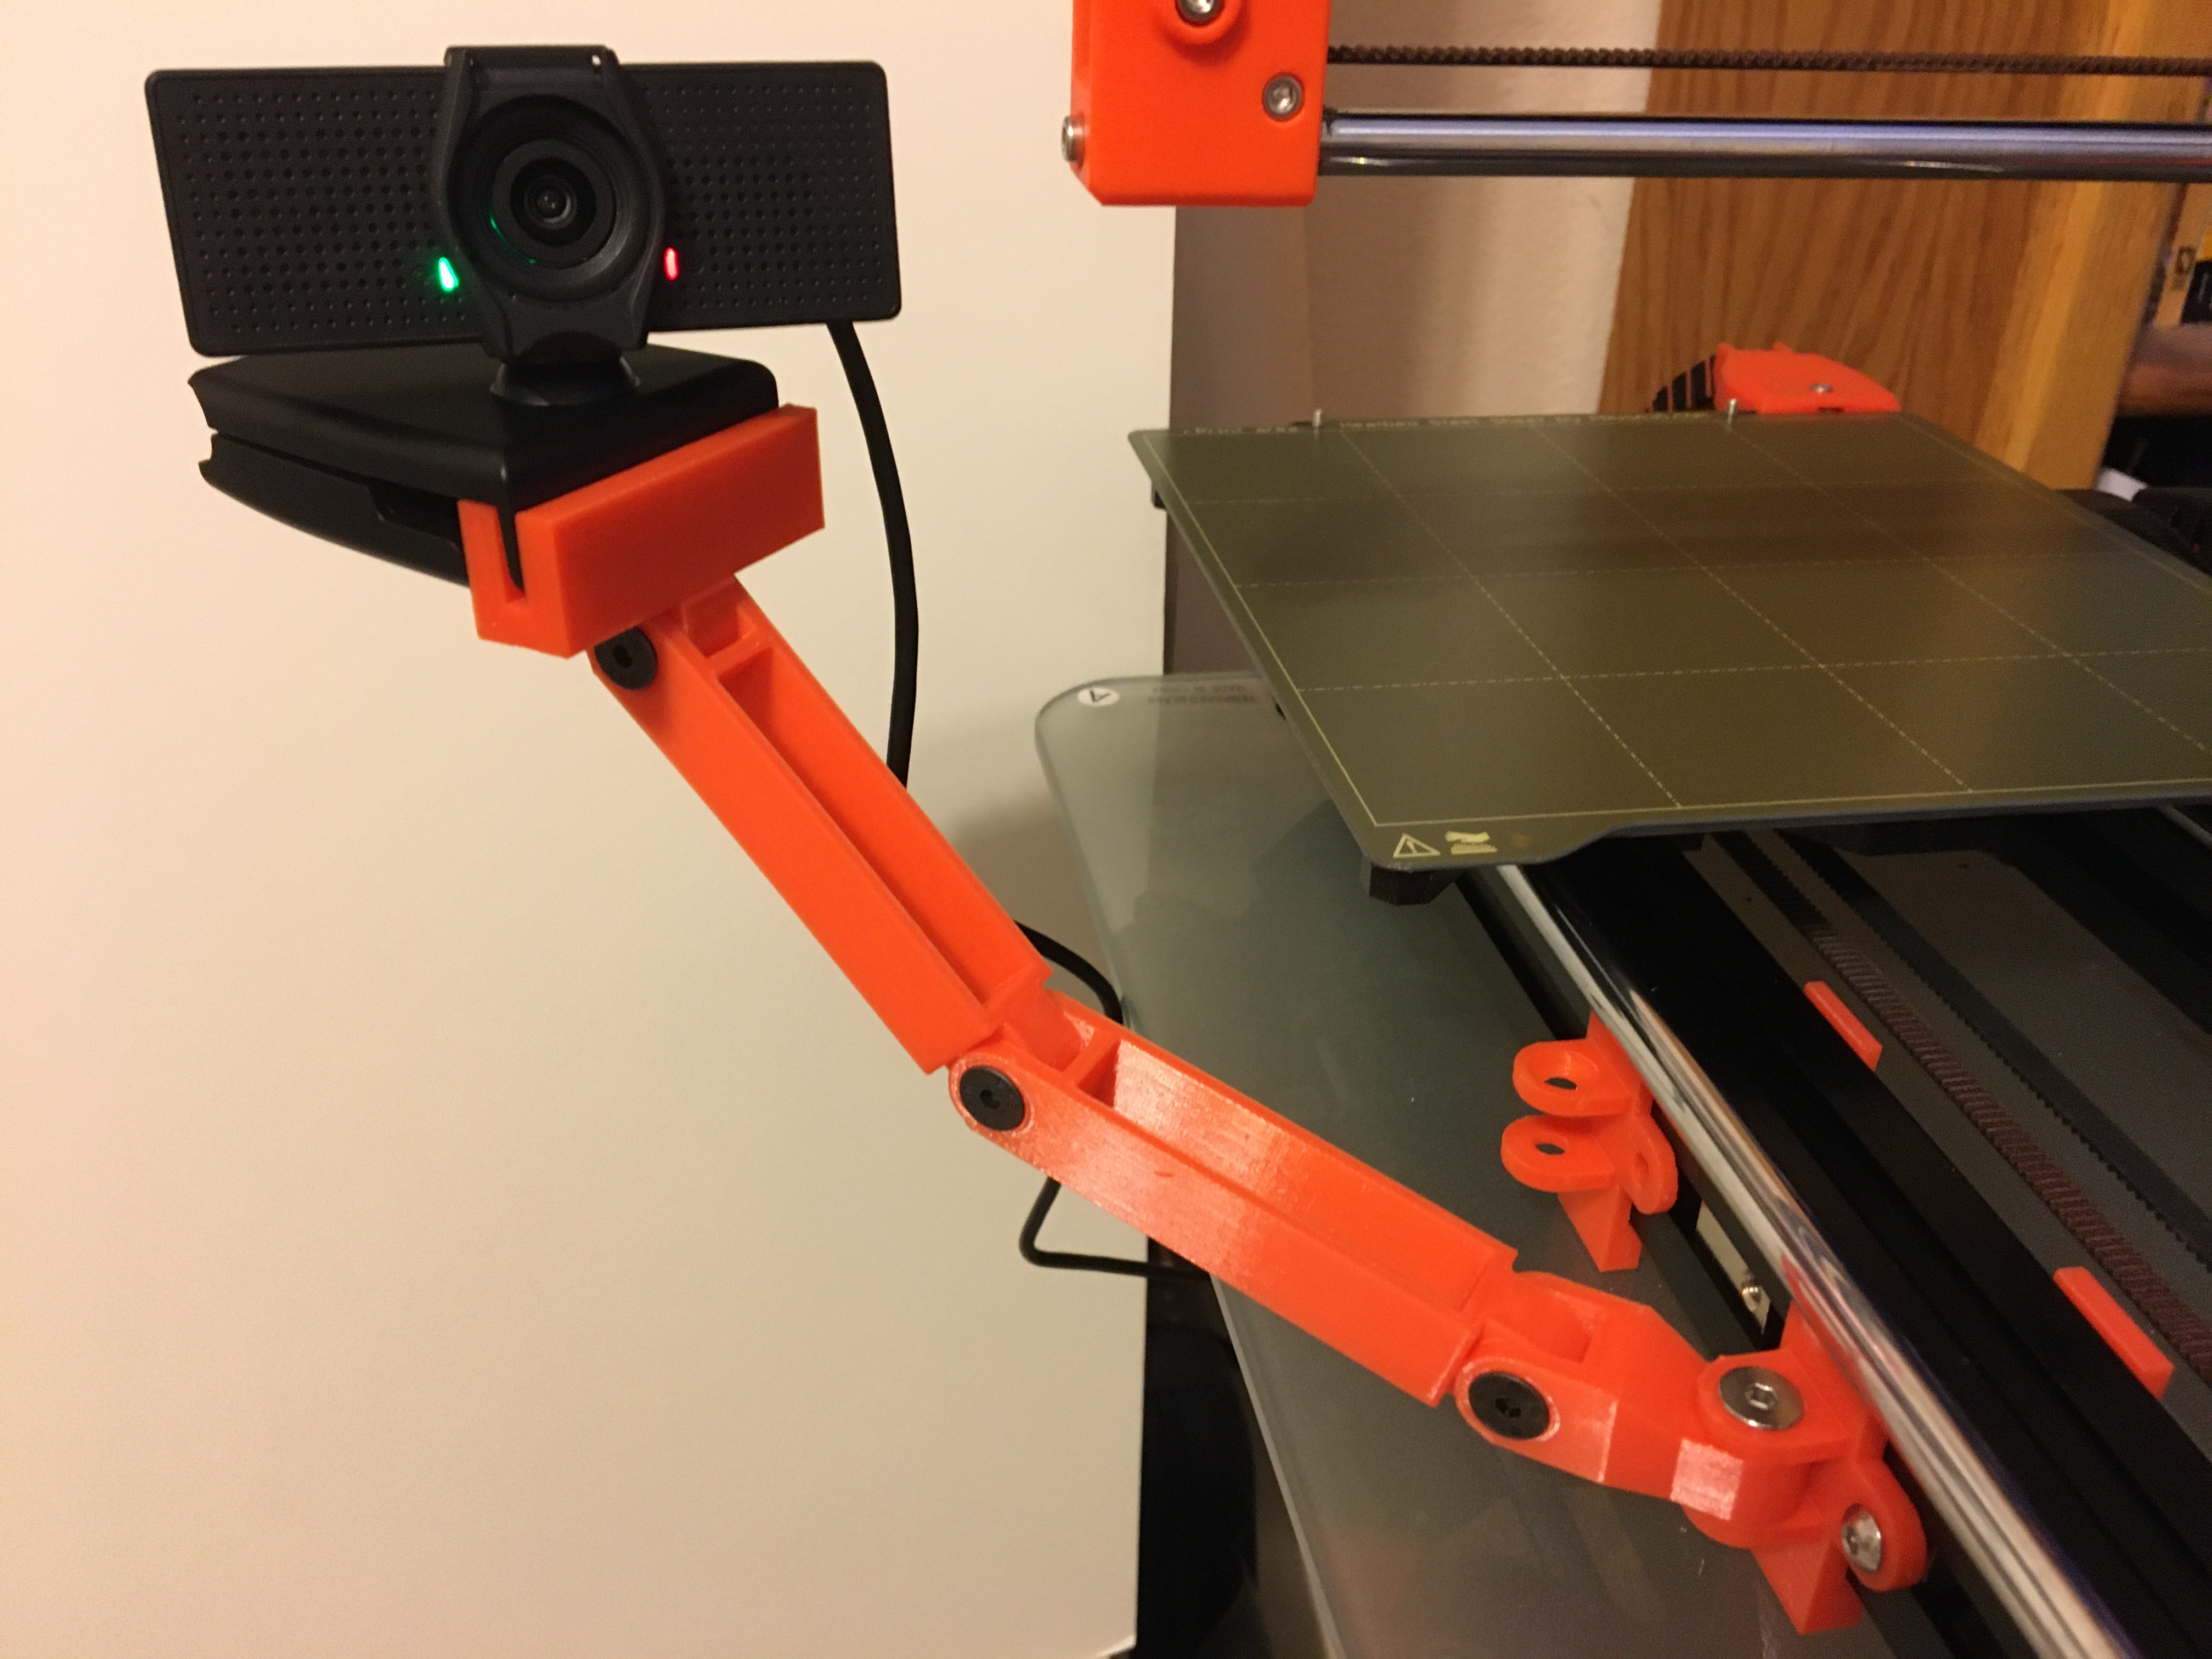
<p>Hardware</p><p> Bolts & Nuts - </p><p> Camera Arm uses Countersink Hex Socket M5x20mm bolts</p><p> T-Slot Nut for 3030 Profile fixture. </p><p> I used a M4 Roll-In Spring-Bearing T-Slot Nut (You can use most any type that fits)</p><p> M4x12mm Button Head Cap Screw (8mm-12mm length will work)</p><p> </p><p>This remix was my first time using and modifying a SCAD file. User <i>greenhalos</i> did a great job writing the SCAD Program and I had a lot of fun learning another 3D modeling system and programming language! </p><p>The main reason I remixed this webcam mount was I noticed even if I printed a 4mm thick (2mm was the original default thickness) Profile fixture I would get a gap between the fixture and the profile slot. (The new default thickness is 3mm). I initially just drilled a hole in the original fixture for a T-Nut bolt but the drilled hole was beneath the web cam arm mount so I had to take off the web cam arm every time I needed to adjust the position of the fixture. I then added a tab mount to the side of the profile fixture so I could use a T-nut in the profile slot to keep the camera arm more stable without any gaps and still be easy to move when necessary. </p><p>I used Roll-In Spring T-nuts because I like how easy they slide in the side of a slot and the spring loaded bearing keeps them in place before and during the mounting of the fixture. The long T-nut can be placed under the profile tab without any issues. I made the front side slot rail on the Profile fixture thinner than the back side rail to accommodate this. I used a 3030 series M4 T-Nut that was in a kit of T-nuts from IEUYO that I purchased on Amazon. You should be able to use most any T-Nut shape designed for a 3030 Profile.</p><p>I also changed the default camera mount size. I found that the original 6mm wide slot would not hold my Nexigo N60 or my Logitech C920S webcams tightly in the default camera mount slot. I made the slot 3.5mm and increased the size of the mount to make it longer. These changes allowed both cameras to use the same mount. </p><p>I updated the project SCAD file Customizer Tab code so it was easier to use by adding sections for the different parameter types. You can download the SCAD program for your system and open up the project SCAD file. You just need to make sure the Window/Hide Customizer command is not checked. You should see the customizer window on your screen and it will allow you to easily make changes to the parameters which will automatically update the displayed model. You can then Export a new 3MF or STL file to 3D print.</p>
With this file you will be able to print Prusa Mini Camera Mount Remixed with your 3D printer. Click on the button and save the file on your computer to work, edit or customize your design. You can also find more 3D designs for printers on Prusa Mini Camera Mount Remixed.