Prusa Mini LED Light Bar
prusaprinters
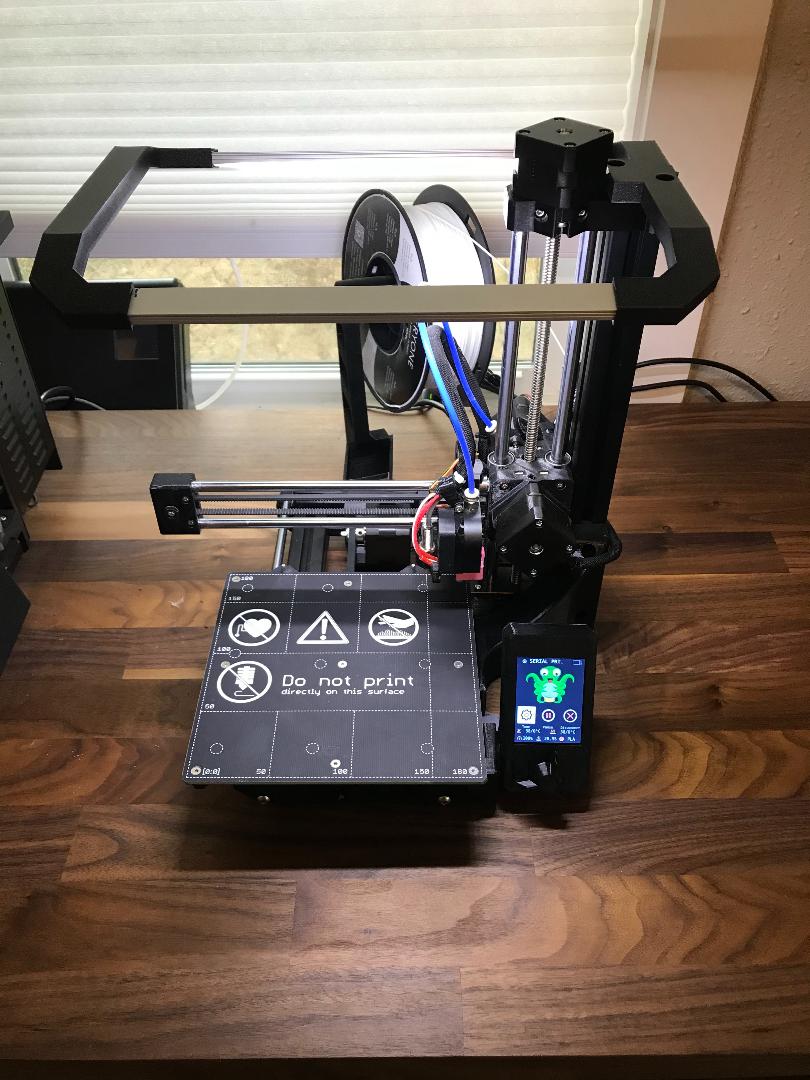
<p>This is an LED Light Bar for the Prusa Mini. This light bar is powered by a 12v power supply. It mounts to the top of the Z axis using (2) 5Mx20 button head screws. The stock screws are 5Mx15. The power switch is located above the Z axis 3030 extrusion and the wire is fed down the back side of the extrusion and is hidden like the Z axis motor wire.</p> <p>Print the files on their backs with bracket openings up. Use supports under the pegs on the Right Bracket. No other supports are needed. The uploaded gcode file has the supports in place and is setup for an MK3s using PLA. I have also uploaded the files to print on the Mini. You have to print each bracket individually.</p> <p>Final assembled size is 13" x 9". End of light bar is even with end of X axis.</p> <h3>Print instructions</h3><p><b>Assembly Instructions</b></p> <p><a href="https://www.etsy.com/listing/846832206/prusa-mini-led-light-bar">Buy the Parts Kit Here</a></p> <p><b>Necessary tools:</b><br/> Soldering Iron<br/> Solder<br/> Wire strippers<br/> Needle nose pliers<br/> Small flat head screwdriver</p> <p>Using the terrible wiring diagram picture you should be able to see your way through this install. Sorry I am no artist.</p> <p><b>Step 1.</b></p> <p>First step is to pull the 36" length of wire through the small square hole in the bottom of the right side bracket. Feed it through to the longer light leg. You should see the wire through the switch hole. Once you get the wire out of the long leg hole grab the wire through the switch hole and pull it up. You will then cut the red wire and peel it back so you can solder it to the switch. Place the small heat-shrink tubing over the wire before soldering. Once you have the wire soldered to the switch terminals shrink the heat-shrink down on the terminals. Push the wire back in and install the switch.</p> <p><b>Step 2.</b></p> <p>Now move on to stripping the end of the wire at the end of the long leg. This is where you will make your first connection to the LEDs. Be mindful that the red wire is connected to the positive pad on the LEDs. The negative copper pads have a small "-" next to them. Place your heat-shrink over the LEDs and slide it back towards the middle. For this LED strip you will need 2 pieces of heat-shrink. Solder your wires onto the pads. Be careful as they are delicate. Once you have the wires soldered move the heat-shrink over your soldering job and shrink it down.</p> <p><b>Step 3.</b></p> <p>Step 3 is similar to Step 2. Just on the opposite end. Take the 15" length of wire and strip the ends. Solder them onto the copper terminals on the opposite end of your first solder job. Now move the 2nd piece of heat-shrink that you put over the LEDs in step 2 and shrink it down over your terminals.</p> <p><b>Step 4.</b></p> <p>Feed the 15" piece of wire through the left bracket. The arms of the bracket bend upwards while doing this task. When installed they will bend down towards the bed. Once you have the wire all the way through you can strip back the ends and solder them onto the 2nd set of LEDs. You are provided extra wire so you can trim it off before soldering or just push it back into the bracket. Slide the last piece of heat-shrink over the LEDs and shrink it down over your last solder connection.</p> <p><b>Step 5.</b></p> <p>Lay out your aluminum U channel. Peel off the backing on the LEDs. You will place the LEDs centered in the channel. They will not go all the way to the end of the channel as some of it is inside of the brackets. Center length wise and you will be ok. Be careful as they are fragile when you are bending and moving them. Do this for both channels and insert each one into the arms.</p> <p>Depending on printer tolerances you can use hot glue in the ends of the brackets to hold the aluminum U channel more securely. I did not find it necessary but it is an option.</p> <p><b>Step 6.</b></p> <p>Strip the ends off the long piece of wire connected to the switch and hook them to the powerjack.</p> <p><b>Step 7.</b></p> <p>Remove the 2 stock screws in the top of your printer Z axis. Place the light bar on top and push down. Replace the stock screws with (2) M5x20 button head screws.</p> <p><b>Step 8.</b></p> <p>Trim the U shaped plastic LED cover to fit over your lights. They are sent at the length of the aluminum because of the slight variations of how far your aluminum will go into the bracket. I used the side cutters that I use with my printer.</p> <p><b>Step 9.</b></p> <p>Plug in and enjoy!</p>
With this file you will be able to print Prusa Mini LED Light Bar with your 3D printer. Click on the button and save the file on your computer to work, edit or customize your design. You can also find more 3D designs for printers on Prusa Mini LED Light Bar.