Prusa Mini+ Power Switch Housing
prusaprinters
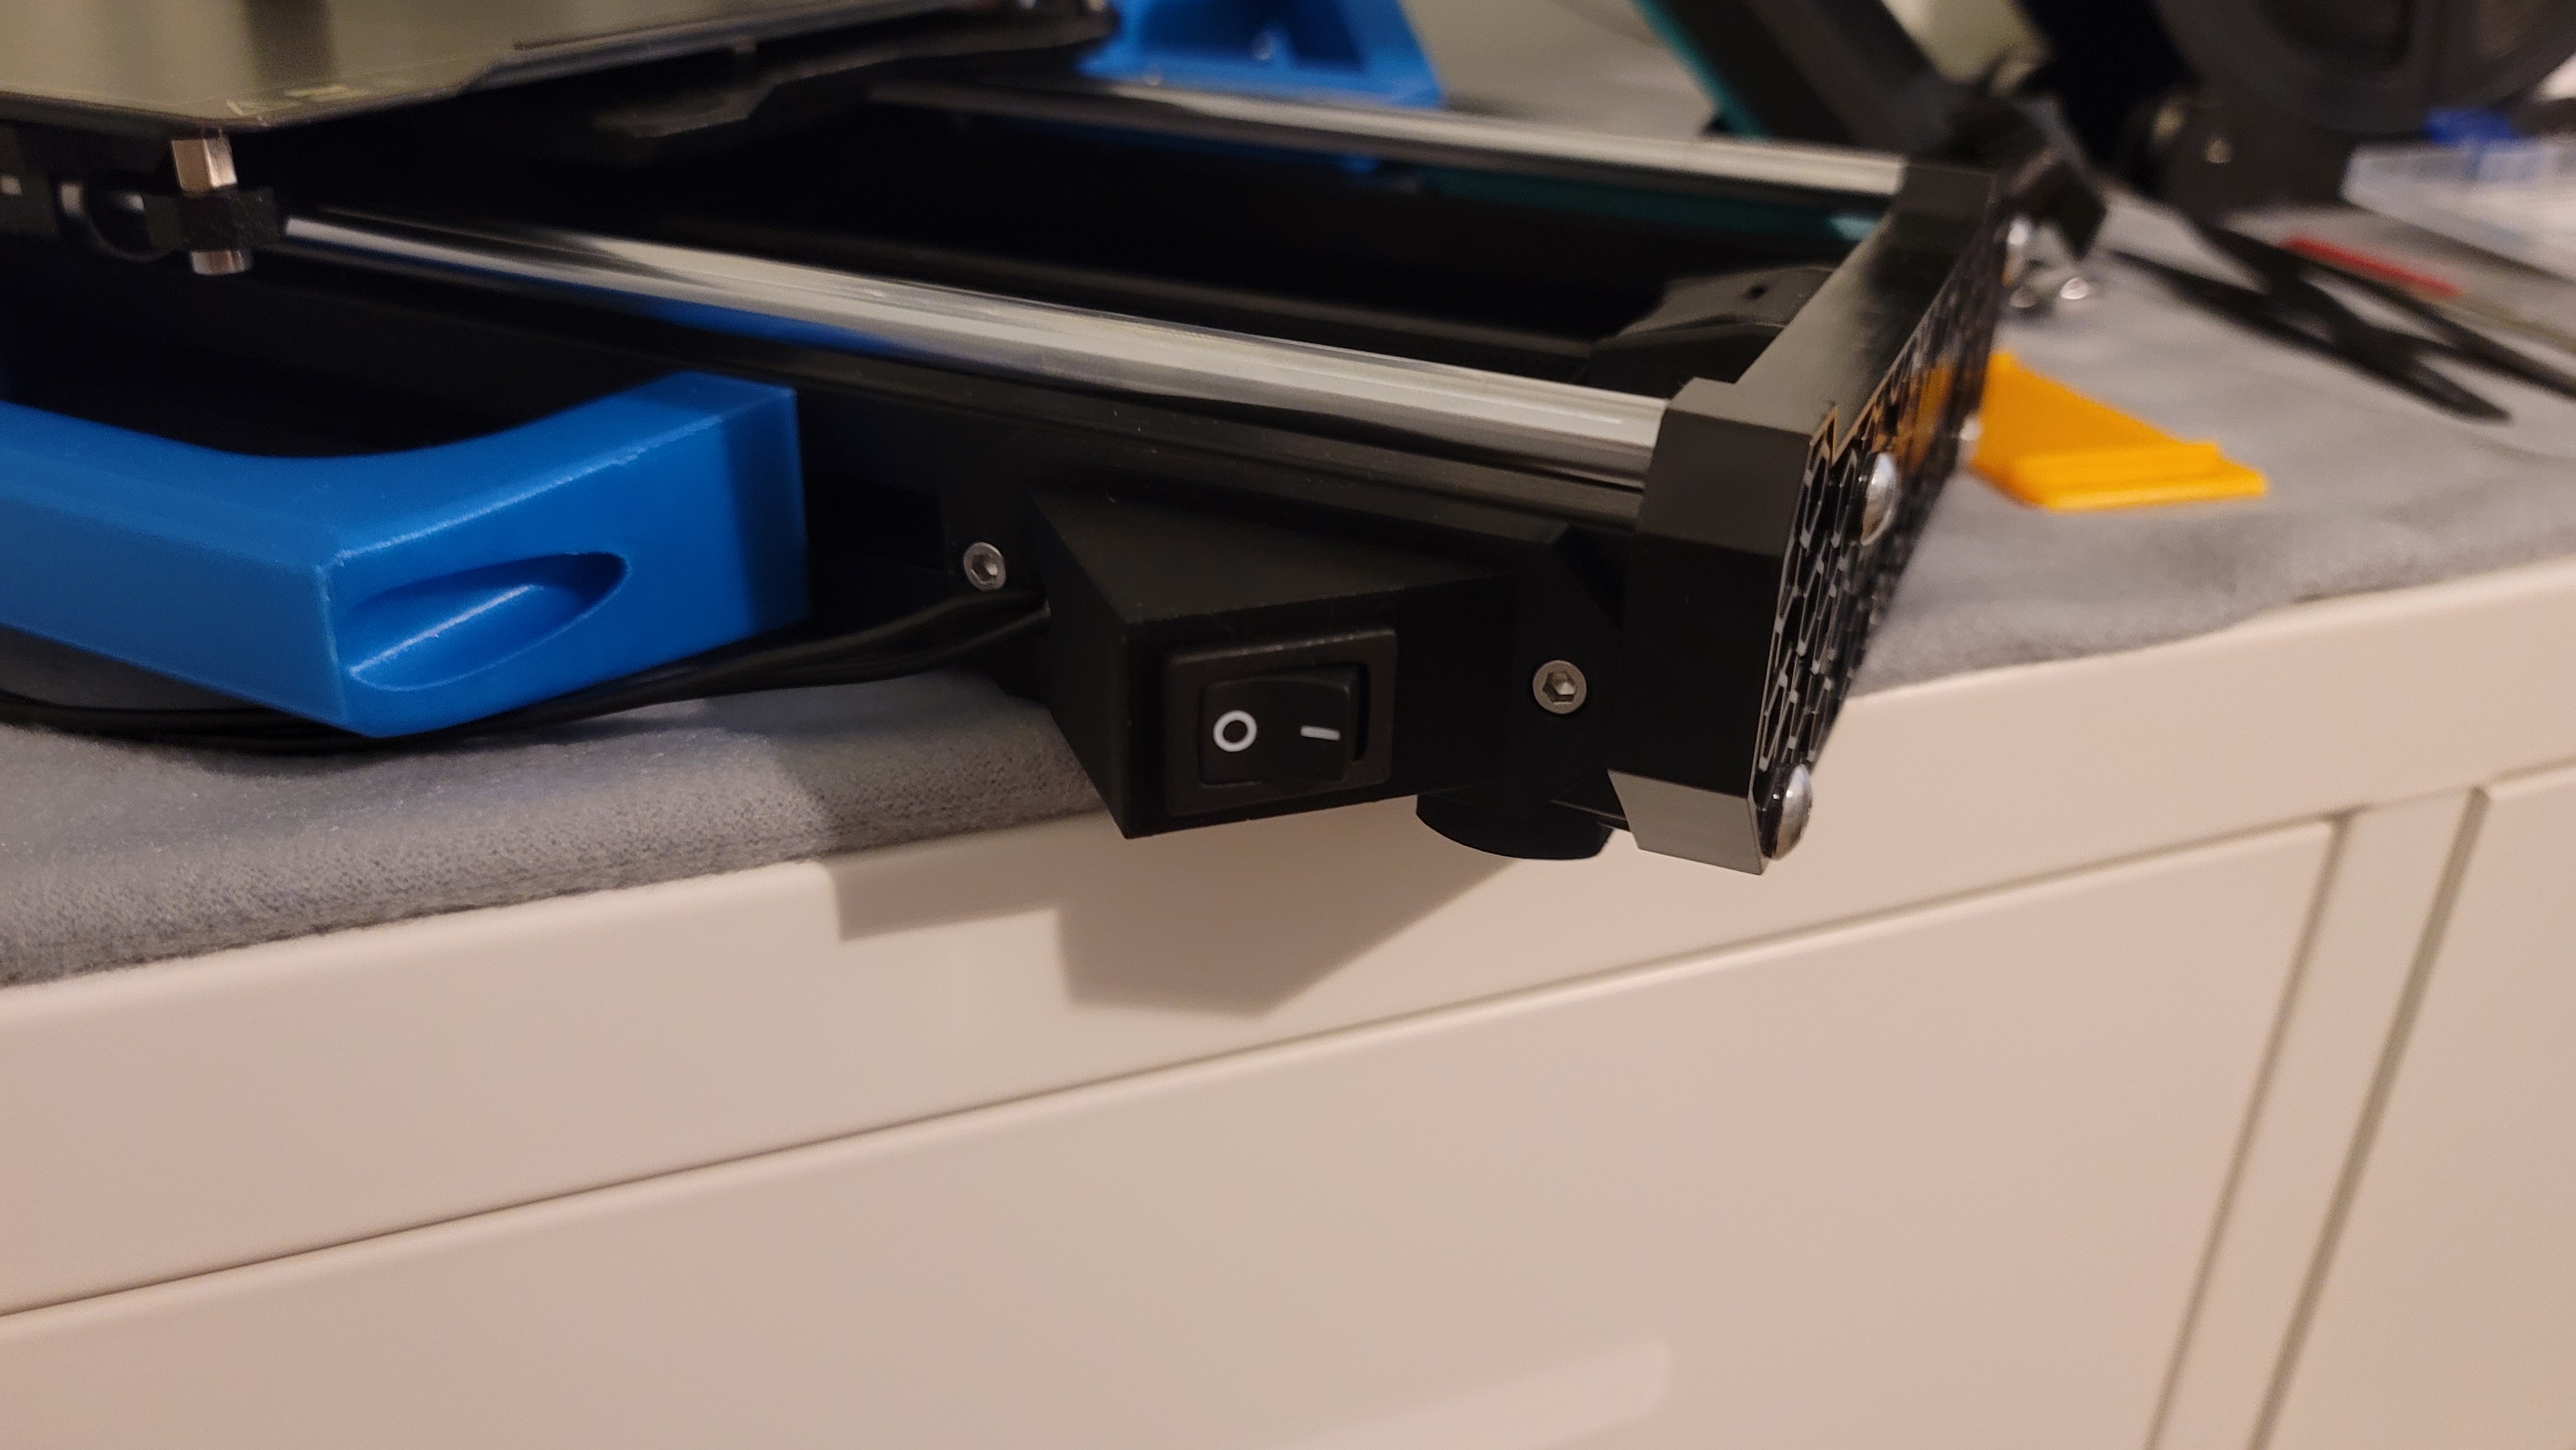
<p>I didn't like having to reach around the printer to turn it on/off so I designed a power switch housing that can be attached to any of the extruded aluminum with M3 T-Nuts. </p><p>You will need:</p><ul><li>2x M3 12mm bolts</li><li>2x M3 Nuts</li><li>The wire will depend on your application. Get one that can manage at least 150watts (I believe that would equate to 6.25amps at 24v if I'm not mistaken) I had 18gauge braided copper wire that does the job. I Placed the housing on the left side of the printer so I cut two 24in runs.</li><li>4x 4.8mm female spade connectors (see pic). You don't need a crimper, but it helps, a lot.</li><li>2ft 1/8 in braided cord protector.</li></ul><p>Use supports in the middle of the housing so the hole is nice and square for the switch.</p>
With this file you will be able to print Prusa Mini+ Power Switch Housing with your 3D printer. Click on the button and save the file on your computer to work, edit or customize your design. You can also find more 3D designs for printers on Prusa Mini+ Power Switch Housing.