Prusa Mini rear extruder part with filament sensor
prusaprinters
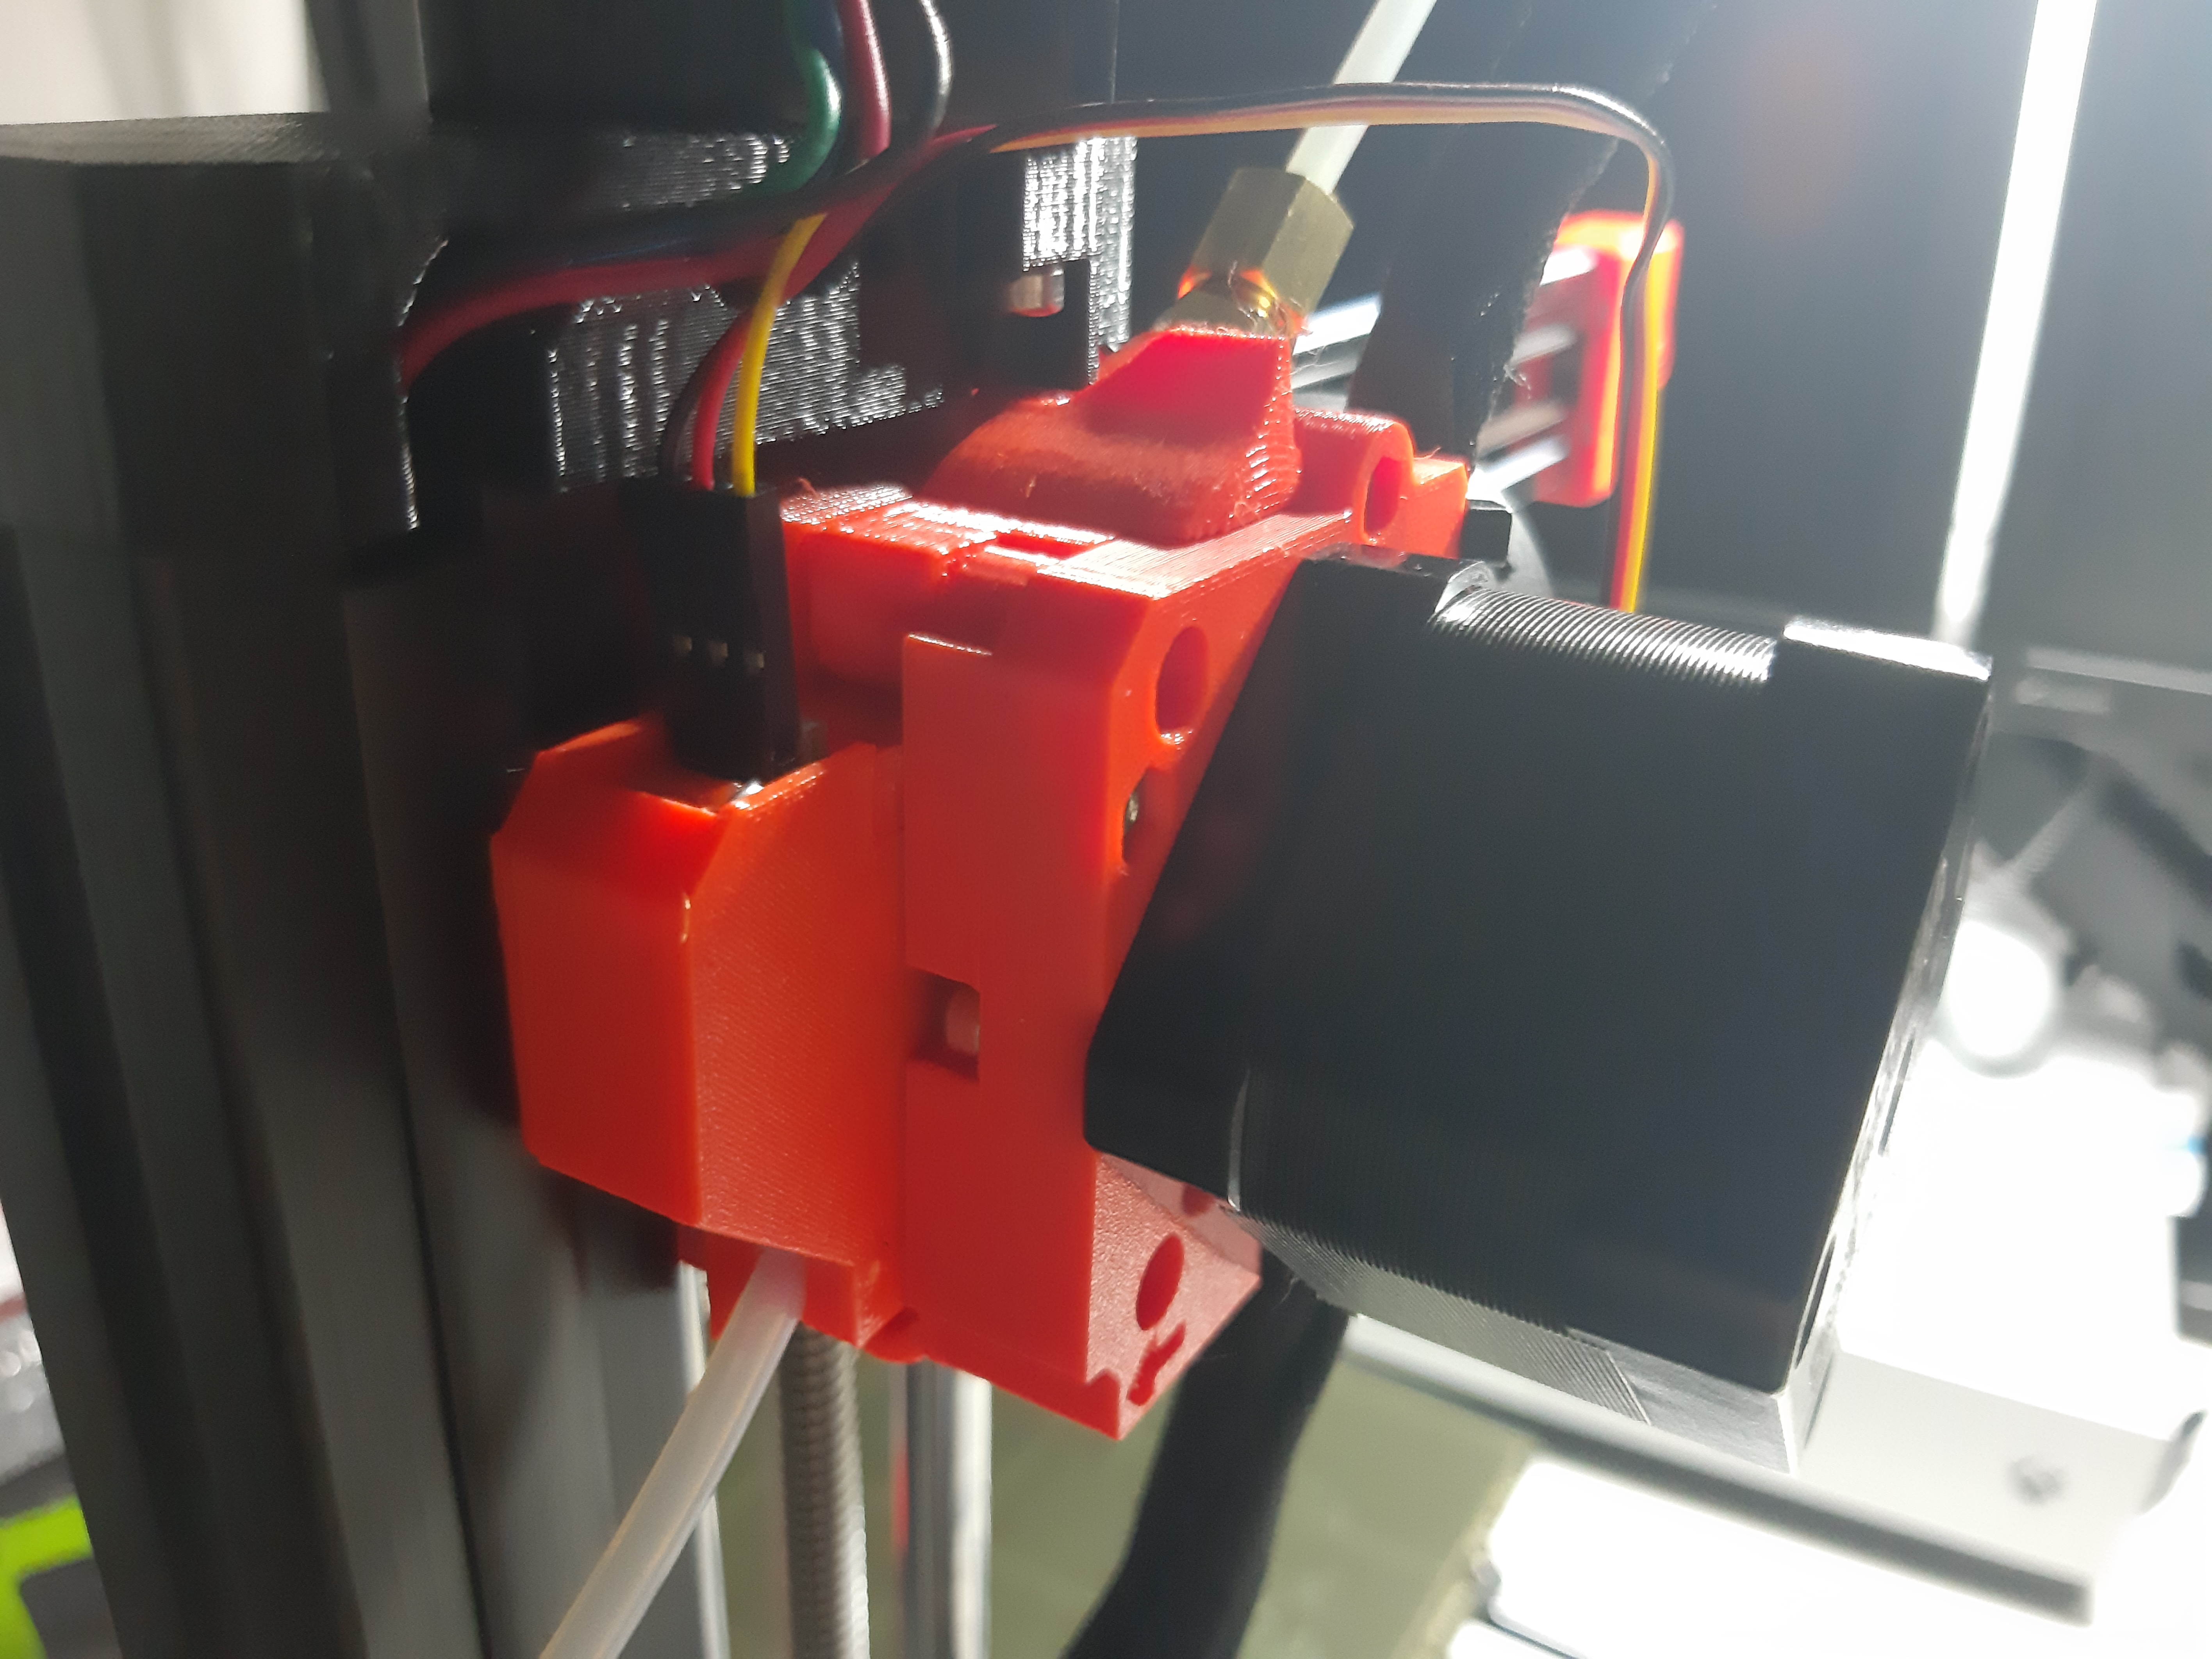
<p>This remix of the Prusa mini extruder rear part with integrated filament sensor. </p><p>You will need parts for this to work: </p><ul><li>parts which are in original filament sensor for Prusa:<br><br>1x IR filament sensor<br>1x cable for filament sensor<br>1x steel ball 7 mm<br>2x magnet 10x6x2 mm<br>1x M2x8 mm<br> </li><li> parts which you need to source elsewhere: <br><br>2x M3x12 screw with roundhead</li></ul><p><strong>Assembly manual</strong>: </p><ul><li>remove support material from the print</li><li>insert steel ball<br><img class="image_resized" style="width:50%;" src="https://media.prusaprinters.org/media/prints/154526/rich_content/a631f2c7-ce8a-4126-ad2b-2008d8169eed/20220326_153011.jpg#%7B%22uuid%22%3A%22216bdb86-7414-457f-9356-cb6cb8c32c11%22%2C%22w%22%3A5664%2C%22h%22%3A4248%7D"> </li><li>screw in lever with hole for magnet with M3x12 roundhead screw<br><img class="image_resized" style="width:50%;" src="https://media.prusaprinters.org/media/prints/154526/rich_content/f0848b17-9026-409b-94f6-b3e3b0638b3b/20220327_235552.jpg#%7B%22uuid%22%3A%221eeab785-ece2-44cd-8a54-fa8ccd5c40d2%22%2C%22w%22%3A5664%2C%22h%22%3A4248%7D"></li><li>screw in IR sensor with M2x8 screw<br><img class="image_resized" style="width:50%;" src="https://media.prusaprinters.org/media/prints/154526/rich_content/e27e0a9b-b2d3-4547-8c1e-21aea23cc30f/20220327_235816.jpg#%7B%22uuid%22%3A%22738b1e28-dfcf-4fbd-9941-dff3d956dbf5%22%2C%22w%22%3A5664%2C%22h%22%3A4248%7D"></li><li>screw in second lever with M3x12 roundhead screw<br><img class="image_resized" style="width:50%;" src="https://media.prusaprinters.org/media/prints/154526/rich_content/45317d0d-d9cf-445b-a94f-383c1ede774b/20220328_000001.jpg#%7B%22uuid%22%3A%22549ba773-bc6a-402d-9411-925419c6c928%22%2C%22w%22%3A5664%2C%22h%22%3A4248%7D"></li><li>put magnets in so they repel each other<br><img class="image_resized" style="width:50%;" src="https://media.prusaprinters.org/media/prints/154526/rich_content/f8afaec9-ec3a-4757-a83a-6b3605d4c256/20220328_000115.jpg#%7B%22uuid%22%3A%22517dbeca-407b-4c7d-871b-1d71905683de%22%2C%22w%22%3A5664%2C%22h%22%3A4248%7D"></li><li><strong>test </strong>if machanism work with piece of the filament</li><li>put cover on<br><img class="image_resized" style="width:50%;" src="https://media.prusaprinters.org/media/prints/154526/rich_content/010d14e6-23d2-45bd-ba01-6bb9e984d007/20220328_000202.jpg#%7B%22uuid%22%3A%22f07a9e6a-d367-4d3d-915c-43e428a1d0b4%22%2C%22w%22%3A5664%2C%22h%22%3A4248%7D"><br><br><strong>Hotend disassembly</strong>:</li><li>unload filament</li><li>unscrew extruder by this order → hold it so it will not fall down<br><img class="image_resized" style="width:50%;" src="https://media.prusaprinters.org/media/prints/154526/rich_content/0de37e4a-cd26-4340-8920-96525bad1bed/20220328_002512.jpg#%7B%22uuid%22%3A%222ad83403-3efb-4fe4-b675-ced990cafd7b%22%2C%22w%22%3A5664%2C%22h%22%3A4248%7D"></li><li>loosen screw which holds PTFE tube (1)</li><li>remove screw which holds extruder together (2-4)</li><li>remove M3 locknut (5)</li><li>push out bearing (6)</li><li>remove tensioning screw (7)</li><li>remove brass fitting (8) with universal wrench from Prusa Mini kit (or with other tool)<br><img class="image_resized" style="width:50%;" src="https://media.prusaprinters.org/media/prints/154526/rich_content/e1b165fd-f498-4eb0-8846-3d9c0213463f/20220328_002646.jpg#%7B%22uuid%22%3A%224d2eb9ed-f967-4250-8770-c44cdd69ff0a%22%2C%22w%22%3A5664%2C%22h%22%3A4248%7D"><br><br><strong>Hotend assembly</strong>:</li><li>replace rear extruder part with new one</li><li>go backwards in disassembly steps<br><i><strong>TIP</strong></i>: I recommend use 10 mm socket wrench for brass fitting, as it is much easier to allign it with the hole and screw it in. <strong>Be carefull not to bend short PTFE tube!</strong><br><img class="image_resized" style="width:50%;" src="https://media.prusaprinters.org/media/prints/154526/rich_content/3cfcb282-0de7-4c74-9c9c-6359ab165980/20220328_013654.jpg#%7B%22uuid%22%3A%221e808e59-5912-48f9-975c-2f53d6f11cfe%22%2C%22w%22%3A5664%2C%22h%22%3A4248%7D"><br><br>Last part is connect cable from filament sensor to Buddy board. Follow official <a href="https://help.prusa3d.com/en/guide/5-lcd-assembly-electronics_202703#203299">manual</a> for this. <br><i>Note</i>: I do not know if <a href="https://www.prusa3d.com/cs/produkt/ir-filament-senzor-buddy-kabel-mini/">official cable</a> will be long enough, as I used custom made one.<br><i>Note #2: </i>User <a href="https://www.prusaprinters.org/cs/social/210917-amperage/about">Amperage</a> confirmed in the comments that original cable is long enough.<br><br>I wired my non-original cable this way:<br><img class="image_resized" style="width:50%;" src="https://media.prusaprinters.org/media/prints/154526/rich_content/56d102d2-fd2f-415b-b0bb-4e6877820eeb/20220329_225928.jpg#%7B%22uuid%22%3A%226d55a3cf-ba38-4687-bb4c-48e18c87105a%22%2C%22w%22%3A5664%2C%22h%22%3A4248%7D"> <br><img class="image_resized" style="width:50%;" src="https://media.prusaprinters.org/media/prints/154526/rich_content/d6e1740e-d386-462b-b3e2-e372b4158821/20220329_225943.jpg#%7B%22uuid%22%3A%2239a1b69e-2ab9-451e-b480-dc92cb312903%22%2C%22w%22%3A5664%2C%22h%22%3A4248%7D"></li><li><strong>push </strong>PTFE tubing (for filament) in to the rear extruder part. It should hold in on its own by friction. <br> </li></ul><p><strong>Warning! </strong><br>There is issue with extruder colliding with sleeve for X-axis motor. There is not enough space between my version of rear extruder part and Z-axis profile, but I can do much about it. Solution which I´m using is pull-out sleeve from the profile and leave there just cables as you can see at pictures below. <br> <br><img class="image_resized" style="width:50%;" src="https://media.prusaprinters.org/media/prints/154526/rich_content/740444bd-86cc-48e6-a29e-cf5007d4d6e1/20220329_224445.jpg#%7B%22uuid%22%3A%229b360159-d969-413c-b282-a45f118c61f8%22%2C%22w%22%3A5664%2C%22h%22%3A4248%7D"><br> <br><img class="image_resized" style="width:50%;" src="https://media.prusaprinters.org/media/prints/154526/rich_content/13890552-9de1-4388-aad4-4c9f07d4a932/20220329_224521.jpg#%7B%22uuid%22%3A%229618484d-2da0-4d2f-a33c-faf5847238a9%22%2C%22w%22%3A5664%2C%22h%22%3A4248%7D"><br> <br><img class="image_resized" style="width:75%;"><img class="image_resized" style="width:50%;" src="https://media.prusaprinters.org/media/prints/154526/rich_content/fc70cf0f-6162-4b8c-af19-81ce959dcbb2/20220329_224543.jpg#%7B%22uuid%22%3A%22cebbf3e4-767c-45a2-a972-82150b795cb5%22%2C%22w%22%3A5664%2C%22h%22%3A4248%7D"><br><br><br>I hope this will help you make this work. If you will have any question, do not hesitate to ask. </p>
With this file you will be able to print Prusa Mini rear extruder part with filament sensor with your 3D printer. Click on the button and save the file on your computer to work, edit or customize your design. You can also find more 3D designs for printers on Prusa Mini rear extruder part with filament sensor.