Prusa Mini Thumb Tabs
prusaprinters
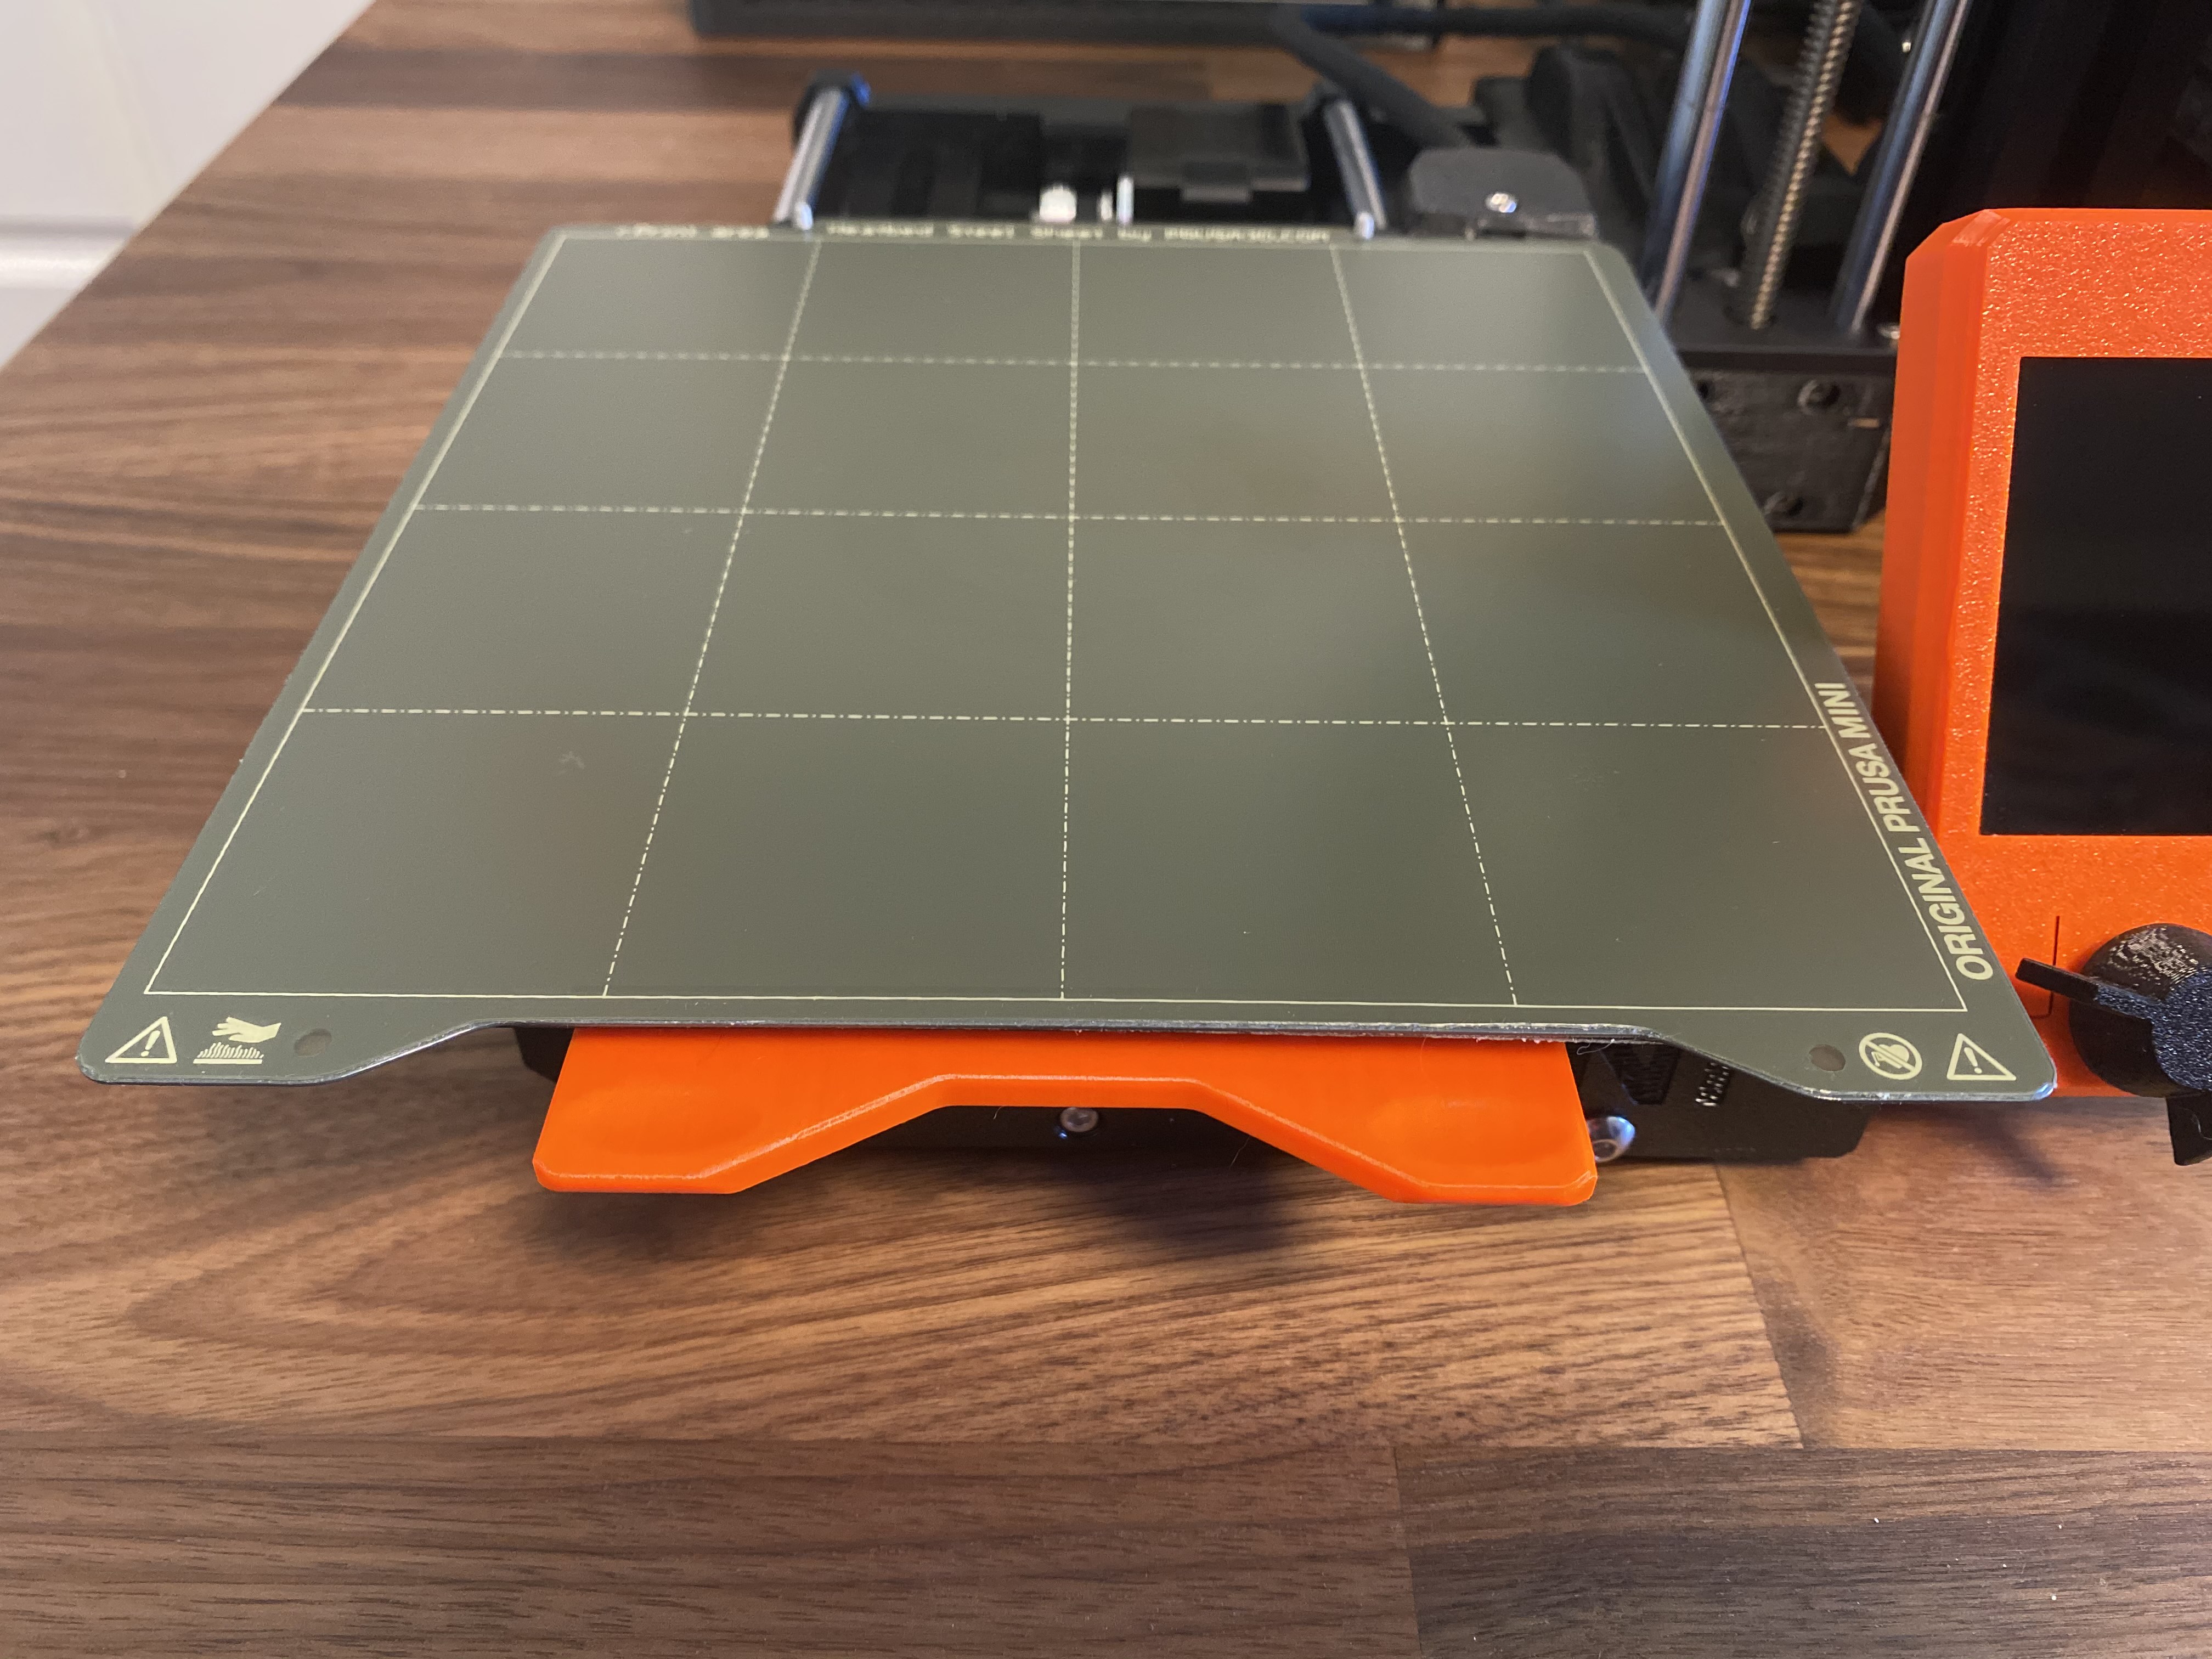
<p>These thumb tabs mount underneath the heated bed. Allows easier removal of the steel sheet in the same way that the MK3 works.</p> <h3>Print instructions</h3><p>Must be printed from PETG due to high temps. Part is best printed vertically on one side, no supports are needed in this orientation.</p> <p>Assembly:</p> <ol> <li><p>Press two M3 nuts into the hex cavities on the printed part. It is easiest to do this by pulling them in with a screw, but make sure you support the print with something so you don't break it. The Mini's USB stick is actually the perfect size.</p> </li> <li><p>Remove your steel sheet from the printer. Press the printed part onto the Y-carriage, making sure to align the notch with the center screw on the heated bed. It fits rather snug so this may take some force. Make sure it is on far enough that you can get the screws through without hitting the carriage.</p> </li> <li><p>Thread in two M3 x 12mm screws into the holes, clamping the printed part onto the Y-carriage. This will be much easier with a ball-end hex driver since the frame is in the way of one of the screws. Make sure that you don't overtighten the screws, they could hit the bottom of the heated bed if you do.</p> </li> </ol>
With this file you will be able to print Prusa Mini Thumb Tabs with your 3D printer. Click on the button and save the file on your computer to work, edit or customize your design. You can also find more 3D designs for printers on Prusa Mini Thumb Tabs.