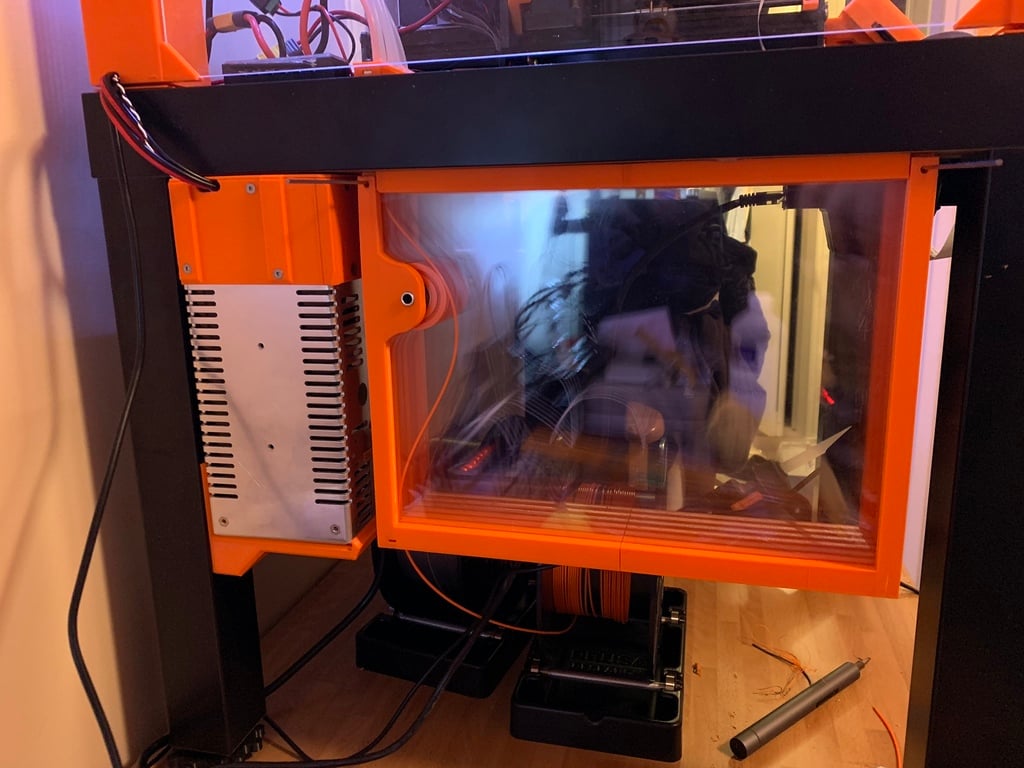
Prusa MMU 2.0 filament control
thingiverse
<h3>Prusa MMU 2.0 filament control for lack enclosure</h3> I needed to control the loading/unloading of the filaments for my Prusa Multi-Material 2.0. And it should be compact and bellow my Ikea lack enclosure laying on my desk to be fed by a airtight box. I have been inspired by https://www.thingiverse.com/thing:3184377 Filament Control in action https://youtu.be/2knFnbs0e2s <h3>Material</h3> <ul> <li>6 x plexi plate 210x297x3 mm</li> <li>4 x screws M3 16 mm (for the frame assembly</li> <li>4 x screws M3 6 mm (for PTFE tube holder assembly)</li> <li>6 x screws M3 12 mm (for PTFE tube holder assembly)</li> <li>14 x scare bolts M3</li> <li>6 x screw M4 20 mm (for assembly with the enclosure)</li> <li>glue gun (for assembly with the enclosure)</li> <li>6 x bearings 608 (I used those from the MMU 2.0)</li> <li>1 x aluminium tube 8x70 mm (I used one from the MMU 2.0 that I cut)</li> <li>2 x sleel rods 2 mm (I used steel rod for RC plane)</li> <li>drills</li> </ul> <h3>Box Assembly</h3> <ol> <li>Start to sand the holes for screws, bolts and PTFE tubes with adequate files (flat, round needle) and make sure that everything fits.</li> <li>Joins the 2 bottom part with 2 M3 16 mm screws and bolts. Do the same thing with the top parts</li> <li>Put the 6 plexi plates in the bottom part. Close with the top part</li> <li>Put the 2 mm rods in the holes to assemble top and bottom parts. If needed, adjust the holes with a 3mm drill <li>Mark the centre of the bearing axis on the first plexi plate. Remove the plexi plates.</li> <li>Tighten securely the plexi plates together and to your workbench before drilling it. Start with a 3 mm drill and increase step by step up to 10 mm with a slight pressure to not crack the plexi plates.</li> <li>Put the plexi plates back in the bottom part. Put the bearings in the 5 wheels. Put the wheels at there place. Put the 8 mm aluminium axis through everything and fix it with 2 plugs.</li> </ol> <h3>Assembly to the enclosure</h3> <ol> <li>With a drill, make a hole in your enclosure to put the filament pass part. Glue it with a glue gun. Keep some place from the border of your enclosure for it wall (see picture)</li> <li>Put PTFE tubes in the filament pass part and in the top part. Glue the top part to the enclosure with the glue gun. Put the 6 M4 20 mm screws to fix the top to the enclosure</li> <li>Fix the Holder part 1 to the filament pass with 2 M3 6 mm screws. Put the 5 PTFE tubes from the MMU 2.0 through the filament pass. The should be out of the Top part from few mm. Fix them with the Holder part 2 and 3 M3 12 mm screws</li> <li>if needed, you can add also a PTFE tubes holder to the bottom part of the box</li> </ol> <h3>Usage</h3> <ol> <li>Remove the box from the enclosure</li> <li>Put the 5 filaments though the box and through the PTFE tubes</li> <li>Load the filaments with your prusa</li> <li>Close the box with the 2 mm rods</li> </ol> <h3>Additional</h3> My lack enclosure for MMU 2.0 : https://www.thingiverse.com/thing:3296106 My PSU holder and closure mod : https://www.thingiverse.com/thing:3319006
With this file you will be able to print Prusa MMU 2.0 filament control with your 3D printer. Click on the button and save the file on your computer to work, edit or customize your design. You can also find more 3D designs for printers on Prusa MMU 2.0 filament control.
