Prusa MMU2 Tuning and Optimization
thingiverse
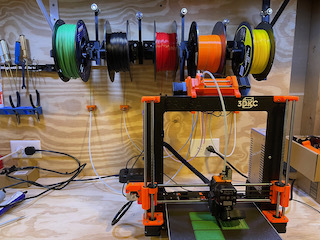
The attached PDF contains a summery of the steps I took to get my Prusa MK3S MMU2S printer running with almost no interventions. Start with the PDF and follow the steps and modificaitons. The real goal of this process is to eliminate any friction points for the filament. In doing so I converted all of the filament paths to connect with M10 passthrough fittings. Thought it would be useful to share. Also there is one original part included. The wall mount for the M10. Good Luck and let me know if there is anything that should be added. Happy to edit this post and process to help others. First – Watch this You tube Video: Prusa MMU2 Multi Material Unit - Tips and Tricks - Chris's Basement https://www.youtube.com/watch?v=XH-F8h7Y1tM&t=876s Two Primary items to review when working to get reliable prints for your MMU2. 1) Checking the filament paths to make sure there is as little friction as possible. From the spool to the extruder here are the steps I took. a. Make sure you have the latest selector printed from Prusa. i. Print the selector out at .15 with Quality layer height out of PETG. ii. When you assemble make sure the filament path is clear, I used a drill to clean it up a bit. Also, when you set your finda height make sure the filament can pass through WITH MMU THE FORMED END. When changing filaments, the MMU forms an end that has a larger OD. b. Updated M10 Pass Through connector to get filament tube all the way to the bond tech gears. i. https://www.thingiverse.com/thing:3541897 c. Prusa MMU2 PTFE Holder M10 Passthrough Adapter. i. Supports the PTFE tubes as they enter the MMU with much less resistance. ii. https://www.thingiverse.com/thing:3233579 d. Gravity Auto – Rewinder i. I have tied 4 types of buffers, 2 rewinders and this so far is the best I have found. ii. https://www.prusaprinters.org/prints/3729-multiple-mechanism-auto-rewind-spool-holder 2) Tension on the MMU and Extruder can cause issues. I found that there is a sweet spot for both that can cause miss feeds. Specifically, I found that the filament would index to the extruder. The extruder would grab it, pull it in and then retract. Not sure why it does this but sometimes it retracts too far and loses the filament. 3) Signal and Power cables between the MMU and Prusa. I kept having the MMU fail with both Red and Green flashing lights. After I separated power and signal cable, re-routed then along the frame to the MMU it solved the issue.
With this file you will be able to print Prusa MMU2 Tuning and Optimization with your 3D printer. Click on the button and save the file on your computer to work, edit or customize your design. You can also find more 3D designs for printers on Prusa MMU2 Tuning and Optimization.