Prusa Octoprint Mount for Raspberry Pi and Camera
thingiverse
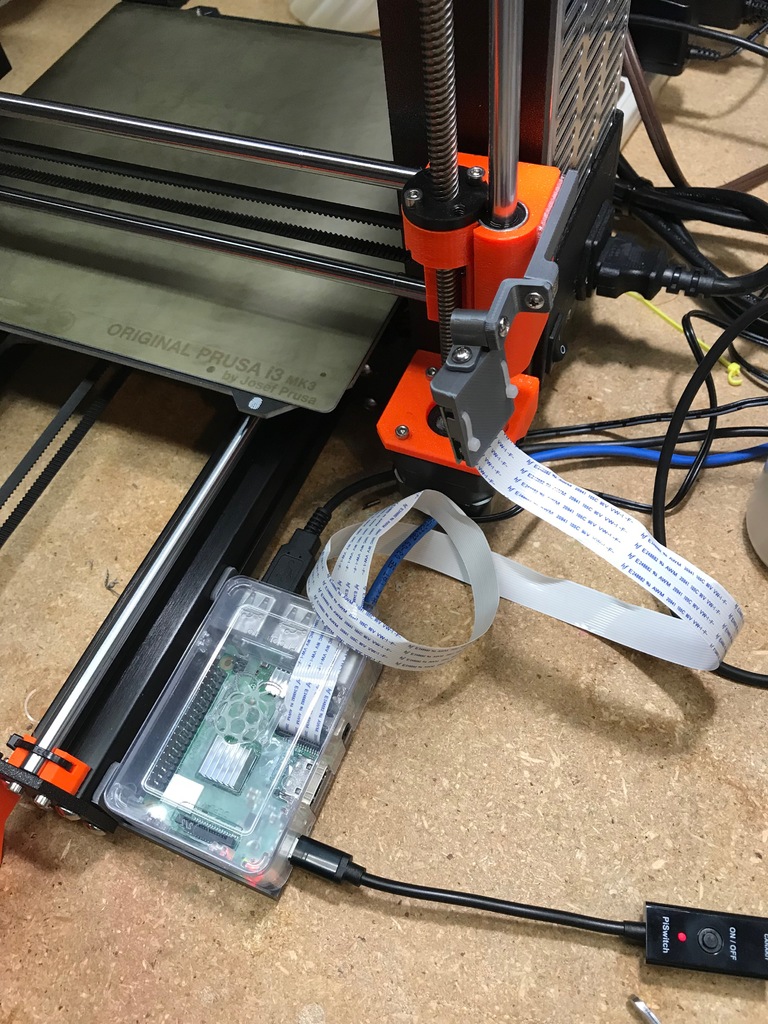
Here's a clean and easy way to attach a Raspberry Pi 3 and camera to a Prusa i3 MK3. I wanted to mount the equipment on the printer so it would be simple to quickly move around the shop and have a secure way to adjust the camera angle. Ball and socket camera mounts are great but they don't hold their positions well under vibration, so screws were added to allow the joints to be tightened down so they won't move. Make sure to rotate the parts as needed to avoid the need for supports! As the Z axis moves up, the camera follows it, meaning the top layer stays in the same location in the camera view. The part "grows down" in the time lapse. The RBpi brackets easily attach to 30 mm extrusion with a quarter-turn. To make the second mount, simply mirror the original part in your slicer. You can use velcro or dual-lock to attach the RBpi case to 30 mm brackets. Use micro cable ties to attach the camera, and #4 sheet metal screws for the camera mount parts. Drill out the larger holes for the screws to 3.0 mm. You will need a longer camera cable than comes supplied with the RBpi camera.
With this file you will be able to print Prusa Octoprint Mount for Raspberry Pi and Camera with your 3D printer. Click on the button and save the file on your computer to work, edit or customize your design. You can also find more 3D designs for printers on Prusa Octoprint Mount for Raspberry Pi and Camera.