Prusa spool holder (with bearings)
prusaprinters
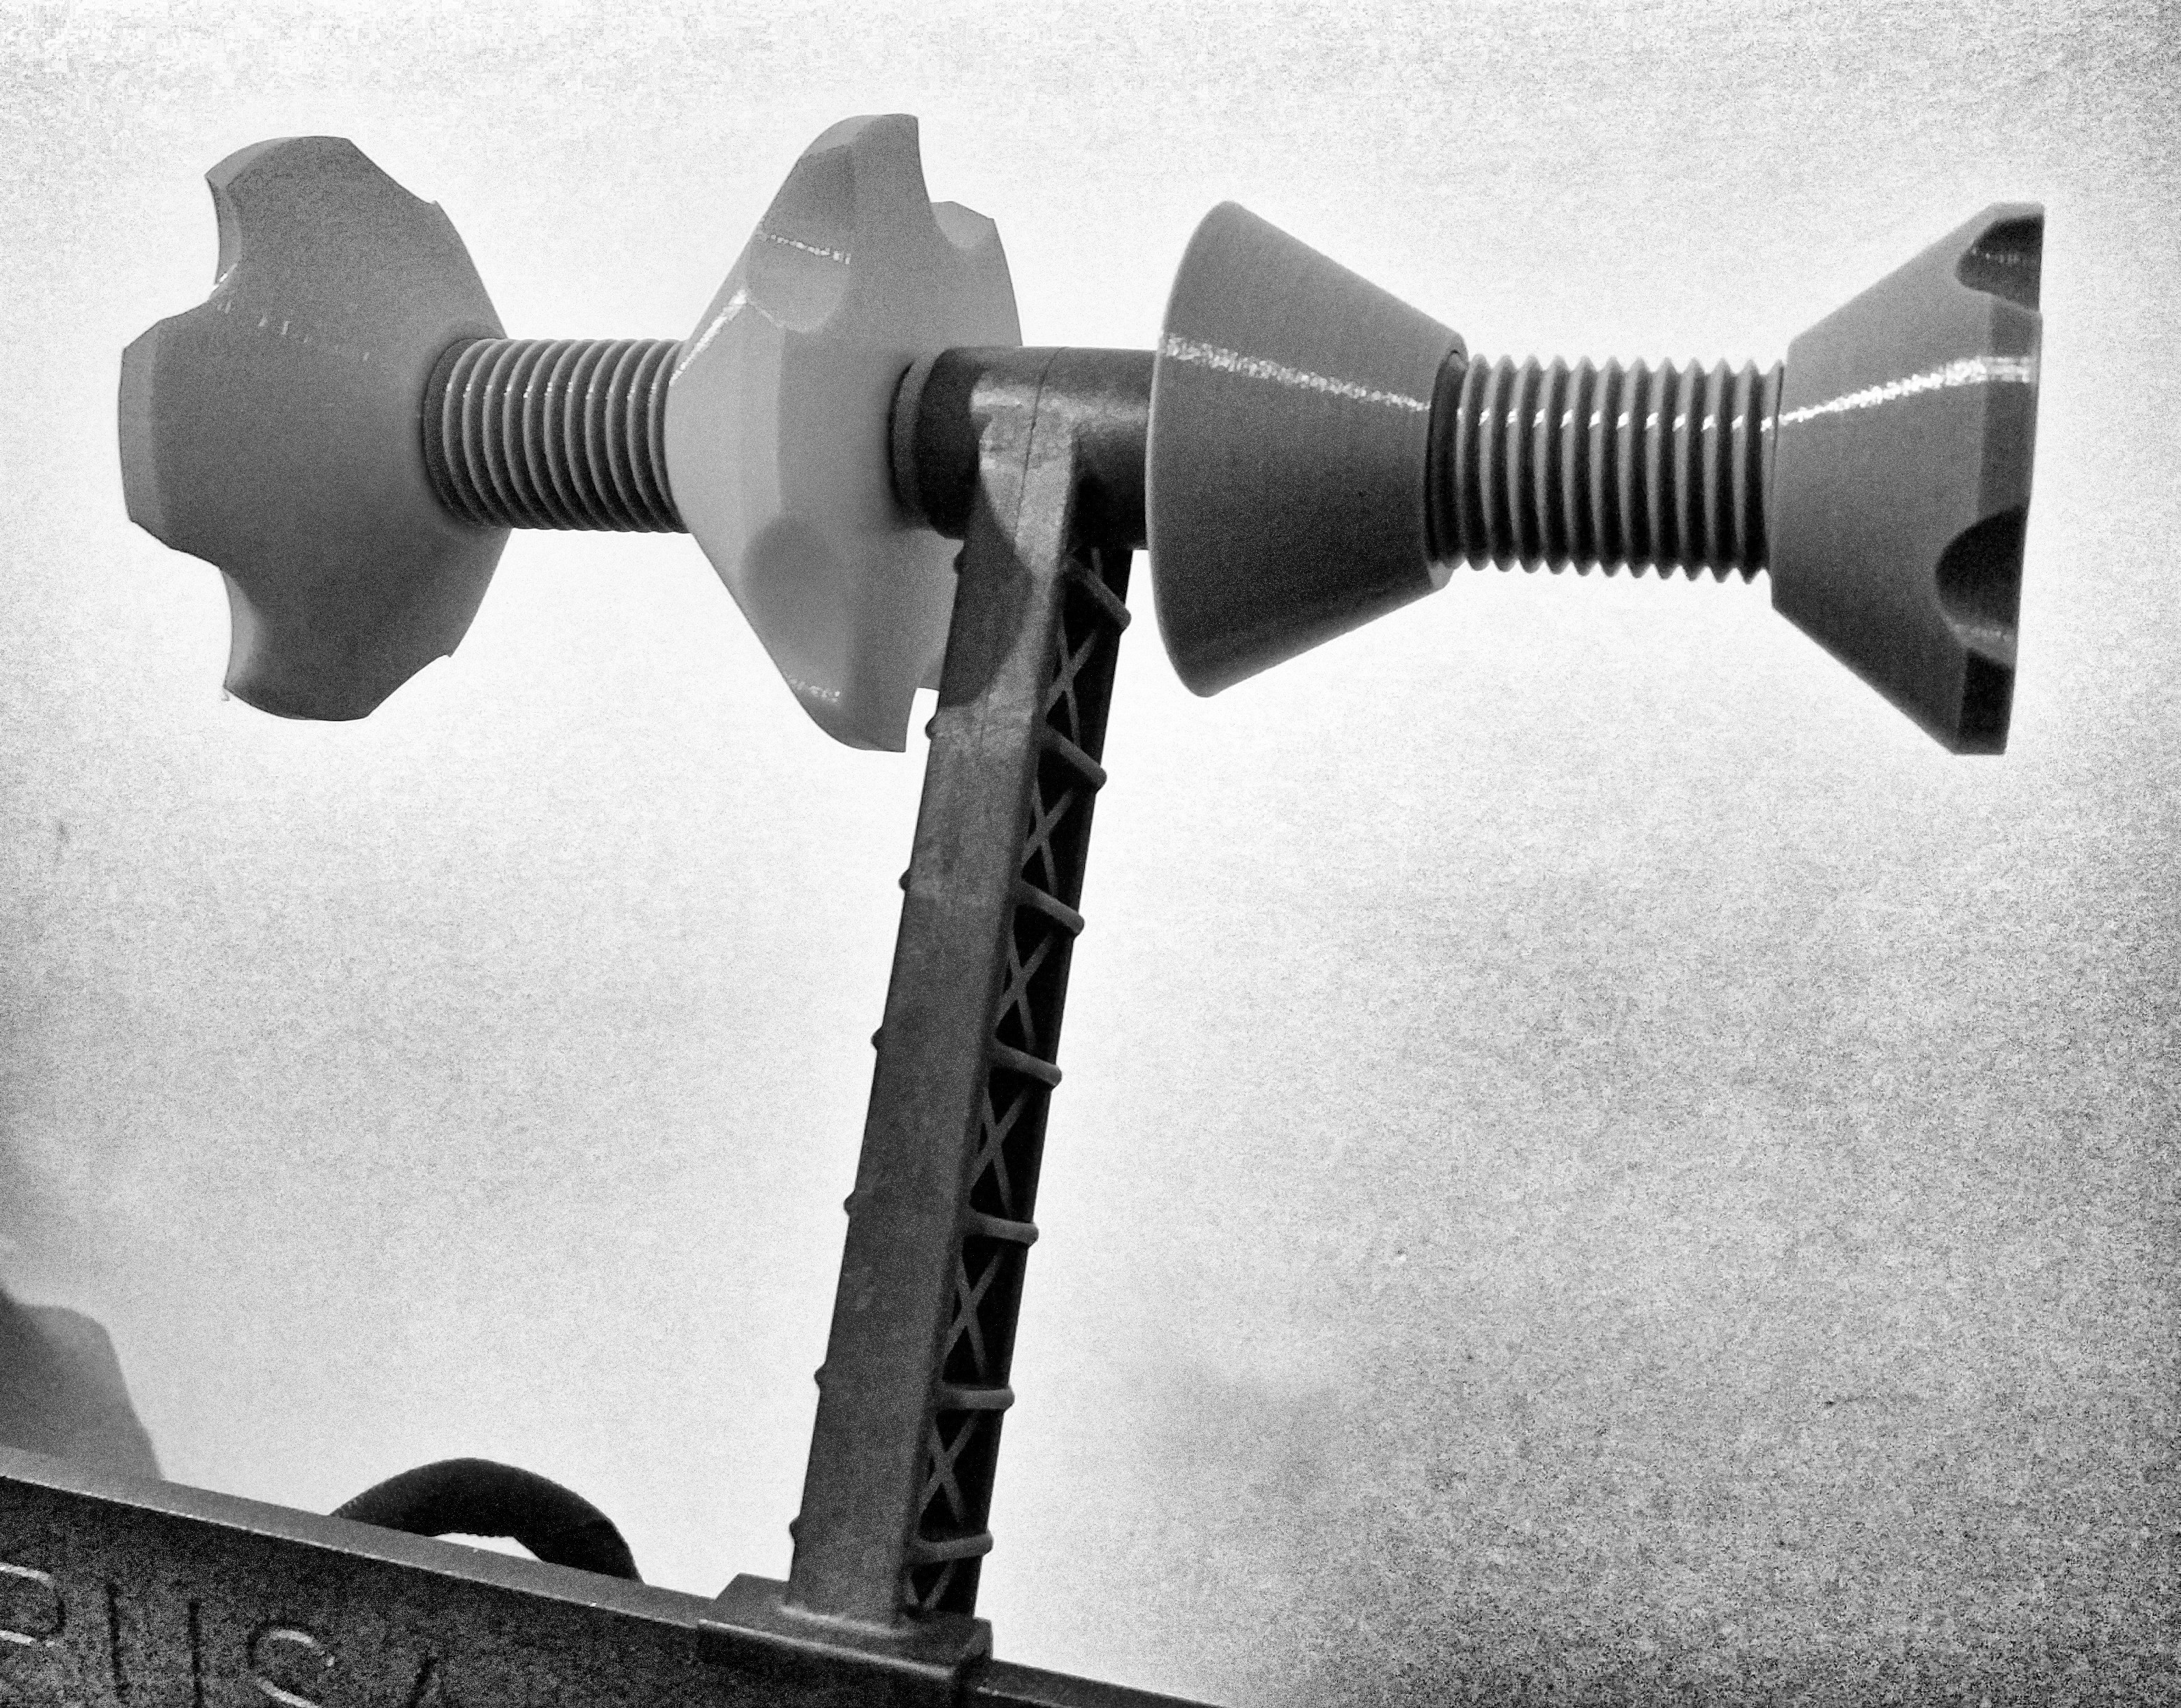
<p>Centering spool holder with 608 bearings to be used with the original spool holder for the Prusa MK3S+.</p><p>I have some TPU which sticks quite well to itself so I needed a spool holder which allows for super-smooth rotation so the filament peals off easily - I tried some others, they did not work as expected.<br> </p><p><strong>Design:</strong></p><p>Fits spools up to (roughly) 75mm in width given a 55mm inner diameter. Depending on the printed nuts the maximum inner diameter is 60mm or 80mm (see STL file names).</p><p>I made the two pins as separate parts for two reasons:</p><ol><li>Stability: If they are printed lying horizontal on the bed there is (imho) less chance of layer separation while in use</li><li>Printability: No supports needed for the base part (or any other part)</li></ol><p>The M3 screw connects the base part with the bearings and also increases the overall stability of the base part. The M3 nut secures both the screw and the pins.<br> </p><p><strong>Update 13.07.2021</strong>: Added chamfers to all nuts and bolts.</p><p><strong>Assembly:</strong></p><blockquote><p>See the comments section for how others solved the assembly problem. Feel free to share your own solution!</p></blockquote><p>You need two 608 bearings one M3x30 socket cap hex screw, and one M3 hex nut.</p><p>You need to slide the two pins and the M3 hex nut into the base part all at the same time. This can be a bit wearisome. Here is how I assembled the base part, see the last 5 pictures labeled STEP1-5.</p><ol><li>Partly slide the two pins into the base such that the slots for the M3 nut are level with the top of the base part.</li><li>Use a plier to push the M3 nut into position, this may require some attempts.</li><li>The base part should now look like in STEP 3, make sure the M3 nut is properly aligned.</li><li>Turn the base upside-down and press the part against the table. This may require some force, but the pins should slide in just fine.</li><li>You are done, great!</li></ol><p>Attach the base part to the Prusa spool holder using the screwdriver before you attach the threaded rod, otherwise it's going to be a bit difficult ;)</p><p>See the labeled cross section rendering for details.</p><blockquote><p>Initially I used <a href="https://www.amazon.de/gp/product/B076T5MQW8/ref=ppx_yo_dt_b_asin_title_o03_s00?ie=UTF8&th=1)">hybrid ceramic bearings</a> for the rolls to run smoothly but when using really flexible filament (shore 30D) on an out-of-balance spool the filament partially unrolled itself over time. Fixed it by using <a href="https://www.skf.com/group/products/rolling-bearings/ball-bearings/deep-groove-ball-bearings/productid-608-2RSH">SKF 608-2RSH</a> bearings but I assume using any cheap 608-2RS bearings will do.</p></blockquote><p><br><strong>Print:</strong></p><p>Use your slicer to get the individual parts. </p><p>Printed all in PETG with 4 perimeters, looks good so far. The base part and the pins are printed with 100% infill. Use 0.15mm layer height to get nice threads. To get less noticable seams set random seam position.</p><p> </p><blockquote><p>Please leave a comment or a photo if you print it!</p></blockquote>
With this file you will be able to print Prusa spool holder (with bearings) with your 3D printer. Click on the button and save the file on your computer to work, edit or customize your design. You can also find more 3D designs for printers on Prusa spool holder (with bearings).