Prusa Y-axis belt tensioner
thingiverse
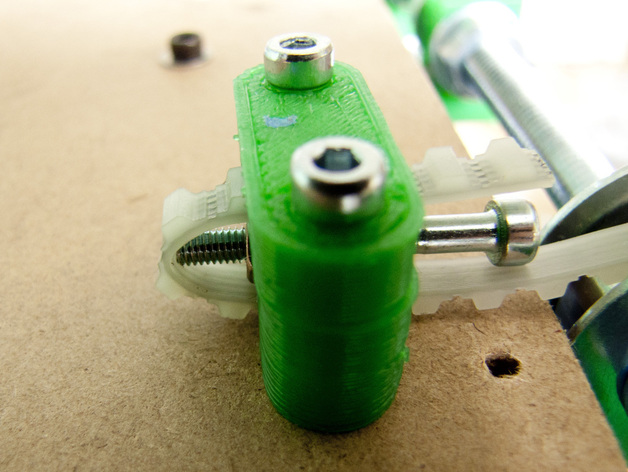
I found it a bit challenging to get the Y-axis belt tension just right by using the belt clamps, so I made this Y-belt tensioner in SketchUp. It allows for more accurate tensioning of the belt using a M3 bolt and captive nut. The design is based on the belt tensioning system used in GregFrost's LM8UU X-Carriage (http://www.thingiverse.com/thing:9869). The holes have the same spacing as the original belt clamps, so you should be able to simply replace the existing clamps without drilling new holes. The tensioning bolt can be reached with an allen key even with the build plate mounted on top. Sorry for the SketchUp design. I haven't taken the plunge into parametric modelling yet... Instructions Print Clean up if necessary Insert captive M3 nut Bolt the two parts to the plate, so the bottom part has the belt slot facing down towards the plate and the captive nut is facing towards the middle of the plate. The top piece should have the teeth facing down, grabbing the teeth of the belt. Screw in the M3 tensioning bolt (I used a 25mm one) Adjust the bolt till you get the tension just right
With this file you will be able to print Prusa Y-axis belt tensioner with your 3D printer. Click on the button and save the file on your computer to work, edit or customize your design. You can also find more 3D designs for printers on Prusa Y-axis belt tensioner.