Prusa Z Screw Isolator
thingiverse
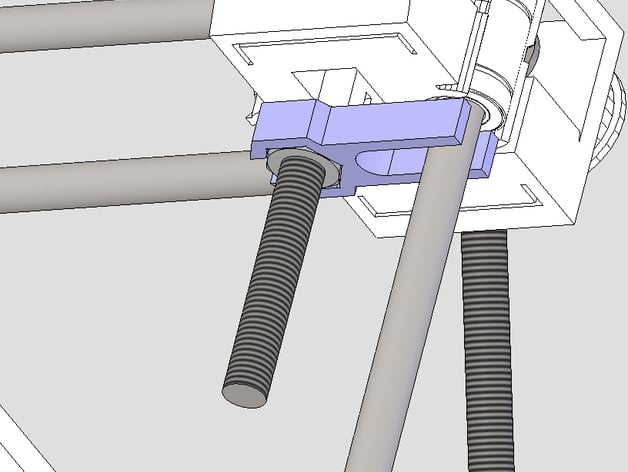
This little bracket allows the Z axis screw to wobble without influencing the position of the nozzle. The Z axis nut iss captured in a bracket that is not rigidly coupled to the X end brackets as with the regular Prusa. Instructions If you built your Prusa without the upper Z axis nuts and springs, you can lift the X axis off of the lower Z nuts to install these. If you have the springs, you'll have to back the Z axis screws out of the X axis. If you want to keep the springs, you can install a second pair of these above the X axis. As pointed out by Buserror in the comments, you will need to make sure you have enough room in your X ends for the movements of the screws. I found when assembling my Prusa that the threaded rods themselves are abrasive enough to widen a hole in ABS parts, if used as a file. So, if you don't have enough room for your Z wobbling screws, you can use them to open up the hole. Or you could possibly straighten them enough by hand to avoid interference. Either way, make sure you have enough clearance.
With this file you will be able to print Prusa Z Screw Isolator with your 3D printer. Click on the button and save the file on your computer to work, edit or customize your design. You can also find more 3D designs for printers on Prusa Z Screw Isolator.