Prusamatic motorized conveyor build platform
thingiverse
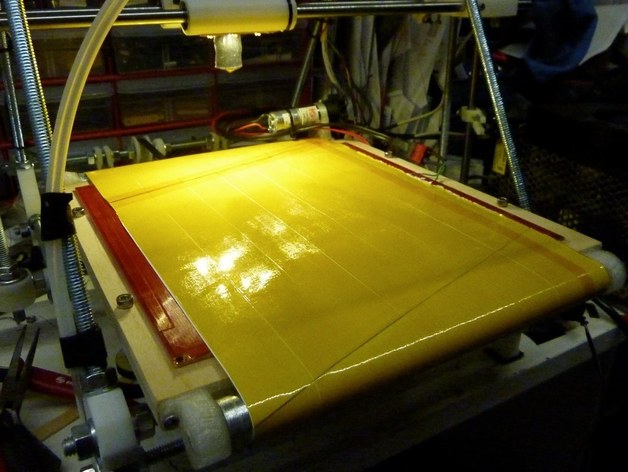
I recently upgraded to a MakerGear Prusa Mendel from a Cupcake CNC with an automated build platform, and I missed the automatic ejection of parts out the front. So I designed a super-sized conveyor platform, re-using the gearmotor and also making use of AVataRR's paper + kapton belt design. Video of it working: http://natetrue.posterous.com/automated-prusa-mendel-3d-printer-win-go-prus In addition to the printed parts, it also requires: A Kysan DC Gearmotor A20RU-12V36RPM-15.5 (same one as the Cupcake's ABP) 200mm and 212mm lenghts of 1/2" EMT electrical conduit from a local hardware store 3x M4x20 bolts 6x M4 nuts 3x 624ZZ bearings (4mm x 13mm x 5mm) 5x M3x15 bolts 1x M3 nut Quite a bit of polyamide/kapton tape (the wider the better) Some silicone sealant or rubber cement Known issues: The DC gearmotor is almost not powerful enough Sometimes the belt 'wanders' one way over time and gets gummed up against the roller holders A belt this big doesn't stay very even Instructions Print the STL part bed, dust off your outdated 2D printer and print three copies of the PDF for the belt, and buy all the other parts. For each of the 3 roller holders, screw in an M4 screw and add two nuts around a 624 bearing as shown in the picture. Drill holes into the wooden platform holder (you may need to re-imagine the mounting if you don't have a specifically MakerGear Prusa) for the mounts flush along the left edge of the platform. Make sure to align the mounts like they are aligned in the Blender file, with the shorter roller holders along the front edge of the platform and their beveled side facing up. Put the 200mm piece of tubing between the roller holders and make sure it can spin freely and loosely. The 624 bearings aren't big enough to fill the pipe but they will hold it in the right place under tension. Mount the larger roller holder on the rear left of the platform, assembled the same as the other two. Locate the gear with the longer, skinnier shaft and jam it down one end of the 212mm tube, so that the entire shaft is in the tube. You can add a set screw if you want but it should be a very snug fit. Put the tube through the hole in the motor mount so that the gear is facing to the right and the mounting screw holes are facing downward, as modeled in the Blender file. Mill out the hole if the tube is too tight. It should spin freely in the hole. Drill holes in the board and use M3 screws (or good wood screws) to mount the motor holder as modeled. Take the other gear and put an M3 nut in the slot so that it lines up with the set screw hole and use an M3 bolt as a set screw. Mount the motor on the motor mount so that the gear is facing outward and meshes with the other gear. Apply power to the motor to test that it turns the roller properly. If it gets stuck, make sure the holes are big enough and nothing's in the way. After that, rub a thin layer of silicone sealant or rubber cement on the motorized roller where the belt will contact it. Allow to dry completely and then play with it with your fingers to make sure it's not super sticky still. Take the three parallelogram printouts and cut them on the lines. Figure out how to orient them so they are the right size on the platform and tape them in a line. Thread it around the rollers and platform and pull it tight with your fingers; mark where you need to cut the belt and cut it, then tape it together into a loop. Test the motor again - it should turn the belt nicely. Now, cover the belt with the Kapton tape using strips lengthwise along the belt. It helps to remove the motor gear so you can freely move the belt around. Try not to overlap the tape nor have gaps of much paper showing. The goal is a nice smoothly covered belt. Once everything's assembled, connect the motor to output D10 of your RAMPS electronics (or similar). It should be the pins controlling the cooling fan. Use a variant of the end gcode provided (my start is also here but it's not very relevant to the conveyor). Essentially it moves to the end of the Y axis, waits 30 seconds, then runs the conveyor for 10 seconds.
With this file you will be able to print Prusamatic motorized conveyor build platform with your 3D printer. Click on the button and save the file on your computer to work, edit or customize your design. You can also find more 3D designs for printers on Prusamatic motorized conveyor build platform.